How to Hang Pictures Without Damaging Walls: 7 Proven Methods
Nothing personalises a space quite like photographs and artwork on the walls. But the thought of putting holes in your walls stops many people from decorating at all. Whether you are protecting freshly painted walls or living in a rental property with strict no-holes policies, hang pictures without damaging walls methods let you decorate without worry. The good news is that modern adhesive technology has transformed how we hang pictures. Products like Command strips can hold frames weighing up to 7kg (16 pounds) without leaving any marks when removed properly. Picture rail systems offer even more flexibility, allowing you to rearrange artwork whenever inspiration strikes. This guide covers seven proven methods for hanging pictures without damaging your walls. You will learn which method works best for different frame weights, how to apply adhesive strips correctly for maximum hold, and the museum-approved height rules that make any arrangement look professionally designed.
What You Need to Hang Pictures Without Damage
Gathering the right supplies before you start makes the process smooth and ensures your pictures stay securely in place.
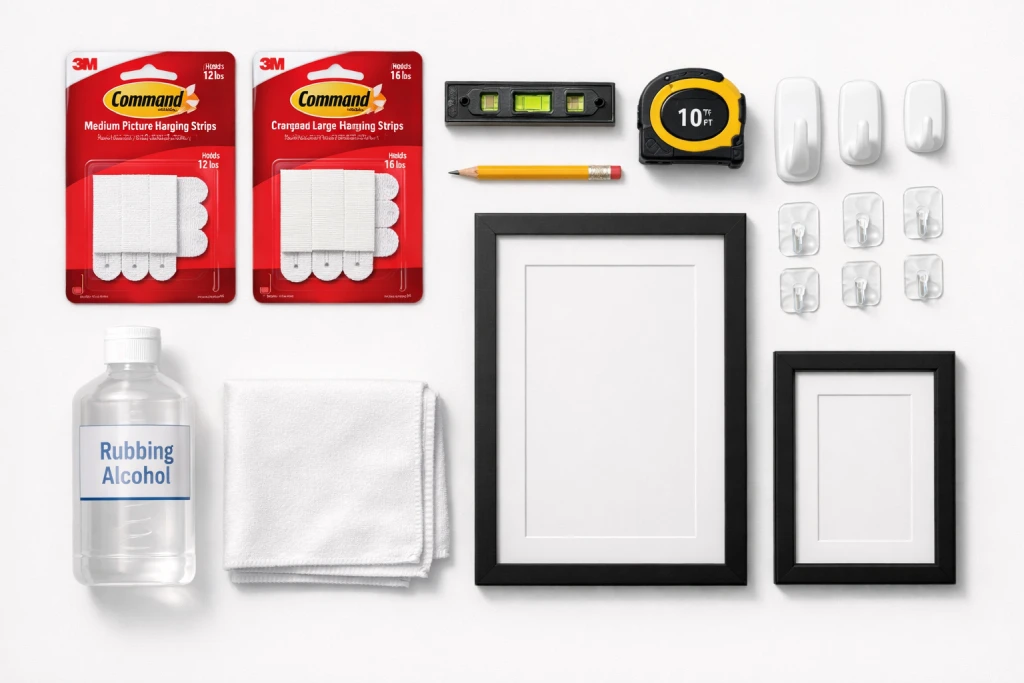
Here is your complete checklist:
- Adhesive Products: Command picture hanging strips (various sizes), adhesive hooks, or Velcro-style mounting strips. Choose based on your frame weight.
- Measuring Tools: Tape measure, pencil for light marking, and a small spirit level. A laser level helps with gallery walls.
- Surface Preparation: Rubbing alcohol (isopropyl alcohol) and clean cloths for wall cleaning. This step is essential for adhesive bond strength.
- Optional Accessories: Frame bumpers to prevent scuff marks, paper templates for planning arrangements, painter’s tape for temporary positioning.
Method 1: Adhesive Picture Hanging Strips
Adhesive strips are the most popular damage-free hanging method, and for good reason. They work on most smooth surfaces and remove cleanly when you want to redecorate.
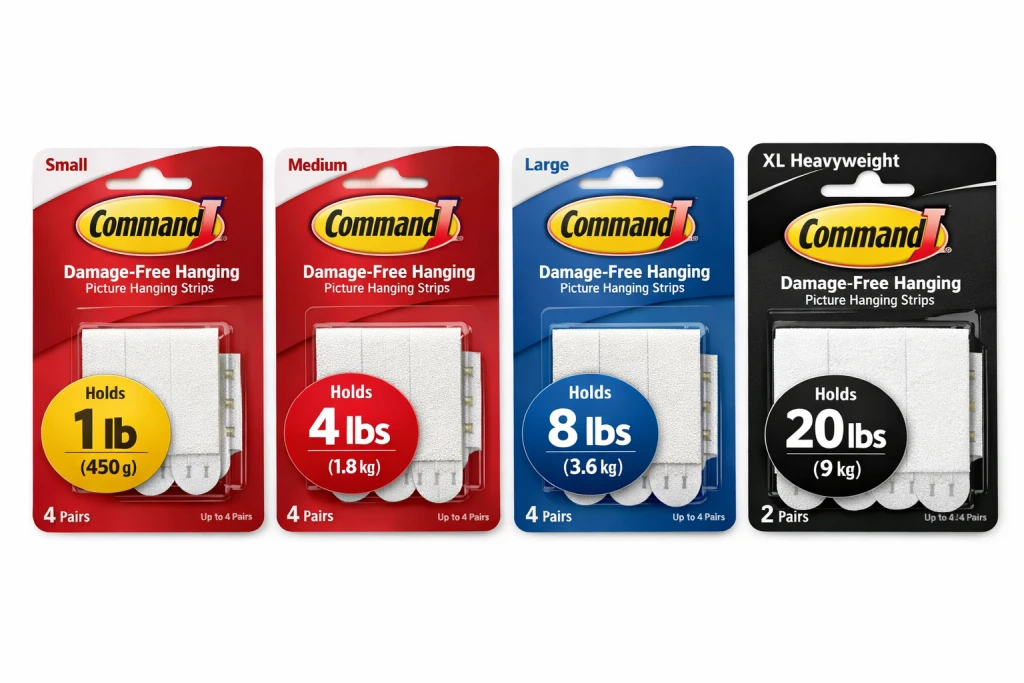
Command strips come in different sizes based on weight capacity. Small strips hold up to 1.8kg (4 pounds), medium strips hold up to 5.4kg (12 pounds), and large strips hold up to 7.2kg (16 pounds). The extra-large heavyweight strips can support frames up to 9kg (20 pounds) when used in sets of four pairs
Just as cleaning your walls properly matters before painting, preparing the surface is essential for adhesive strips to bond correctly.
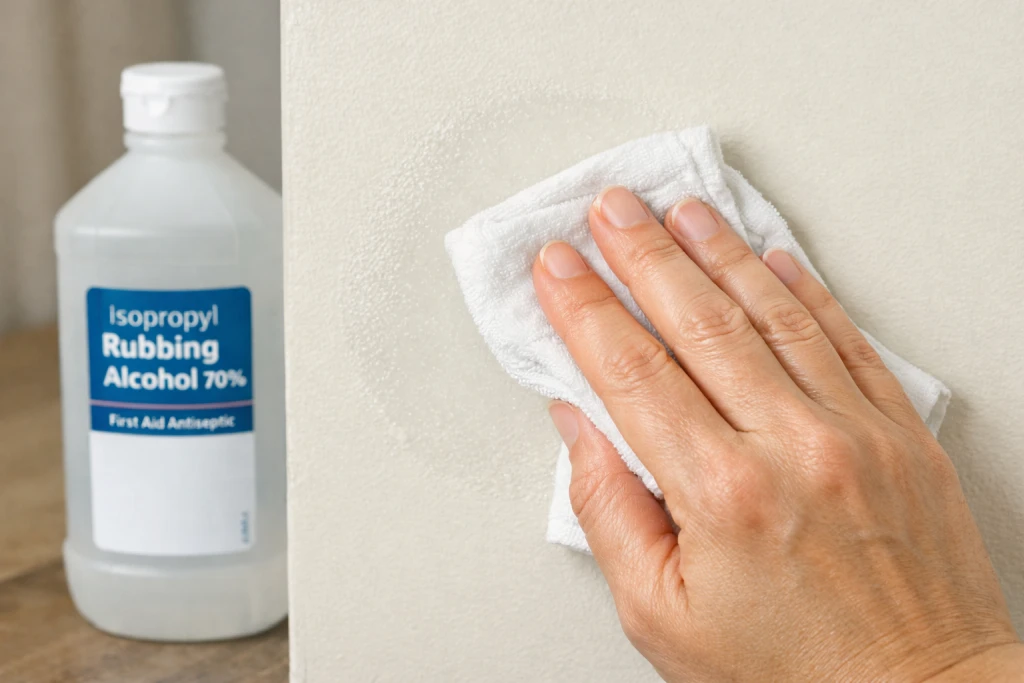
Step 1: Clean the wall surface.
Wipe the area with rubbing alcohol using a clean cloth. Do not use household cleaners or water, as these can leave residue that prevents proper adhesion. Let the surface dry completely.

Step 2: Click the strip pairs together.
Press the two halves of each strip firmly until you hear or feel them click. This interlocking connection is what allows clean removal later.
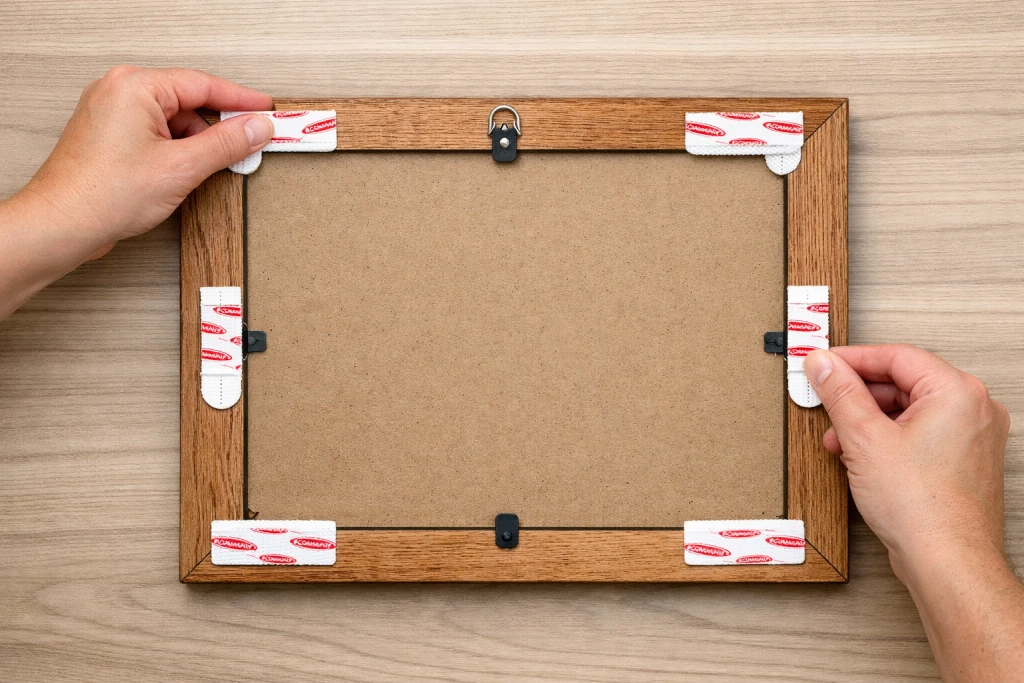
Step 3: Attach strips to your frame.
Remove the liner from one side and stick the strips to the back of your frame. Place one pair at each top corner, and add pairs halfway down each side for heavier frames. 3M recommends using four pairs for frames up to 60cm x 90cm (24 x 36 inches).
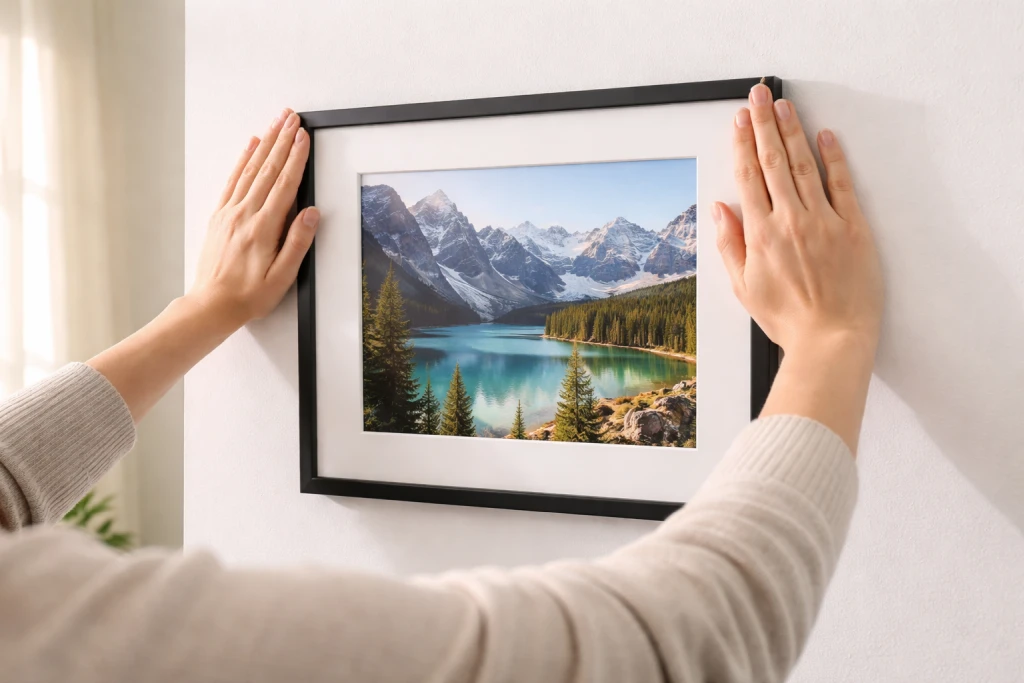
Step 4: Press the frame to the wall.
Remove the remaining liners and position your frame on the wall. Press firmly for 30 seconds on each strip location. Wait one hour before hanging anything on the frame to allow the adhesive to reach full strength.
Method 2: Adhesive Hooks
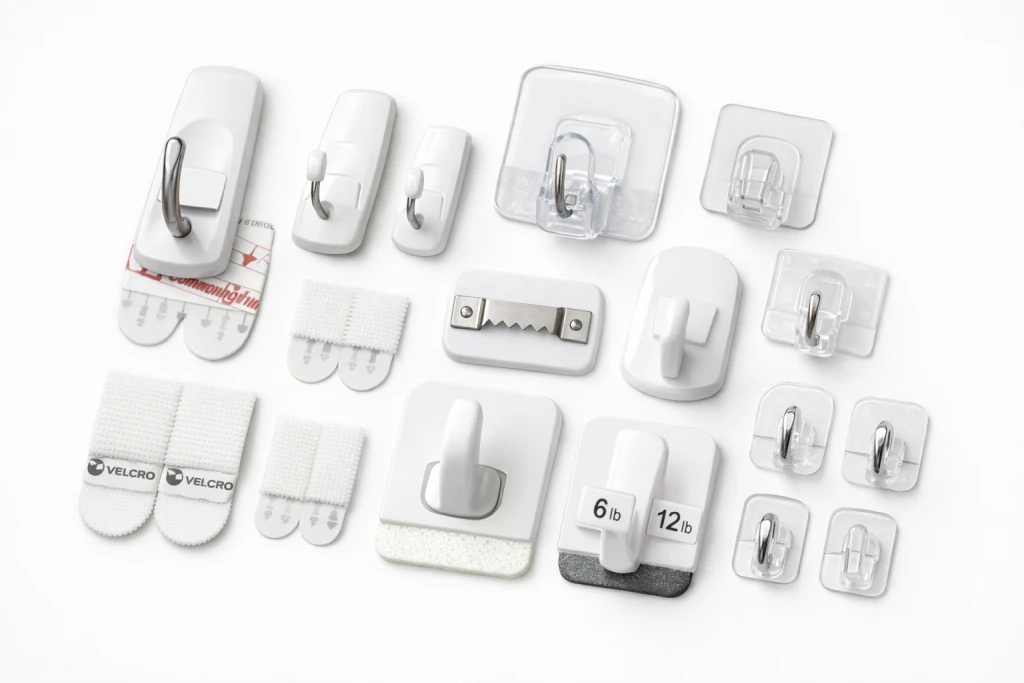
Adhesive hooks work brilliantly for frames with wire or sawtooth hangers on the back. They provide a more traditional hanging experience while still being completely damage-free. The key advantage of hooks over strips is versatility. You can easily swap out artwork without removing the hook from the wall. Simply lift off one frame and hang another in its place.
When selecting adhesive hooks, always check the weight rating. Small hooks typically hold 225g to 450g (0.5 to 1 pound), while heavy-duty picture hooks can support up to 3.6kg (8 pounds) each. For heavier pieces, use two hooks spaced apart to distribute the weight.
Apply adhesive hooks the same way as strips: clean the wall with rubbing alcohol, press the hook firmly for 30 seconds, and wait one hour before hanging anything.
Method 3: Picture Rail Systems
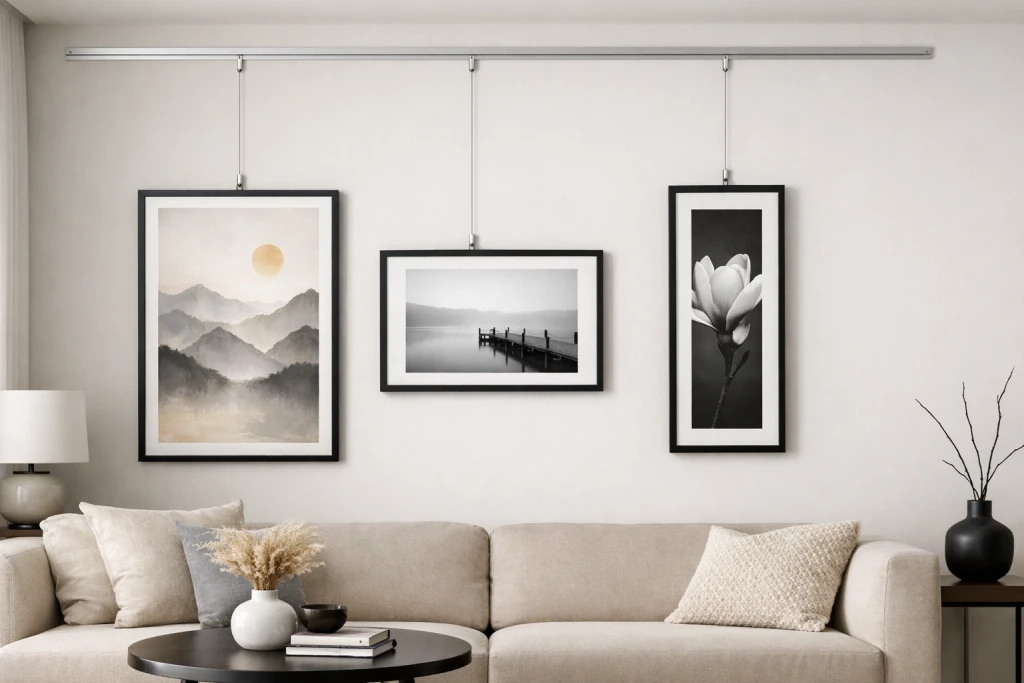
Picture rail systems offer the ultimate flexibility for anyone who likes to rearrange artwork frequently. Once installed, you can hang, move, and swap frames without ever touching the wall again.
A picture rail is a moulding installed horizontally near the ceiling. Hooks slide along the rail, and cables or cords drop down to support your frames at any height. This is the same system used in museums and galleries worldwide.
Modern aluminium rails are sleek and nearly invisible. Traditional wooden picture rails suit period properties and add architectural interest. Both options support significant weight, with some systems rated for 22kg (50 pounds) per linear foot of rail.
The one-time installation does require screws or nails into the wall or ceiling. However, you then have unlimited flexibility to change your display without any additional wall damage. If you create a budget for your decorating project, you will find that damage-free hanging methods are surprisingly affordable compared to professional installation.
Finding the Perfect Height

Getting the height right transforms a random collection of frames into a cohesive, professional-looking display. The museum standard, used by galleries and interior designers worldwide, provides the perfect starting point.
The rule is simple: hang pictures so the centre of the artwork sits at 145cm (57 inches) from the floor. This represents average eye level and ensures comfortable viewing without straining to look up or down.
To calculate where to place your hook or strips, measure your frame’s total height and divide by two to find the centre point. Then measure from that centre point up to where your hanging hardware sits. Subtract this measurement from 145cm (57 inches) to find exactly where your hook should go.
For example: a frame that is 50cm (20 inches) tall has its centre at 25cm (10 inches). If the wire sits 5cm (2 inches) from the top, your hook should be 8cm (3 inches) above centre, or 153cm (60 inches) from the floor.
Apartment Therapy explains that the museum standard keeps pictures at a comfortable viewing height for standing viewers, making your home feel professionally curated.
Hanging Above Furniture
The 145cm (57-inch) rule changes when hanging pictures above sofas, beds, or other furniture. Here, the relationship between artwork and furniture matters more than the absolute height.
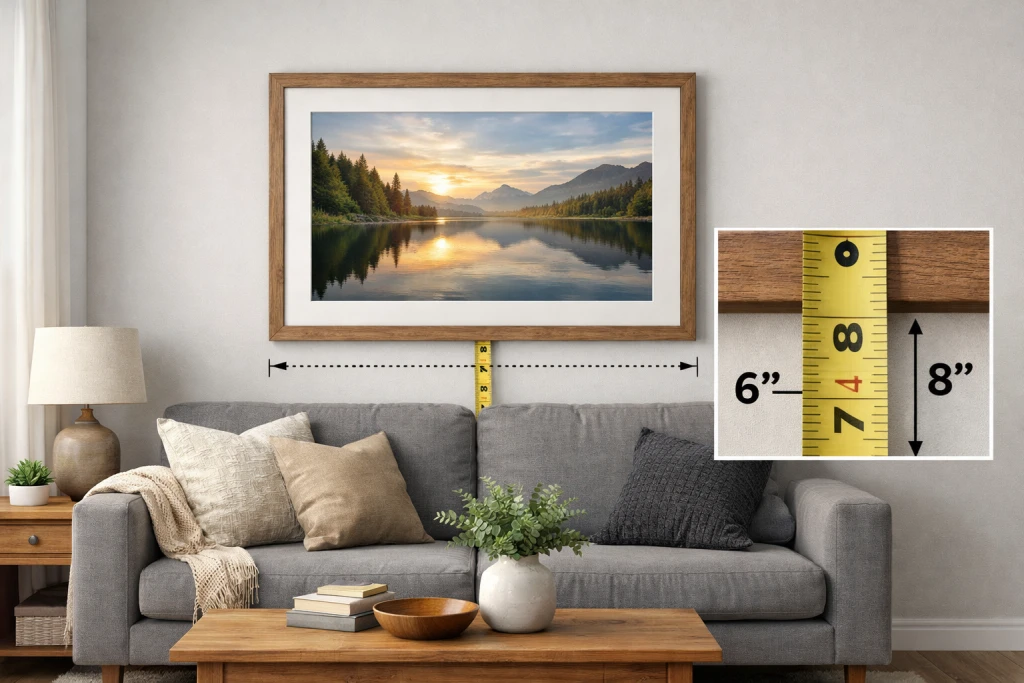
Framebridge suggests hanging artwork so the bottom of the frame sits 15-25cm (6-10 inches) above the furniture top. This creates visual connection between the two elements without the picture floating awkwardly high on the wall.
For artwork above a sofa, the frame or grouping should span roughly two-thirds the width of the furniture below. A tiny frame above a large sofa looks lost, while an oversized piece can overwhelm the space.
Above beds, position artwork 20-25cm (8-10 inches) above the headboard. This keeps the display visually connected while leaving room to sit up against pillows without bumping frames.
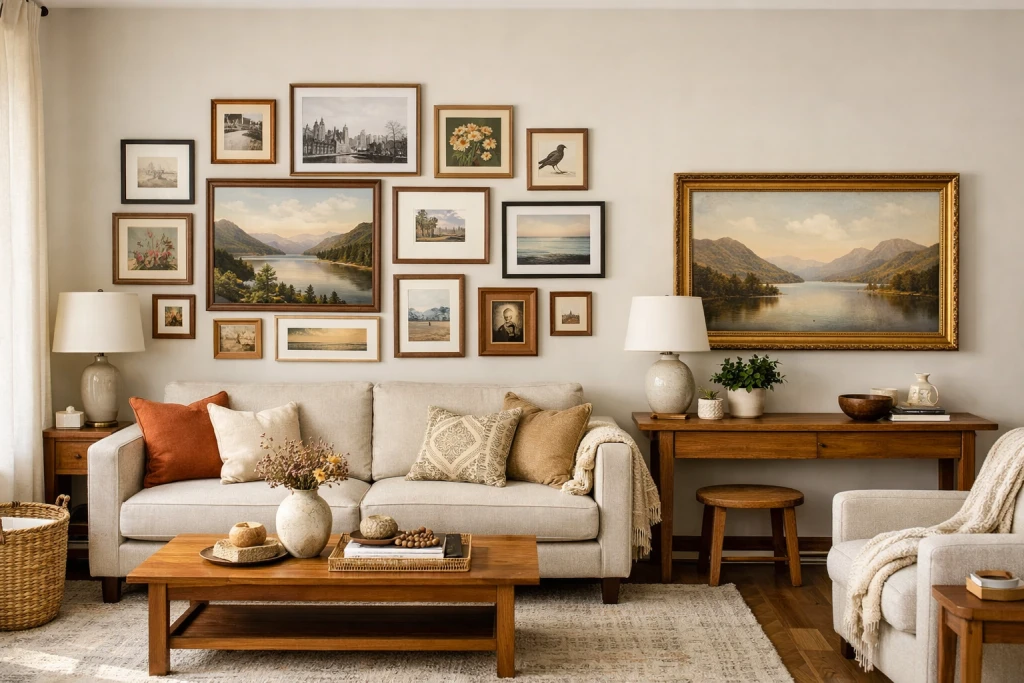
Creating a Gallery Wall
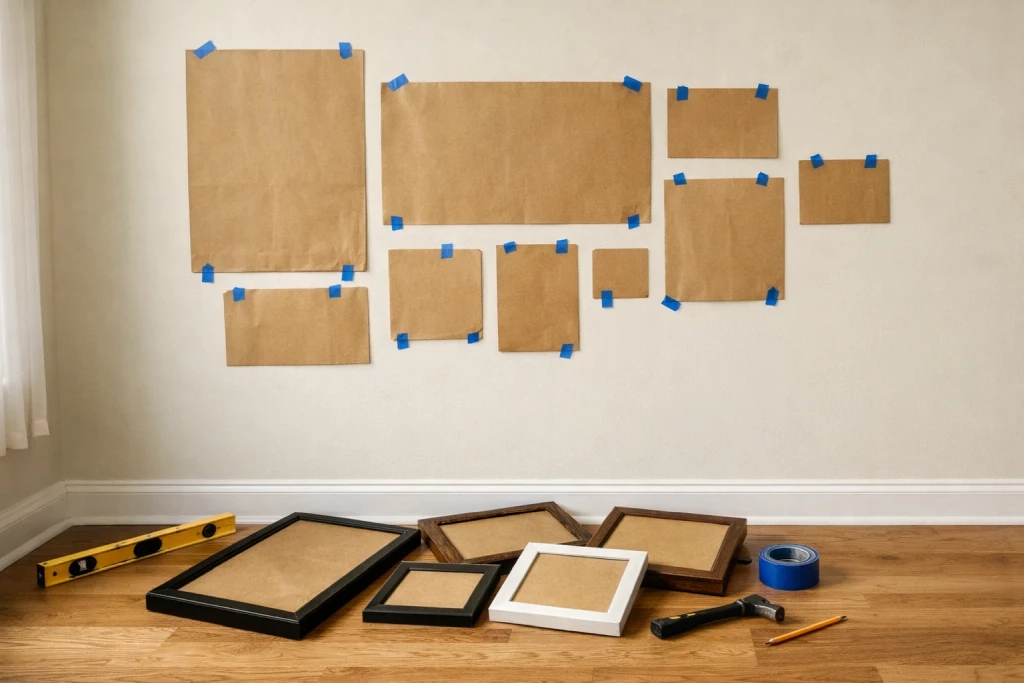
Gallery walls make stunning focal points, but they require planning to look intentional rather than chaotic. The secret is arranging everything before committing to the wall.
Cut paper templates to match each frame size. Tape these templates to the wall using painter’s tape and adjust until you find the perfect arrangement. Live with the layout for a day or two before hanging the actual frames. This prevents regret and unnecessary repositioning.
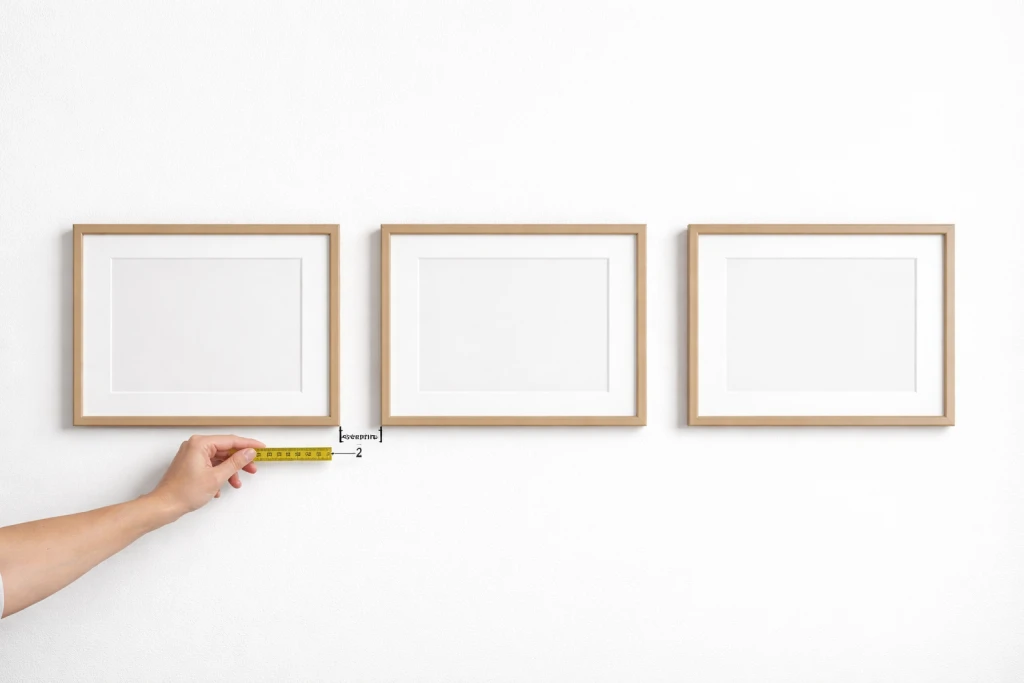
When spacing frames in a gallery wall, maintain consistent gaps of 5-7cm (2-3 inches) between each piece. Closer spacing creates a cohesive grouping that reads as one unit, while wider gaps can make the arrangement feel scattered.
Treat your entire gallery wall as a single piece of art. The centre of the overall grouping should still sit at 145cm (57 inches) from the floor, with individual pieces arranged around that central point.
Start hanging from the centre of your arrangement and work outward. This approach ensures your focal piece is perfectly positioned, with supporting frames falling naturally into place around it.
How to Remove Without Damage
The key to damage-free removal is patience and technique. Rushing this step is the most common cause of paint damage with adhesive products.
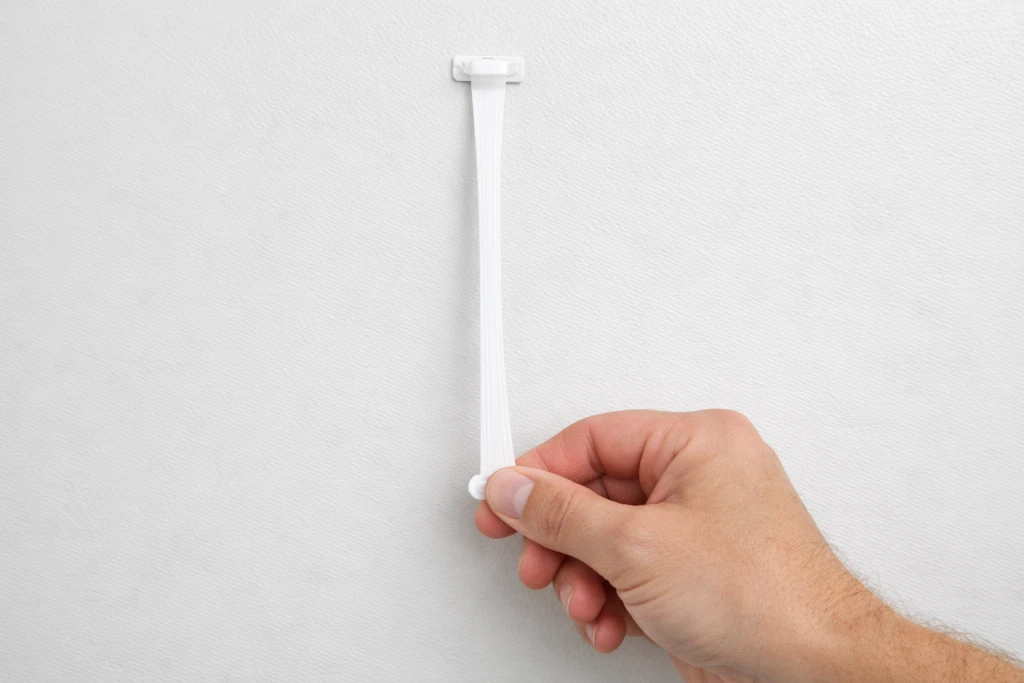
For Command strips, first remove the frame from the wall by separating the interlocked strips. Then locate the pull tab on each strip stuck to the wall. Pull the tab slowly and steadily, stretching the strip down against the wall at a shallow angle.
3M recommends stretching each strip at least 30cm (12 inches) before it releases. The stretching action breaks the adhesive bond gradually without pulling paint off the wall. Never pull the strip straight out from the wall, as this concentrates force and can damage the paint surface.
If a pull tab breaks, do not panic. Use dental floss to saw behind the strip, starting at one corner. This releases the adhesive without pulling on the paint.
For adhesive hooks, warm the adhesive with a hair dryer for 30 seconds before attempting removal. The heat softens the bond and makes clean removal much easier.
Preventing Scuff Marks
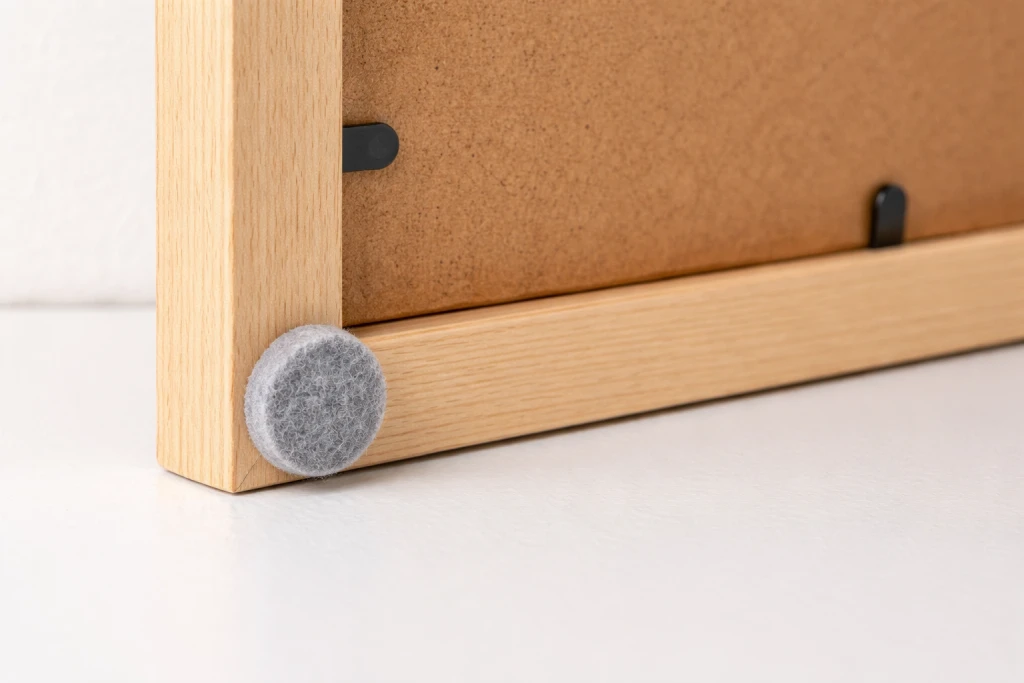
Even damage-free hanging can leave marks if frame corners rub against the wall over time. Small felt or silicone bumpers prevent this common problem.
Stick bumpers to the bottom two corners on the back of each frame. These create a tiny cushion between frame and wall, preventing the scratches and scuffs that appear when pictures shift slightly or get bumped.
Bumpers also help keep frames level. The slight spacing they create allows air circulation behind the frame, which prevents the moisture buildup that can occur when frames sit flush against walls in humid environments.
You can find packs of 50 bumpers for just a few pounds, making this an incredibly affordable upgrade for all your framed artwork.
Common Mistakes When Hanging Pictures
- Skipping wall preparation: Dust, grease, and residue prevent proper adhesion. Always clean with rubbing alcohol first, even if the wall looks clean.
- Overloading adhesive products: Check weight ratings carefully. A frame that exceeds the rated capacity will eventually fall, potentially damaging both the artwork and the wall below.
- Hanging too high: Most people instinctively hang pictures too high. Use the 145cm (57-inch) rule as your starting point to avoid this common error.
- Ignoring the wait time: Adhesive products need time to reach full strength. Hanging heavy items immediately can cause them to slide or fall before the bond sets properly.
- Pulling strips straight off: The stretching technique matters. Pulling adhesive strips directly away from the wall almost always damages paint.
- Forgetting about sunlight: Direct sunlight fades photographs and artwork over time. Consider UV-protective glass for valuable pieces near windows.
Weight Guide for Damage-Free Hanging
- Understanding weight limits helps you choose the right method for each piece:
- Under 450g (1 pound): Single adhesive strip or small hook. Suitable for lightweight prints and photos in thin frames.
- 450g to 1.8kg (1-4 pounds): Small to medium Command strips or standard adhesive hooks. Works for most standard photo frames.
- 1.8kg to 3.6kg (4-8 pounds): Medium to large strips, multiple hooks, or heavy-duty adhesive solutions. Good for canvas prints and medium artwork.
- 3.6kg to 7.2kg (8-16 pounds): Large or extra-large strips used in pairs, or specialised heavy-picture adhesive systems. Suitable for framed mirrors and substantial artwork.
- Over 7.2kg (16 pounds): Consider picture rail systems, or accept that some wall anchoring may be necessary. Very heavy pieces need structural support that adhesives alone cannot provide.
Frequently Asked Questions About Hanging Pictures Without Damage
How do you hang pictures without putting holes in the wall?
Use adhesive strips, adhesive hooks, or picture rail systems. Adhesive products stick to the wall and remove cleanly when stretched properly. Picture rail systems require one-time installation but then allow unlimited rearranging without additional holes.
Do Command strips damage walls?
When applied and removed correctly, Command strips leave no damage. The key is pulling the strip slowly and stretching it along the wall surface rather than pulling it straight out. Some paint types, especially flat or matte finishes, may show slight marks if strips are left in place for many years.
How much weight can adhesive strips hold?
Weight capacity varies by product size. Small strips hold up to 1.8kg (4 pounds), large strips up to 7.2kg (16 pounds), and extra-large heavyweight strips can support 9kg (20 pounds) when used in sets of four pairs.
What is the 57-inch rule for hanging pictures?
The 57-inch (145cm) rule states that the centre of your artwork should be 57 inches from the floor. This represents average eye level and is the standard used by museums and galleries worldwide.
How do you hang heavy pictures without nails?
For pictures weighing 3.6-7.2kg (8-16 pounds), use extra-large adhesive strips in pairs at all four corners. For heavier pieces, picture rail systems provide the strongest damage-free option, supporting up to 22kg (50 pounds) per linear foot of rail.
Can you hang pictures on wallpaper?
Yes, but proceed with caution. Adhesive products may pull the wallpaper when removed. Test in an inconspicuous area first, and consider using the lightest possible hanging method for your frame weight.
How do you remove Command strips without damaging paint?
Pull the tab slowly, stretching the strip down against the wall at a shallow angle for at least 30cm (12 inches). Never pull straight out. If the tab breaks, use dental floss to saw behind the strip.
How far apart should pictures be hung?
For gallery walls, maintain consistent gaps of 5-7cm (2-3 inches) between frames. Closer spacing creates a cohesive grouping, while wider gaps can make the arrangement look scattered.
How do you hang pictures above a sofa?
Position the bottom of the frame 15-25cm (6-10 inches) above the sofa back. The artwork should span roughly two-thirds the width of the sofa below for proper visual balance.
What surfaces do adhesive strips work on?
Adhesive strips bond to most smooth surfaces including painted walls, finished wood, metal, tile, and glass. They do not work well on textured walls, brick, unpainted surfaces, or freshly painted walls that have not cured for at least seven days.
Conclusion
Learning how to hang pictures without damaging walls opens up endless decorating possibilities. Picture hanging is one of those simple home maintenance tasks that anyone can learn with the right technique. With the right adhesive products and proper application, your walls stay pristine while your rooms gain personality.
Remember the fundamentals: clean surfaces thoroughly, match product weight ratings to your frames, and always use the stretching technique when removing adhesive strips. Follow the 145cm (57-inch) rule for perfect height, and plan gallery walls with paper templates before committing.
Once you master damage-free picture hanging, you will have the confidence to tackle other DIY home improvements around your house. Your rental deposit stays safe, your painted walls remain unmarked, and your home reflects your style beautifully.