How to Change Engine Oil at Home: Complete Step-by-Step Guide
Your oil change light is on. The garage quoted £50-80 for a 20-minute job. You’re thinking: “Can I do this myself?” Yes, absolutely yes. Wondering how to change engine oil at home? Changing your own engine oil is one of the easiest car maintenance tasks you can learn, and it saves you £40-60 every single time.
Most people avoid DIY oil changes because they think it’s complicated or messy. In reality, it takes 30-45 minutes once you know what you’re doing, requires minimal tools (most under £30 total), and gives you complete control over the quality of oil going into your engine.
This complete guide walks you through every step, from choosing the right oil and gathering tools, to draining old oil, replacing the filter, and disposing of waste properly. We’ll cover common mistakes that damage engines and troubleshooting tips if something goes wrong.
By the end, you’ll have the confidence to perform this essential maintenance yourself, saving hundreds of pounds annually while keeping your engine running smoothly.
Let’s get started.
Why Regular Oil Changes Matter
Engine oil is your car’s lifeblood. Understanding why it’s critical helps you appreciate this simple maintenance task.
What engine oil does:
- Lubricates moving parts (pistons, crankshaft, camshaft) preventing metal-on-metal friction
- Cools engine by transferring heat away from combustion
- Cleans engine by suspending dirt, metal particles, and combustion by-products
- Seals gaps between piston rings and cylinder walls
- Prevents corrosion and rust on metal components
What happens with old oil:
- Breaks down from heat and chemical reactions (loses viscosity)
- Becomes saturated with contaminants and can’t clean effectively
- Turns into sludge that clogs oil passages
- Stops protecting against friction, causing accelerated wear
- Can lead to engine damage costing thousands to repair
Change frequency:
- Modern synthetic oil: Every 10,000-12,000 miles or 12 months
- Semi-synthetic oil: Every 7,500-10,000 miles or 9-12 months
- Conventional mineral oil: Every 5,000-7,500 miles or 6-9 months
- Check owner’s manual for manufacturer recommendation (they know best)
Cost comparison:
- Garage oil change: £50-80
- DIY oil change: £20-35 (oil + filter)
- Annual savings (2 changes): £60-90
- Over 5 years of car ownership: £300-450
Tools and Materials You’ll Need
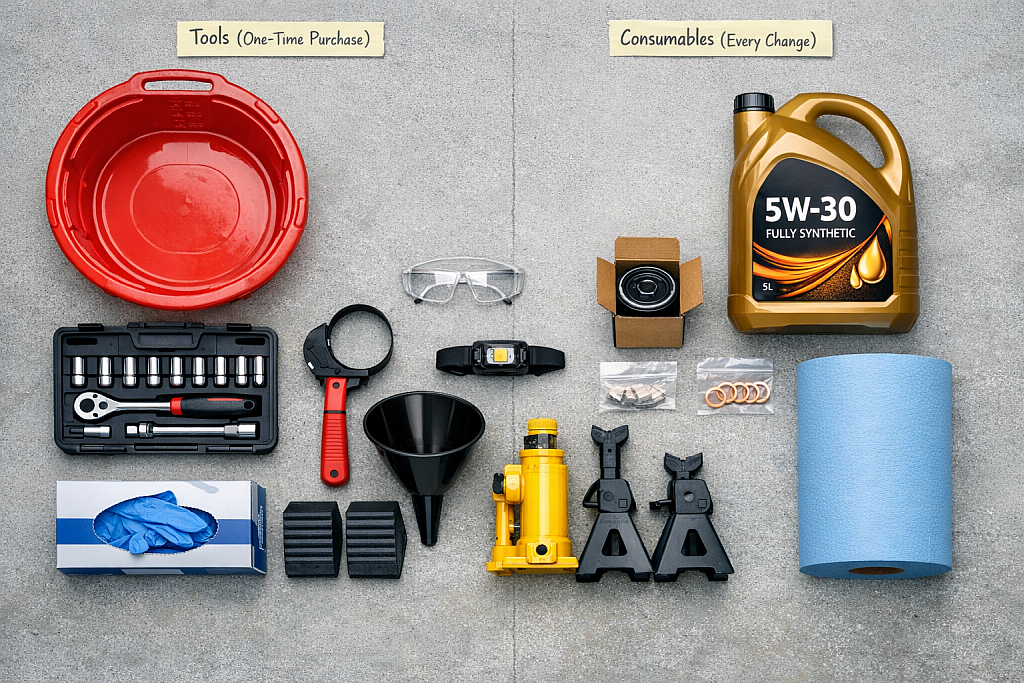
Essential tools (one-time purchase):
- Oil drain pan (£10-15) – holds 5+ litres, wide opening to catch oil
- Socket wrench set (£15-25) – for sump plug and filter housing
- Oil filter wrench (£8-12) – gets tight filters off easily
- Funnel (£3-5) – for pouring new oil without spilling
- Jack and axle stands (£40-60) OR car ramps (£30-50)
- Latex or nitrile gloves (£5 for box) – keeps hands clean Total tool investment: £81-137 (pays for itself after 2-3 oil changes)
Consumables (every oil change):
- Engine oil – 4-6 litres depending on engine (£15-25 for quality synthetic)
- Oil filter – specific to your car make/model (£5-10)
- Sump plug washer – copper or aluminium crush washer (£1-2 or pack of 10 for £5)
- Shop rags or kitchen roll (£2-3) – for cleanup
- Total per oil change: £23-40
Optional but helpful:
- Torque wrench (£20-35) – ensures correct sump plug tightness
- Oil drain plug remover tool (£10) – for stripped plugs
- Headlamp or work light (£10-15) – see what you’re doing
- Cardboard or tarp (free/£5) – protect garage floor from spills
Step 1: Choose the Right Oil and Filter
Using incorrect oil can damage your engine. Here’s how to get it right.
Finding the right specification:
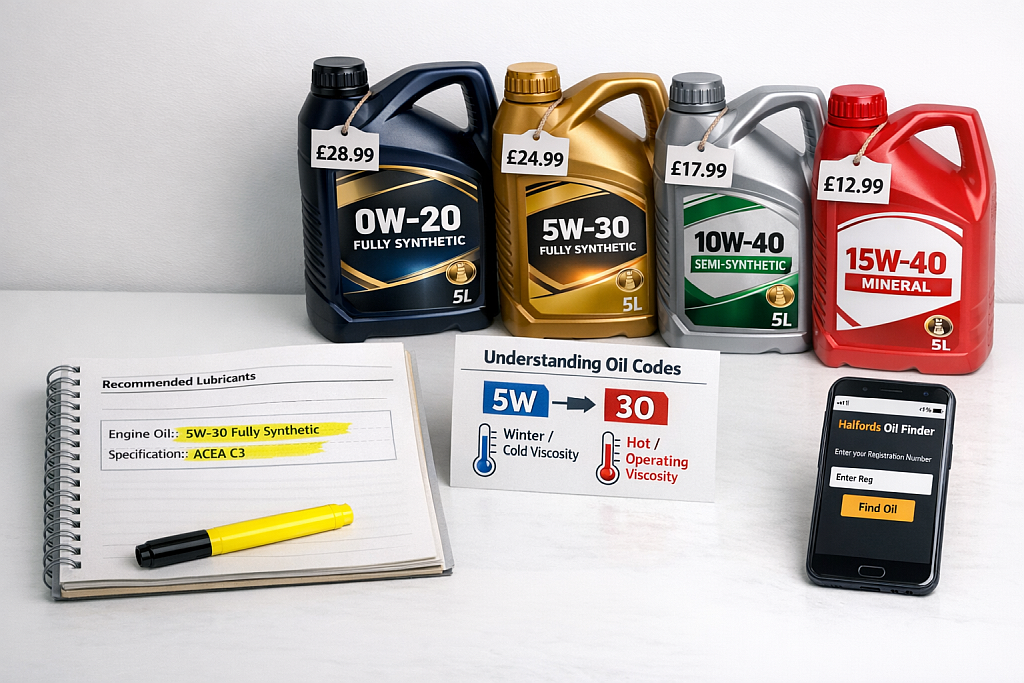
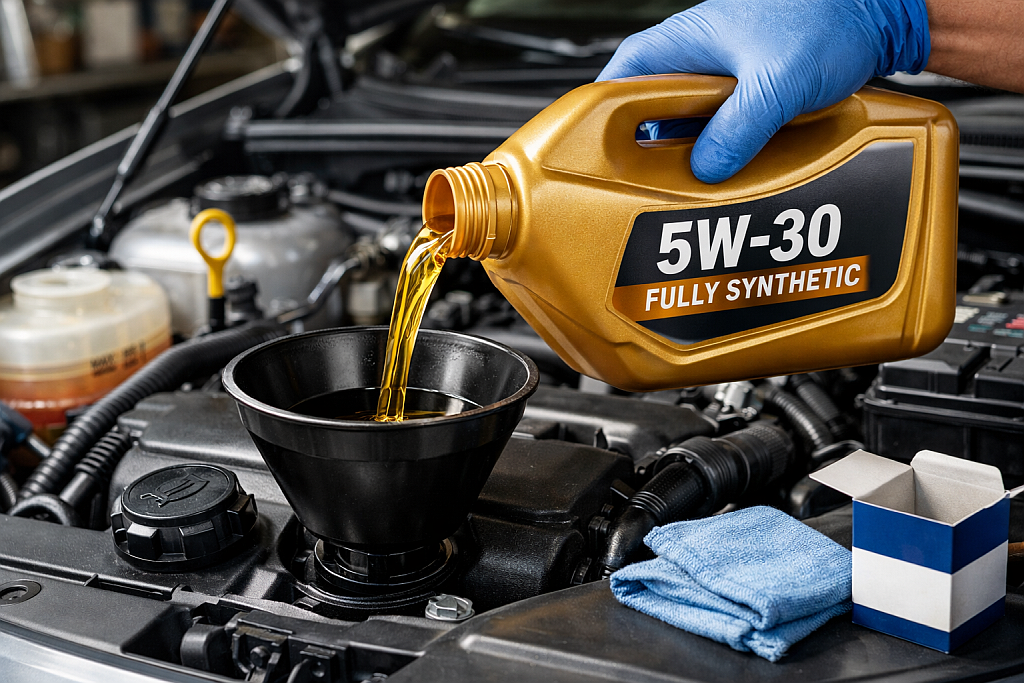
- Check owner’s manual (usually specifies exact oil grade like “5W-30 fully synthetic”)
- Look on oil filler cap (sometimes shows grade)
- Use online oil finder tools (Halfords, Euro Car Parts) – enter reg number
- Phone dealer parts department with VIN number
- RAC recommends always using the oil specification listed in your vehicle’s handbook, as using the wrong grade can damage your engine and void warranty.
Understanding oil codes (e.g., 5W-30):
- First number (5W) = winter/cold viscosity (lower = better cold flow)
- Second number (30) = hot/running viscosity (thickness at operating temp)
- Common grades: 0W-20, 5W-30, 5W-40, 10W-40
- Never guess—wrong grade causes poor lubrication or increased wear
Oil types:
- Fully synthetic: Best protection, longest intervals (10,000-12,000 miles), £20-30 for 5L. Recommended for modern engines.
- Semi-synthetic: Middle ground, good protection, 7,500-10,000 miles, £15-20 for 5L. Fine for older cars.
- Mineral: Basic protection, shorter intervals (5,000-7,500 miles), £12-18 for 5L. Old technology, rarely recommended now.
How much oil to buy:
- Check manual for capacity (usually 3.5-6 litres)
- Buy 5L bottle for most cars (leaves 0.5-1.5L for future top-ups)
- Larger engines (V6, V8) may need 6-8L – buy two bottles
Choosing oil filter:
- Use online parts finder (Euro Car Parts, Halfords) with registration
- Buy OEM (original equipment manufacturer) or quality aftermarket (Mann, Bosch, Fram)
- Avoid the cheapest filters, they use poor filter media
- Cost: £5-15 depending on car
Step 2: Prepare Your Workspace and Car
Safety first:
- Work on level ground (slight slope causes incomplete draining)
- Engine should be warm but not hot (warm oil drains faster, but hot oil burns)
- Let car sit 10-15 minutes after running to cool slightly
- Apply handbrake firmly
- Chock rear wheels if working on front
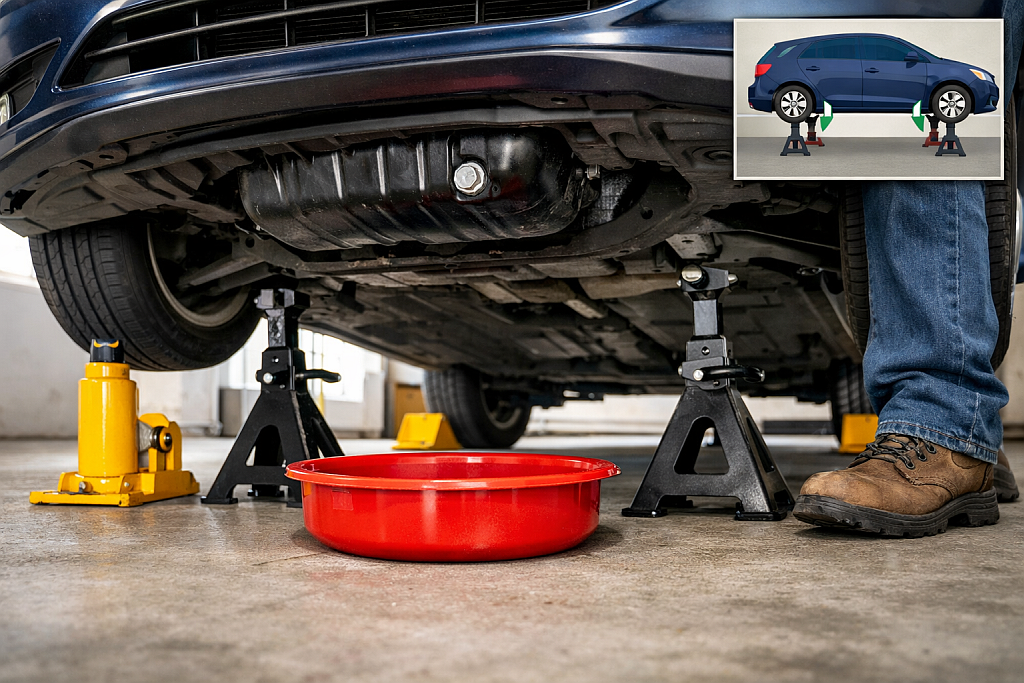
Lifting the car safely:
Option 1:
- Jack and axle stands (most common)
- Position jack under manufacturer’s jacking point (check manual)
- Raise car until front wheels clear ground
- Place axle stands under solid chassis points
- Lower car onto stands (never work under car supported only by jack)
- Give car gentle shake to ensure stability
Option 2:
- Car ramps (easier, safer for beginners)
- Position ramps in front of front wheels
- Slowly drive up ramps (have someone guide you)
- Stop when front wheels at top of ramps
- Apply handbrake, put in park/gear, chock rear wheels
- Much more stable than jack stands
Option 3:
- No lifting (some cars)
- High-ground-clearance vehicles (SUVs, trucks) may not need lifting
- Check if you can slide drain pan under and reach sump plug
- Much safer if feasible for your vehicle
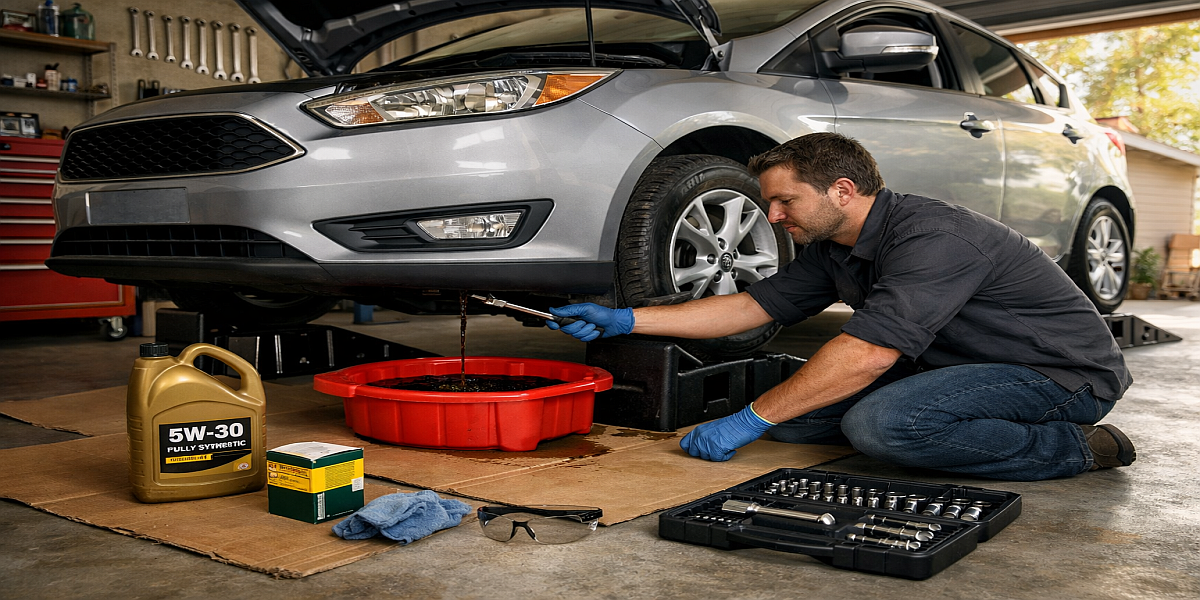
Step 3: Drain the Old Oil
This is the messy part, but preparation makes it manageable.
Locate the sump plug:
- Look under engine at lowest point of oil pan (sump)
- Usually a large bolt (14-19mm) on underside of oil pan
- May have ‘Drain’ label or be obvious lowest point
- Check manual if unsure—removing wrong plug creates disaster
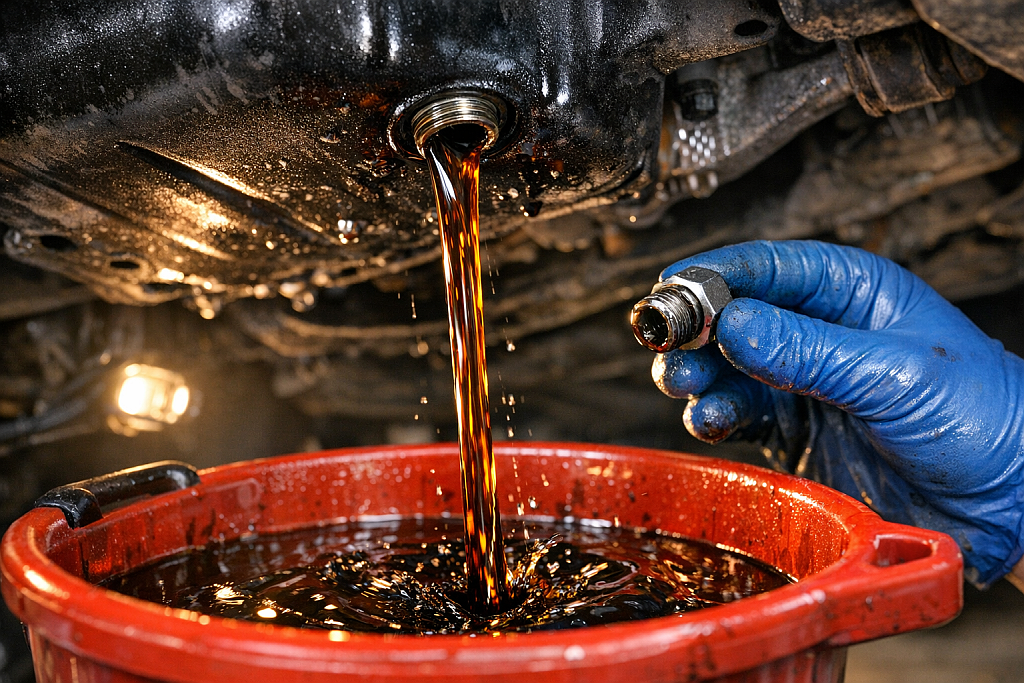
Draining process:
- Put on gloves
- Position drain pan directly under sump plug (oil shoots out initially)
- Using correct socket size, loosen sump plug (anticlockwise)
- Unscrew final few turns by hand, ready to pull plug away quickly
- Remove plug swiftly and move hand clear (oil flows immediately)
- Oil stream may arc outward initially—position pan to catch flow
- Let drain completely (10-15 minutes until dripping stops)
While draining:
- Inspect drain plug washer (small copper or aluminium ring)
- Replace washer every oil change (prevents leaks, costs £1-2)
- Clean threads on drain plug with rag
- Inspect plug threads for damage (stripped threads = expensive repair)
Common mistakes to avoid:
- Don’t overtighten when removing (can strip threads)
- Don’t drop plug into drain pan (fishing it out is messy)
- Don’t position pan too close (oil splashes initially)
- Don’t touch exhaust pipes—they stay hot for hours
Step 4: Replace the Oil Filter
While oil finishes draining, replace the filter.
Locate the oil filter:
- Usually cylindrical canister on side of engine block
- May be top-mounted (cartridge filter inside housing) on newer cars
- Check manual for exact location if not obvious
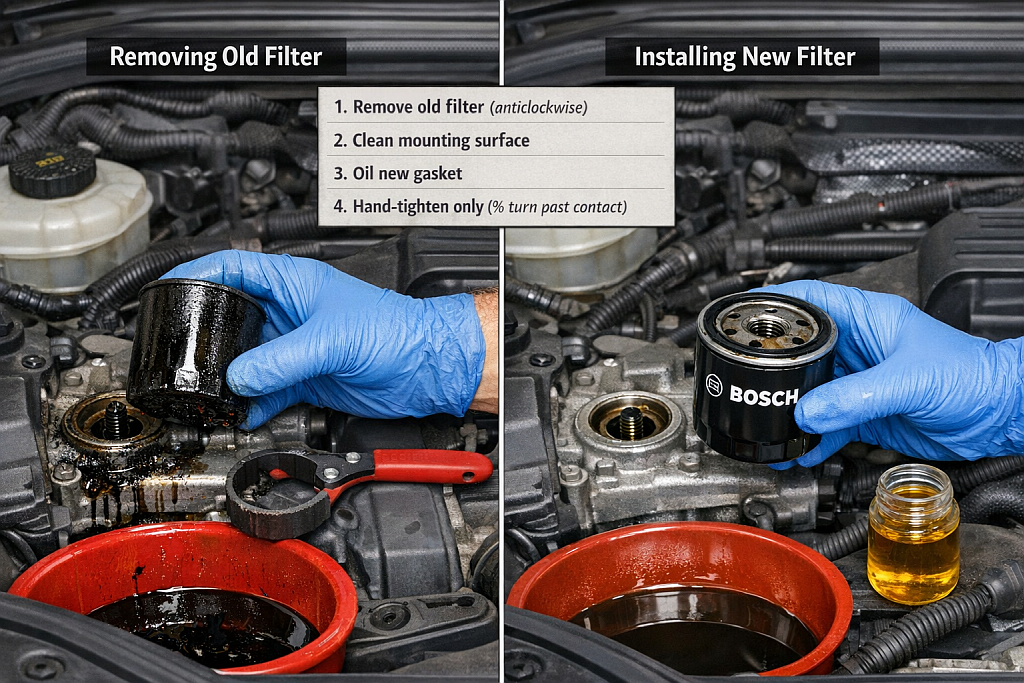
Removal:
- Position drain pan under filter (contains oil)
- Try hand removal first (anticlockwise) – may be tight
- Use oil filter wrench if too tight (strap or cap style)
- Once loose, unscrew by hand—oil will spill out
- Keep filter upright as you remove to minimise spillage
- Empty remaining oil from filter into drain pan
Installation:
- Clean filter mounting surface on engine (remove old rubber gasket)
- Apply thin film of clean oil to rubber gasket on new filter
- Screw filter on by hand until gasket contacts mounting surface
- Tighten 3/4 turn further (hand-tight only—never use wrench to tighten)
- Don’t overtighten—gasket creates seal, crushing it causes leaks
For cartridge-style filters:
- Remove filter housing cap (large plastic cap on top of engine)
- Pull out old paper filter element
- Replace O-rings on housing cap (usually included with filter)
- Insert new filter element
- Tighten cap to specified torque (check manual)
Step 5: Reinstall Drain Plug and Refill with Fresh Oil
Reinstall drain plug:
- Ensure sump is fully drained (no more drips)
- Place new washer on drain plug
- Hand-thread plug into sump (ensures it’s not cross-threaded)
- Tighten with socket wrench—firm but not excessive force
- Torque to specification if using torque wrench (usually 20-30 Nm)
- Hand-tight plus 1/4 turn if no torque wrench
Critical:
Overtightening strips threads (expensive repair). Undertightening causes leaks. Feel for resistance increase, then stop.
Refilling with new oil:
- Lower car back to ground (easier to fill level
- Locate oil filler cap on top of engine (usually labeled ‘Oil’)
- Remove cap and place funnel
- Pour in amount specified in manual MINUS 0.5 litres (e.g., if capacity is 4.5L, pour 4L)
- Wait 2-3 minutes for oil to settle into sump
- Check dipstick level (pull out, wipe clean, reinsert fully, pull out again)
- Add remaining oil slowly until level reaches MAX mark
- Don’t overfill—excess oil damages engine
First run:
- Replace oil filler cap (don’t forget this!)
- Start engine and let idle for 30 seconds
- Check under car for leaks at drain plug and filter
- Oil pressure warning light should go off within 2-3 seconds
- Turn off engine, wait 3-5 minutes
- Recheck dipstick (level may drop slightly as oil fills filter)
- Top up if needed to reach MAX
Step 6: Dispose of Old Oil Properly
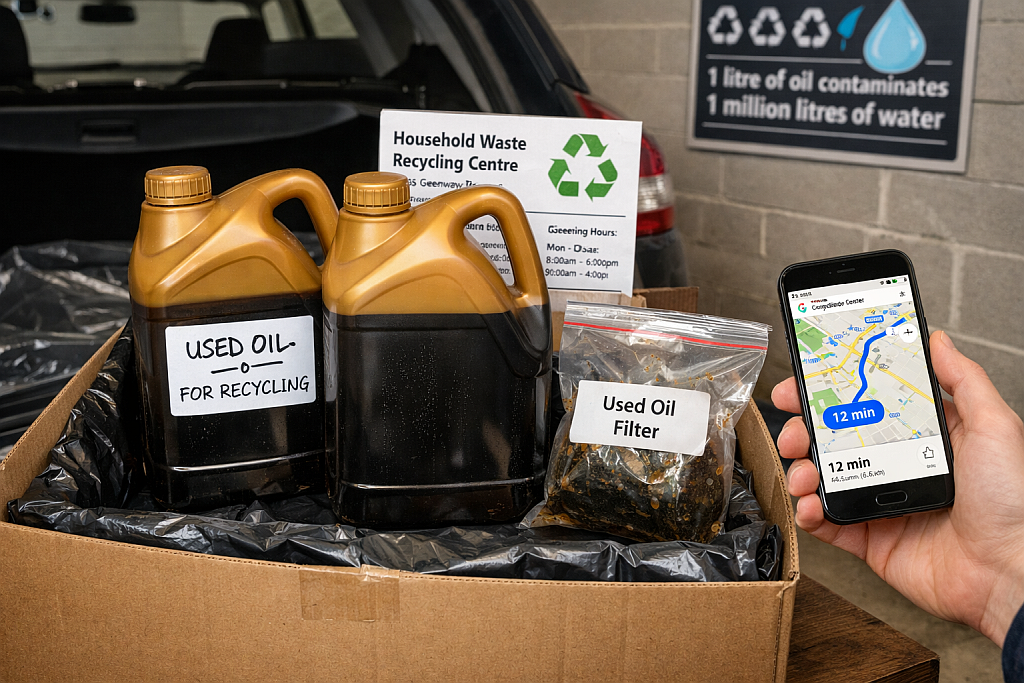
Under environmental regulations, used engine oil must be disposed of properly at designated recycling centres—pouring it down drains is illegal and carries heavy fines.
Proper disposal:
- Pour used oil from drain pan into empty oil bottles (keep old bottles for this)
- Take to local recycling centre (household waste and recycling centre)
- Most centres have dedicated oil disposal tanks (free service)
- Some garages and Halfords stores accept used oil
- Put used oil filter in sealed plastic bag before binning
Never:
- Pour down drains or onto ground (contaminates water supply)
- Mix with other fluids (keeps oil recyclable)
- Leave in general waste bins
- Burn it (releases toxic fumes)
Environmental note:
One litre of oil can contaminate one million litres of water. Used oil is recycled into new oil, fuel, and other products—proper disposal matters.
Troubleshooting Common Issues
Oil pressure warning light stays on:
- Turn off engine immediatelyCheck oil level—may be underfilled
- Check drain plug and filter for leaks
- If level correct and no leaks, may be air in system (run 30 seconds and recheck)
- If light persists, don’t drive—call for help
Oil leaking from drain plug:
- Usually from missing/damaged washer or undertightened plug
- Let engine cool, tighten plug slightly more
- If still leaking, drain oil and replace washer
- If threads stripped, need professional repair
Oil leaking from filter:
- Usually not tight enough or old gasket stuck to engine
- Tighten filter another 1/4 turn (hand-tight only)
- If still leaking, remove filter and check for double gasket
- Overtightening makes it worse—don’t use tools to tighten
Can’t remove filter (stuck):
- Use bigger/better filter wrench with more leverage
- Try hammering large screwdriver through filter body for leverage (messy but effective)
- As last resort, use chain wrench or vice grips
Stripped drain plug:
If threads damaged, plug won’t tighten properly
- Short-term: Use oversized drain plug or rubber plug.
- Permanent fix: Helicoil insert or oil pan replacement (£100-300)
Prevention:
- Never overtighten, always use new washer
- Car won’t start after oil change:
- Rare but possible if accidentally disconnected battery or sensor
- Check battery connections
- If your car won’t start after an oil change (rare but possible if you accidentally disconnected something), you may need to jump start your car safely while troubleshooting the issue.
- Check you didn’t knock any wiring loose under car
Ongoing Maintenance Tips
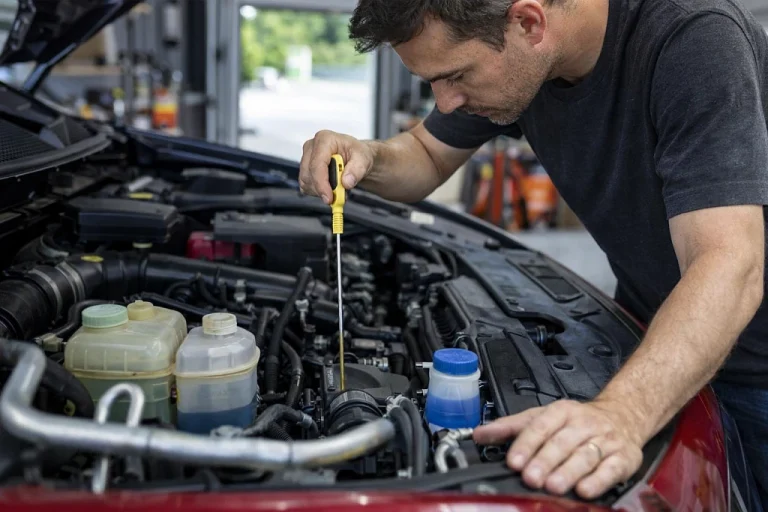
While you have the bonnet open for your oil change, it’s the perfect time to check all your car’s vital fluids, our guide covers exactly what to look for and when to top up.
Between oil changes:
- Check oil level monthly (dipstick should read between MIN and MAX)
- Top up if below halfway (same grade as last change)
- Check for leaks on driveway (dark spots indicate problem)
- Note oil colour on dipstick (light golden = fresh, dark brown/black = needs changing)
Record keeping:
- Log each oil change: date, mileage, oil type, filter brand
- Helps maintain service history for resale
- Reminds you when next change due
- Keep receipts as proof of maintenance
When to use garage instead:
- Very low ground clearance (risk of damage getting underneath)
- Limited mobility or strength issues
- No safe place to work (busy road, apartment parking)
- Warranty requirements specify professional service
- Time constraints (garage takes 20 minutes vs. your 45)
Frequently Asked Questions
How often should I change my engine oil?
Follow your car manufacturer’s recommendation in the owner’s manual—typically 10,000-12,000 miles or 12 months for modern synthetic oil, 7,500-10,000 miles for semi-synthetic, or 5,000-7,500 miles for conventional oil. Severe driving conditions (frequent short trips, towing, dusty environments) require more frequent changes. When in doubt, change it—oil is cheap compared to engine repairs.
Can I switch from conventional to synthetic oil?
Yes, absolutely. Switching to synthetic is beneficial and won’t harm your engine, regardless of age or mileage. Synthetic offers better protection, especially for older engines. The myth that synthetic causes leaks in old engines is false—it’s actually better at keeping seals pliable. Just ensure the viscosity grade (e.g., 5W-30) matches your manual’s specification.
What happens if I overfill the oil?
Overfilling by more than 1/2 litre can cause serious problems: foaming (reduces lubrication), increased pressure (can damage seals), oil burning (catalytic converter damage), and poor engine performance. If overfilled, drain excess oil immediately—either remove drain plug briefly or use oil extractor pump through dipstick tube. Always fill to MAX mark, never above.
Do I need to change the oil filter every time?
Yes, always change the filter with every oil change. The filter traps contaminants removed by the oil. A clogged filter forces oil to bypass filtration, sending dirty oil through your engine and defeating the purpose of fresh oil. Filters cost £5-15—skipping it to save a few pounds is false economy that risks engine damage costing thousands.
How do I know if I’m using the right oil?
Check your owner’s manual for the exact specification (e.g., “5W-30 fully synthetic ACEA C3”). The manual lists approved oil grades and standards. Never guess—wrong viscosity causes poor lubrication or increased wear. Modern engines have tight tolerances requiring specific oil. Using incorrect oil can void warranty. When unsure, call your dealer’s parts department with your VIN number.
Can I mix different brands of oil?
Yes, you can mix brands of the same grade (e.g., Castrol 5W-30 with Mobil 1 5W-30) without issues. All oils meeting the same specification are compatible. However, don’t mix synthetic with conventional regularly—stick with one type for consistency. In emergencies, any correctly-graded oil is better than running low. For top-ups between changes, same brand/type is ideal but not essential.
Why is my oil black after just 1,000 miles?
This is normal and actually good—it means the oil is doing its job of cleaning your engine and suspending contaminants. Dark oil doesn’t necessarily mean it needs changing (modern oils stay effective despite colour). Judge by mileage and time since last change, not colour. However, if oil is thick, gritty, or sludge-like, change it immediately regardless of mileage.
Conclusion
Changing your own engine oil is one of the most valuable skills any car owner can learn. It’s straightforward, requires minimal tools, saves £40-60 every time, and gives you confidence that the job is done properly with quality oil.
Your first oil change might take 60-90 minutes as you learn. By your third time, you’ll complete it in 30-45 minutes. The process becomes routine: lift car safely, drain old oil, replace filter, reinstall plug with new washer, refill with correct oil, check for leaks, dispose responsibly.
The financial savings add up quickly. Two oil changes yearly at £30 each (DIY) versus £70 each (garage) saves £80 annually, £400 over five years of ownership. Plus you know exactly what oil went in and that it was done correctly.
Start with the right tools, follow the steps methodically, take your time, and prioritise safety. Your engine will thank you with years of reliable service, and your wallet will appreciate the savings. You’ve got this.