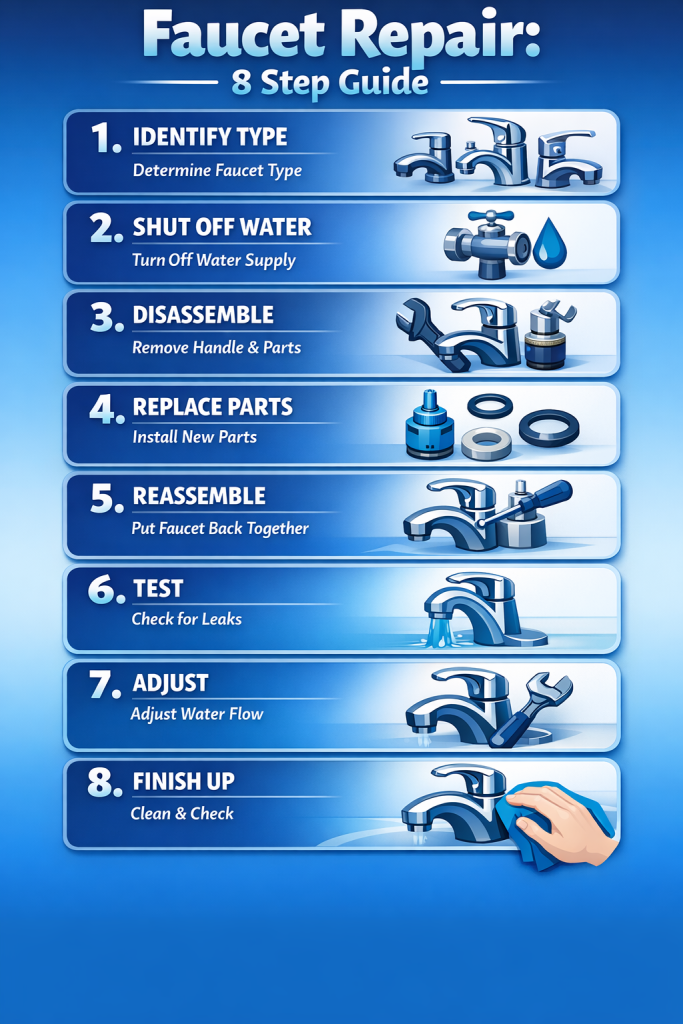
How to Fix a Leaky Faucet: Complete Step-by-Step Guide
Drip. Drip. Drip. That constant sound isn’t just annoying – it’s costing you money. A single leaky faucet dripping at one drop per second wastes over 3,000 gallons of water per year. That’s enough to fill a swimming pool and adds roughly $35 to your annual water bill. Multiply that by multiple faucets, and the cost adds up fast. How to Fix a Leaky Faucet? The good news? Fixing a leaky faucet is one of the easiest and most satisfying DIY plumbing repairs you can do. With basic tools and about an hour of your time, you can stop that drip and start saving water and money. This comprehensive guide will walk you through fixing every type of faucet, from old compression models to modern ceramic disk designs.
Whether you’re a complete beginner or have some DIY experience, you’ll learn exactly how to identify your faucet type, diagnose the problem, and make the repair confidently. Let’s get that faucet fixed.
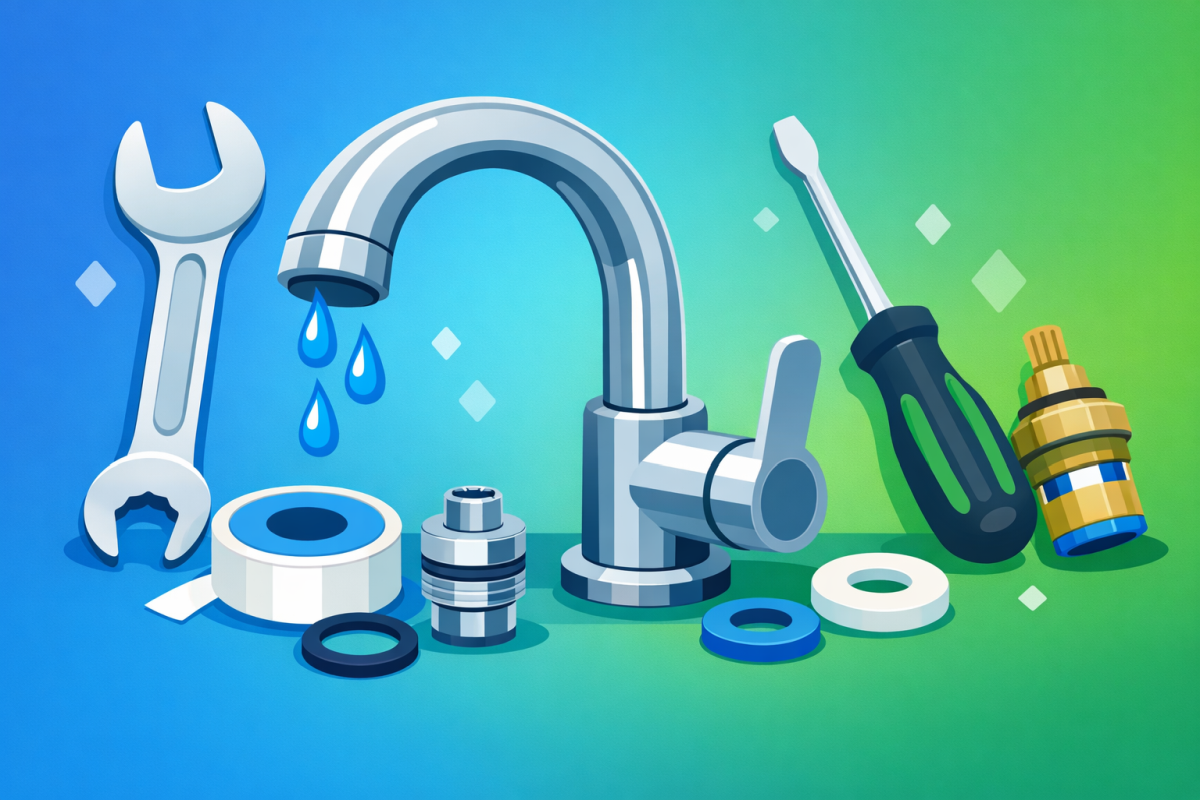
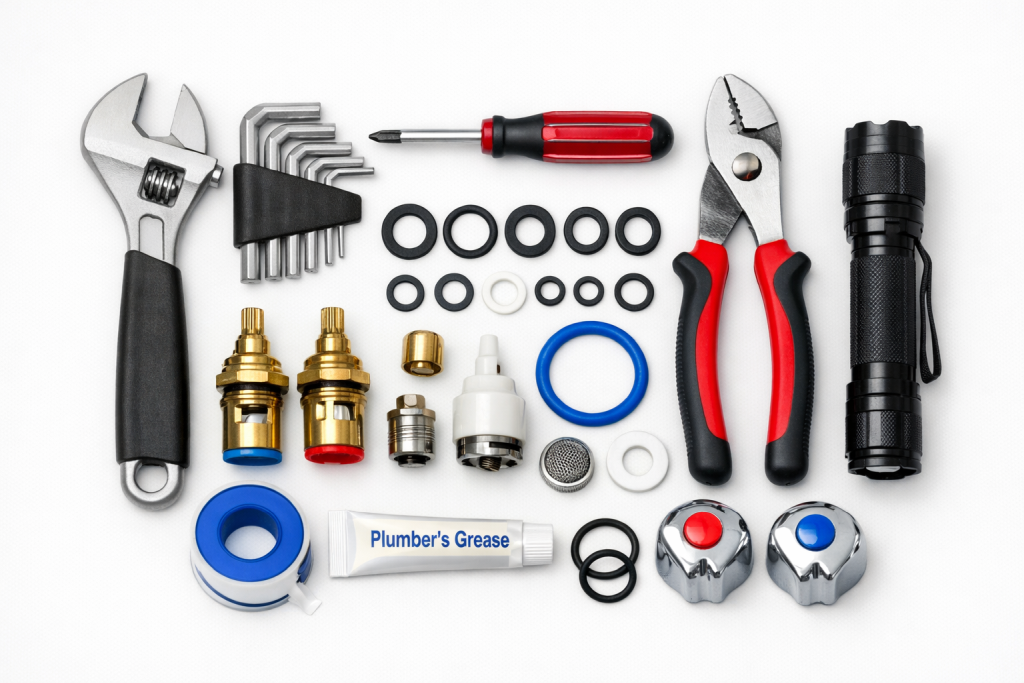
Tools and Materials You’ll Need
Basic Tools (most repairs):
- Adjustable wrench or basin wrench
- Phillips and flathead screwdrivers
- Allen wrench set (hex keys)
- Pliers (needle-nose and regular)
- Flashlight or headlamp
- Old towels or rags
- Bucket or container
Replacement Parts (depends on faucet type):
- Rubber washers and O-rings (various sizes)
- Valve seats (for compression faucets)
- Replacement cartridge (specific to your faucet model)
- Plumber’s grease (silicone-based)
- Distilled white vinegar (for cleaning mineral deposits)
Pro tip:
Before buying replacement parts, take a photo of your faucet and any parts you remove to show hardware store staff. Better yet, bring the old parts with you to ensure you get exact matches.
Step 1: Identify Your Faucet Type
There are four main types of faucets, and each requires a slightly different repair approach. Identifying yours is crucial before you start disassembling anything.
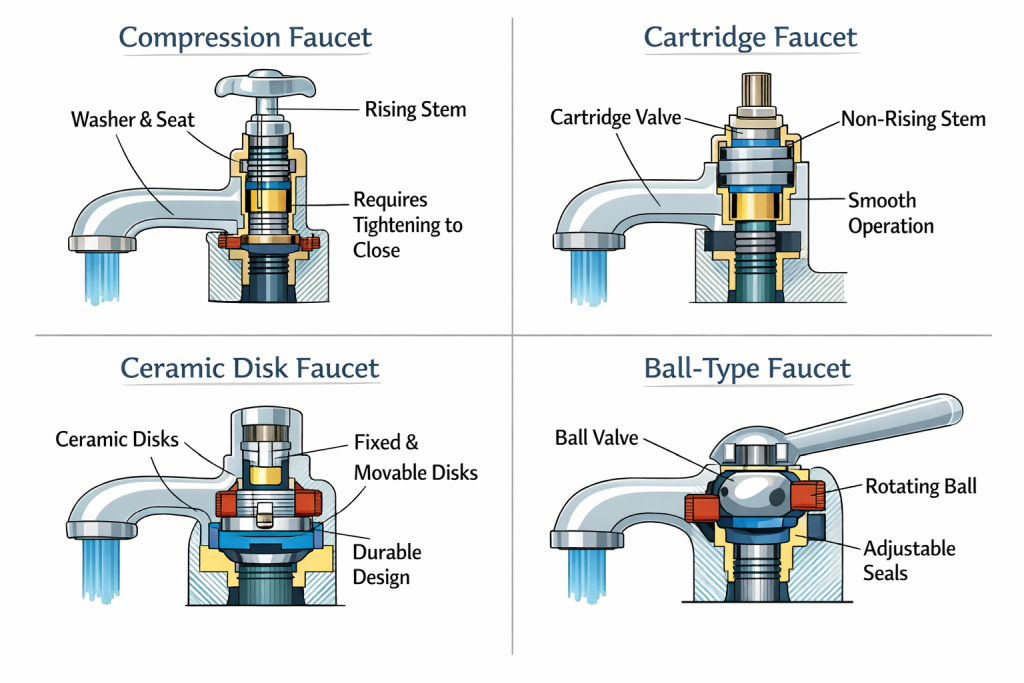
1. Compression Faucets (Oldest Style):
- Two separate handles (hot and cold)
- Turn multiple rotations to fully open or close
- Rubber washers compress against valve seats
- Most common in older homes (pre-1990s)
- Easiest and cheapest to repair
2. Cartridge Faucets:
- Single or double handles
- Smooth operation (no grinding or tight spots)
- Turn on/off with less than one full rotation
- Cartridge moves up/down and rotates
- Very common in modern homes
3. Ceramic Disk Faucets (Most Reliable):
- Single lever handle (usually wide and flat)
- Solid, high-quality feel to handle movement
- Broad base under the handle
- Most expensive but rarely leak
- Premium faucet brands (Kohler, Delta, Moen high-end models)
4. Ball-Type Faucets:
- Single handle
- Handle sits on top of a rounded cap
- Most common brand: Delta
- Loose or wiggly handle feel
- Multiple parts can wear out
Quick identification tip: Single-handle faucets are usually cartridge, ceramic disk, or ball-type. Two-handle faucets are almost always compression or cartridge type. Check under the handle for manufacturer markings to help identify the exact model.
Step 2: Turn Off the Water Supply
This is THE MOST IMPORTANT step. Skipping it will turn your repair job into an indoor flood. Always shut off water before starting any faucet work.
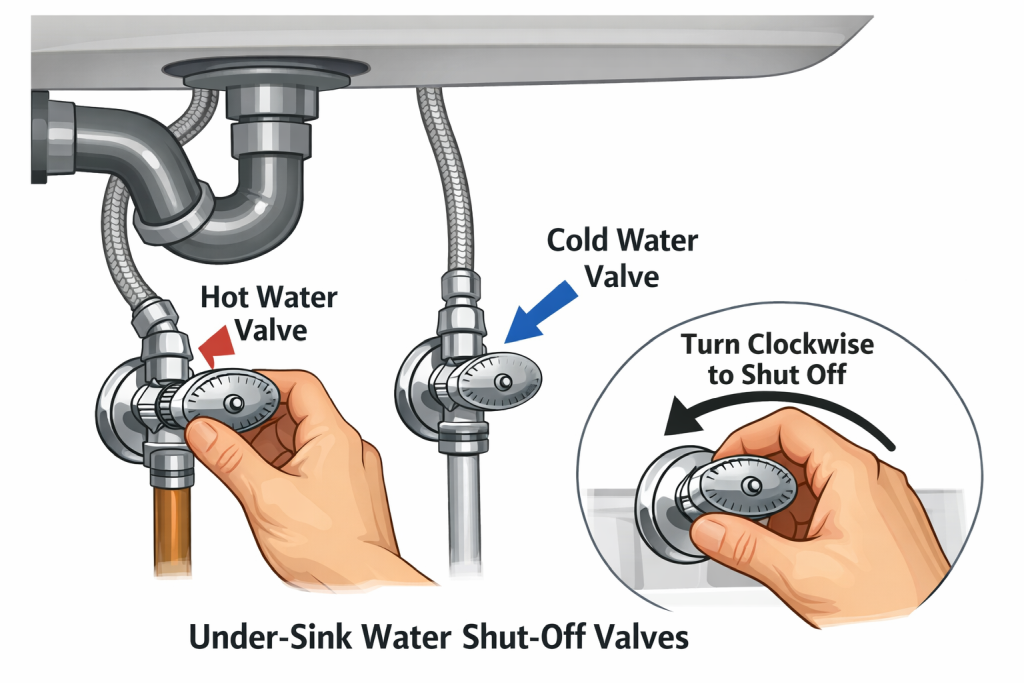
How to Shut Off Water:
- Look under the sink for two small oval valves (one for hot, one for cold water)
- Turn both valves clockwise until tight (right = tight, or ‘righty tighty’)
- Turn on the faucet to release any remaining water pressure
- Place a towel in the sink to catch any dropped parts and protect the sink surface
If you don’t have shut-off valves under the sink:
- Locate your home’s main water shut-off valve (usually in basement, crawl space, or near water meter)
- Turn it clockwise to shut off water to the entire house
- Consider installing shut-off valves under sinks for future convenience
Pro tip: If shut-off valves are corroded and won’t turn, don’t force them – you could break the valve and create a bigger leak. Use penetrating oil, wait 10 minutes, then try again gently. If still stuck, call a plumber to replace the valves first.
Step 3: Fix a Compression Faucet (Two Handles)
Compression faucets are the simplest to repair. The leak is almost always caused by worn rubber washers or O-rings that need replacement.
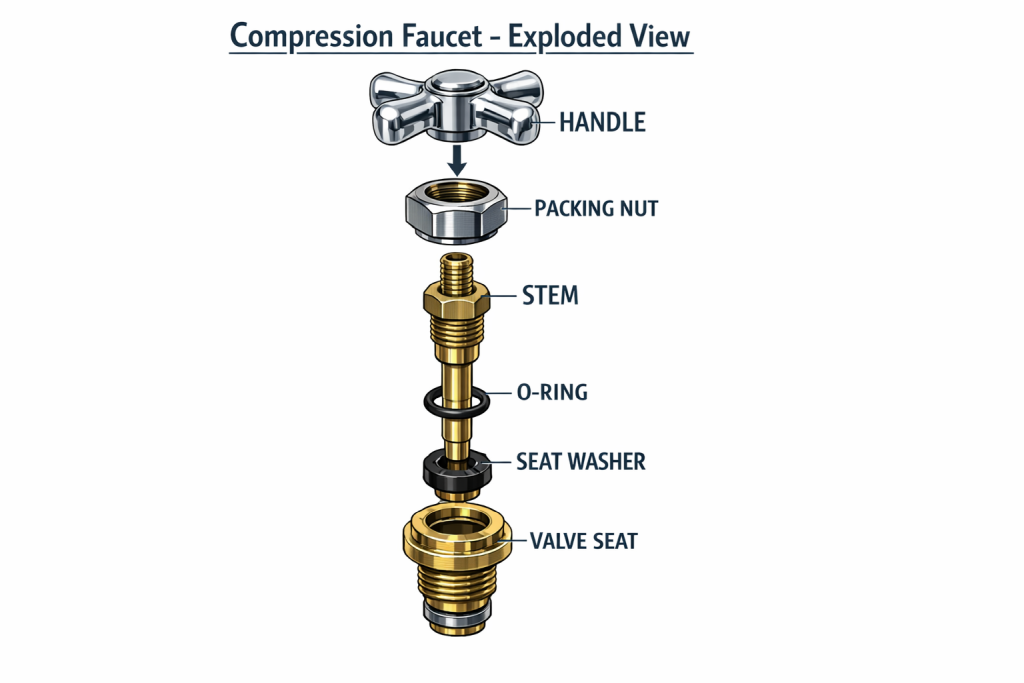
Disassembly Instructions:
- Remove the decorative cap on top of the handle (usually says ‘H’ or ‘C’) – pry gently with a flathead screwdriver
- Unscrew the handle screw (usually Phillips head) and lift off the handle
- Use an adjustable wrench to loosen the packing nut (the large hexagonal nut)
- Unscrew and remove the entire stem assembly
- At the bottom of the stem, you’ll find the seat washer held by a brass screw
- Remove the screw and replace the old washer with a new one of the same size
- Check the O-ring on the stem body – replace if worn or cracked
- Apply plumber’s grease to the new O-ring and washer
Reassembly:
- Insert the stem back into the faucet body
- Tighten the packing nut with your wrench (snug but not overtight)
- Replace the handle and tighten the screw
- Press the decorative cap back on
- Turn water back on slowly and test
Cost: Replacement washers and O-rings cost $2-5 for a complete set.
Step 4: Fix a Cartridge Faucet
Cartridge faucets leak when the cartridge itself wears out or when O-rings deteriorate. Replacing the cartridge is straightforward but requires getting the correct replacement model.
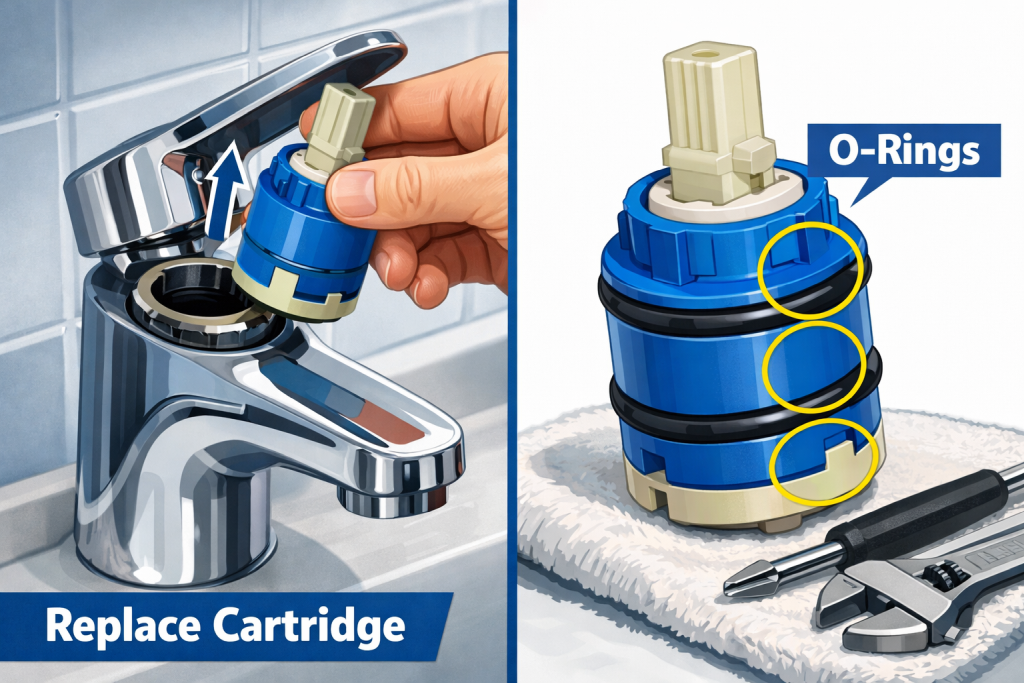
Removal and Replacement:
- Remove the handle – look for a setscrew on the side or back (usually Allen/hex screw)
- Remove the decorative escutcheon (collar or cap) by unscrewing or pulling
- You’ll see a retaining clip or nut holding the cartridge – remove it with pliers
- Pull the cartridge straight up and out (may require significant force – use pliers if needed)
- Note the cartridge orientation – take a photo or mark which direction it faces
- Take the old cartridge to a hardware store to find an exact match (brand and model matter)
- Coat the new cartridge O-rings with plumber’s grease
- Insert the new cartridge in the same orientation as the old one
- Replace the retaining clip or nut
- Reassemble the handle and escutcheon
- Turn water on slowly and test
Important: If hot and cold are reversed after reassembly, you installed the cartridge 180 degrees off. Simply disassemble and rotate it.
Cost: Replacement cartridges range from $10-40 depending on brand (Moen, Delta, Kohler each have proprietary cartridges).
Step 5: Fix a Ceramic Disk Faucet
Ceramic disk faucets rarely develop leaks because the ceramic disks are incredibly durable. When they do leak, it’s usually the neoprene seals that need cleaning or replacement, not the disk cylinder itself.
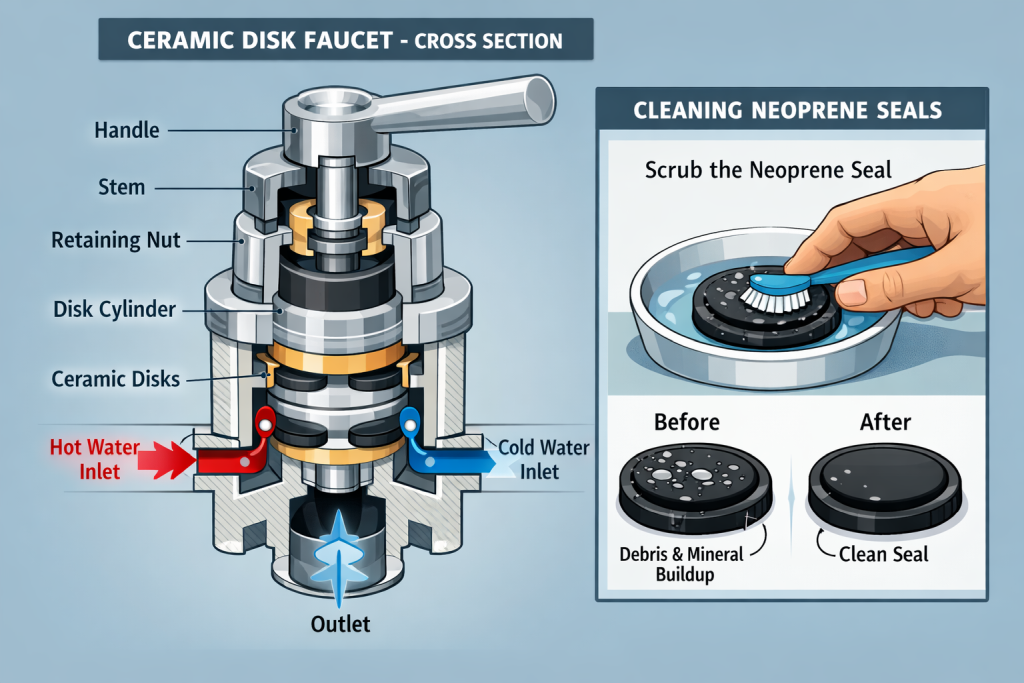
Repair Process:
- Remove the handle by loosening the setscrew (usually under a cap)
- Unscrew the disk cylinder cap (the broad base)
- Lift out the ceramic disk cylinder
- On the underside, you’ll see inlet and outlet seals (small neoprene rings)
- Remove seals with a small screwdriver or pick
- Clean the seal seats with white vinegar to remove mineral deposits
- Install new seals or clean and reinstall old ones if they’re not damaged
- Clean the cylinder holes with vinegar and a soft brush
- Reassemble in reverse order
- Turn water back on SLOWLY (sudden pressure can crack ceramic disks)
Critical warning: Always turn water on gradually after repairing ceramic disk faucets. Abrupt water pressure from quickly opening shut-off valves can crack the ceramic disks, ruining a $50-100 cylinder assembly.
Cost: Seal kits cost $5-10. Full disk cylinder replacement (rarely needed) costs $30-100.
Step 6: Fix a Ball-Type Faucet
Ball-type faucets (primarily Delta) have the most parts of any faucet type, which means more components that can wear out. The good news is that repair kits include everything you need.
Repair Steps:
- Loosen the handle setscrew and remove the handle
- Use pliers to remove the cap and collar
- Remove the plastic cam, cam washer, and rotating ball
- Use needle-nose pliers to remove the inlet seals and springs from the faucet body
- Purchase a ball faucet repair kit (about $15) – easier than finding individual parts
- Install new inlet seals and springs (use the tool included in the kit)
- Place the ball back into the socket, aligning the keyway
- Install the new cam and cam washer with the tab fitting into the slot
- Screw on the cap, tightening with pliers (but not too tight)
- Reattach the handle and test
Pro tip: If your ball-type faucet handle feels loose or wobbly even after repair, tighten the adjusting ring (the piece with notches) using the special tool included in the repair kit. Turn clockwise to tighten.
Cost: Complete ball faucet repair kits cost $12-20 and include all common wear parts.
Common Problems and Solutions
Faucet Still Leaks After Repair:
- Check that you installed parts in the correct orientation
- Ensure the valve seat isn’t corroded (compression faucets) – it may need replacing or resurfacing with a valve seat wrench
- Verify you purchased the correct replacement parts for your exact faucet model
- Make sure O-rings are properly seated and lubricated
- Check that nothing is cross-threaded or overtightened
Low Water Pressure After Repair:
- Remove and clean the aerator (the screen at the faucet tip) – sediment often gets dislodged during repairs
- Check that shut-off valves are fully open
- Ensure no debris is blocking water flow inside the faucet body
Handle Won’t Stay in Position:
- Tighten the handle screw more firmly
- Check for stripped threads on the stem
- For ball-type faucets, adjust the adjusting ring
Leak from Base of Faucet:
- This indicates O-ring failure at the base
- You’ll need to remove the entire faucet from the sink to access these O-rings
- Consider calling a plumber if this seems too complex – it requires disconnecting supply lines
Preventing Future Faucet Leaks
- Don’t overtighten handles when turning off water – this accelerates washer wear
- Replace washers and O-rings preventatively every 3-5 years (cheap insurance)
- Clean faucet aerators quarterly to prevent mineral buildup
- Consider installing a whole-house water softener if you have hard water – minerals corrode faucet parts faster
- Address small drips immediately – they only get worse and waste thousands of gallons yearly
- Keep replacement parts on hand for your specific faucet type
- For other plumbing maintenance, check out our guide on how to unclog drains without chemicals
When to Call a Professional Plumber
While most faucet repairs are DIY-friendly, some situations warrant professional help:
- You can’t identify your faucet type or find replacement parts
- The leak persists after trying these repairs
- You notice leaks inside the wall or under the sink
- The entire faucet needs replacement (requires disconnecting supply lines and dealing with mounting hardware)
- Shut-off valves are corroded, broken, or won’t close
- You’re not comfortable working with plumbing
- The faucet is a high-end designer model (warranty may require professional service)
Average professional repair cost: $150-250 including parts and labor. Weigh this against the $10-40 DIY cost and your comfort level with plumbing work.
Frequently Asked Questions
How do I know which replacement parts to buy?
The best approach is taking photos of your faucet (including any brand names or model numbers) and the old parts you removed to a hardware store. Staff can help identify the correct replacements. Alternatively, search your faucet’s brand and look under the sink or on the faucet body for model numbers, then search online for parts. For cartridge faucets, taking the old cartridge with you is essential since cartridges are model-specific.
Why does my faucet drip only when it’s hot or cold?
If your faucet drips only with hot water, the problem is isolated to the hot water side – focus your repair on that valve stem, cartridge, or seal. Same for cold water drips. Two-handle compression faucets make this easy since each handle controls one temperature. For single-handle faucets, inlet seals or cartridge O-rings on one side have failed. This actually makes repair easier since you know exactly which parts need attention.
Can I use any washer or O-ring, or do they have to match exactly?
Size matters tremendously. Using the wrong size washer or O-ring will result in continued leaking. Washers come in different diameters and thicknesses – take your old washer to the hardware store and match it exactly. O-rings are measured by inner diameter and thickness. Many hardware stores sell assortment packs with multiple sizes, which is useful for future repairs. Always compare the old part side-by-side with the new part before reassembling.
How long do faucet repairs typically last?
Properly done repairs with quality parts should last 3-5 years in normal conditions. Hard water areas may see shorter lifespans (2-3 years) due to mineral deposits accelerating wear. Ceramic disk faucets can go 10+ years between repairs because the ceramic disks are extremely durable. The longevity also depends on water pressure – very high pressure wears parts faster. If your repair lasts less than a year, either parts were installed incorrectly or you may have water quality issues worth addressing.
Is it better to repair or replace an old faucet?
If your faucet is less than 10 years old and still looks good, repair it. Parts cost $5-40 while a quality replacement faucet costs $100-300 plus installation. However, if your faucet is 15+ years old, showing corrosion, leaking from multiple points, or is a cheap builder-grade model, replacement makes more sense. Consider replacement if you’ve repaired it multiple times in recent years or if you’re updating your kitchen/bathroom aesthetics anyway.
What if I can’t remove a stuck cartridge or handle?
Mineral deposits can cement parts together over time. First, try applying penetrating oil (like WD-40 or Liquid Wrench) around the stuck part and wait 10-15 minutes. For cartridges, special cartridge-pulling tools ($10-20) provide extra leverage. If handles are stuck, carefully apply gentle heat with a hairdryer to expand the metal slightly – never use a torch. If parts still won’t budge after these attempts, it’s time to call a plumber before you crack something expensive.
Do I need to replace both hot and cold sides at the same time?
For compression faucets with two handles, you technically only need to fix the side that’s leaking. However, if one side has worn out, the other isn’t far behind. Since you already have tools out and know the process, many people choose to replace washers and O-rings on both sides preventatively. This costs maybe $5 more but saves you from doing the same job again in six months. For single-handle faucets (cartridge, ceramic disk, ball-type), there’s only one cartridge or cylinder to replace anyway.
Conclusion
Fixing a leaky faucet is one of the most rewarding DIY plumbing projects you can tackle. With just basic tools and a small investment in replacement parts, you can stop that annoying drip, save thousands of gallons of water annually, and put $30-50 back in your pocket compared to hiring a plumber.
The key is correctly identifying your faucet type and following the appropriate repair procedure. Take your time during disassembly, keep track of parts and their order, and don’t force anything. Most faucet repairs take less than an hour once you know what you’re doing.
Remember that even small drips waste significant water and money over time. Address leaks as soon as you notice them, perform preventative maintenance every few years, and your faucets will serve you well for decades. And while you’re working on your plumbing, check out our guide on unclogging drains naturally if you’re dealing with slow drainage issues too.