How to Paint a Room Like a Professional: Complete 9-Step Guide
Painting is one of the most rewarding home improvement projects you can tackle yourself, transforming a tired room in just a weekend. The fresh colour brings new energy to your space, and the satisfaction of doing it yourself is unmatched.
But here is the truth: a rushed paint job looks worse than the old walls you started with. Drips, streaks, uneven coverage, and messy edges scream “amateur” and can actually decrease your home’s appeal. Painting a room yourself can save money – hundreds of pounds compared to hiring professionals – but only if you do it right.
This guide walks you through exactly how to paint a room from start to finish. You will learn the preparation steps that professionals never skip, the cutting-in technique that creates crisp edges, and the rolling method that prevents lap marks. Dulux recommends starting at the ceiling and working your way down – this prevents drips on freshly painted surfaces below.
Whether you are painting your first room or your twentieth, these 9 steps and 18 detailed images will help you achieve a flawless, professional finish every time.
What You Need to Paint a Room
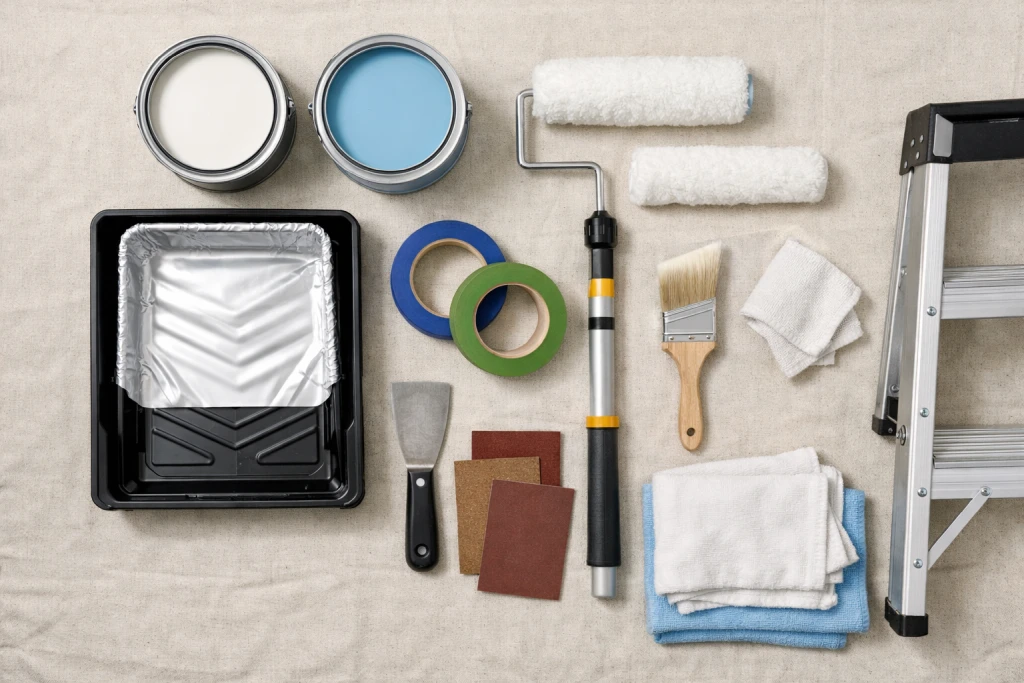
Gathering all your supplies before starting prevents frustrating trips to the hardware store mid-project.
Here is your complete checklist:
Paint and Primer: Quality paint (one gallon covers approximately 35-40 square metres / 350-400 square feet), primer if needed, and sample pots for colour testing.
Brushes and Rollers: 6-7cm angled brush for cutting in, roller frame with extension pole, roller sleeves (6mm nap for smooth walls, 12mm for textured), paint tray with liners.
Preparation Supplies:
Painter tape (Frog Tape or similar), canvas drop cloths, plastic sheeting, spackling compound, putty knife, sandpaper (120-150 grit), clean cloths.
Safety Equipment:
Safety glasses, dust mask for sanding, sturdy step ladder.
Step 1: Clear and Prepare the Room
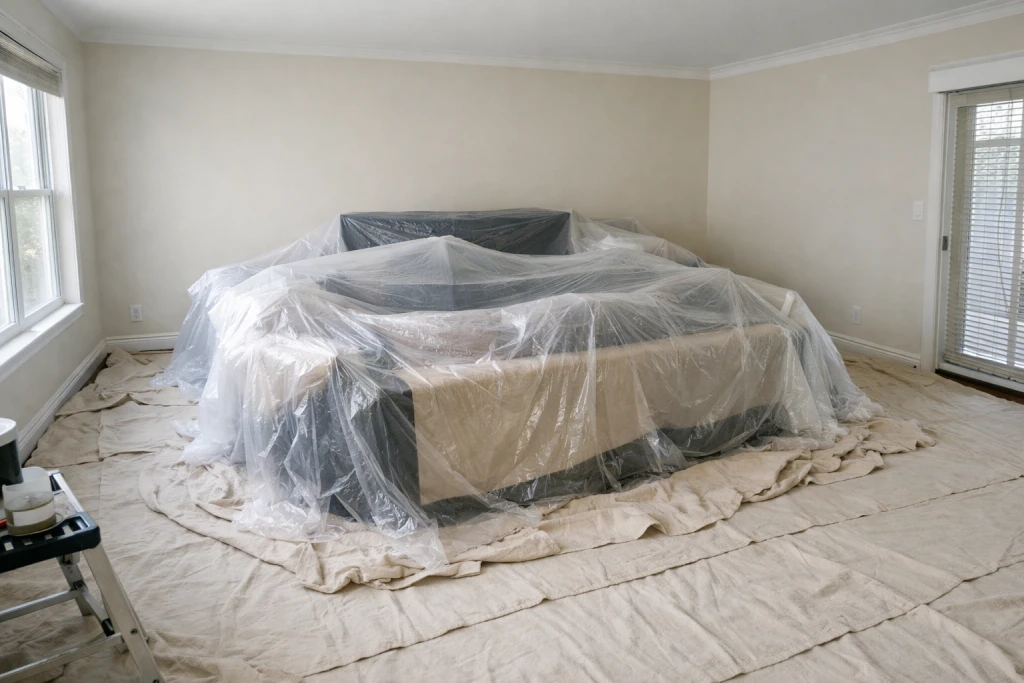
Proper preparation takes longer than actual painting, but skipping this step guarantees disappointing results. Start by removing everything you can from the room.
Move smaller furniture out completely. Push larger pieces to the centre of the room and cover them with plastic sheeting or canvas drop cloths. The more space you have to work, the easier and faster your painting will be.

Remove all outlet covers, light switch plates, and curtain hardware using a screwdriver. Drop the screws into a ziplock bag so you do not lose them. If you cannot remove a fixture, cover it completely with painter tape.
Lay canvas drop cloths on the floor along the walls. Canvas is better than plastic because it absorbs drips rather than letting you track them around. Tape down the edges to prevent tripping.
Step 2: Apply Painter Tape Correctly

Quality tape application separates amateur jobs from professional results. Apply painter tape along baseboards, window frames, door frames, and where walls meet the ceiling.
Position the tape so its edge sits exactly on the line where you want your paint to stop. Press firmly as you apply to prevent paint bleeding underneath.
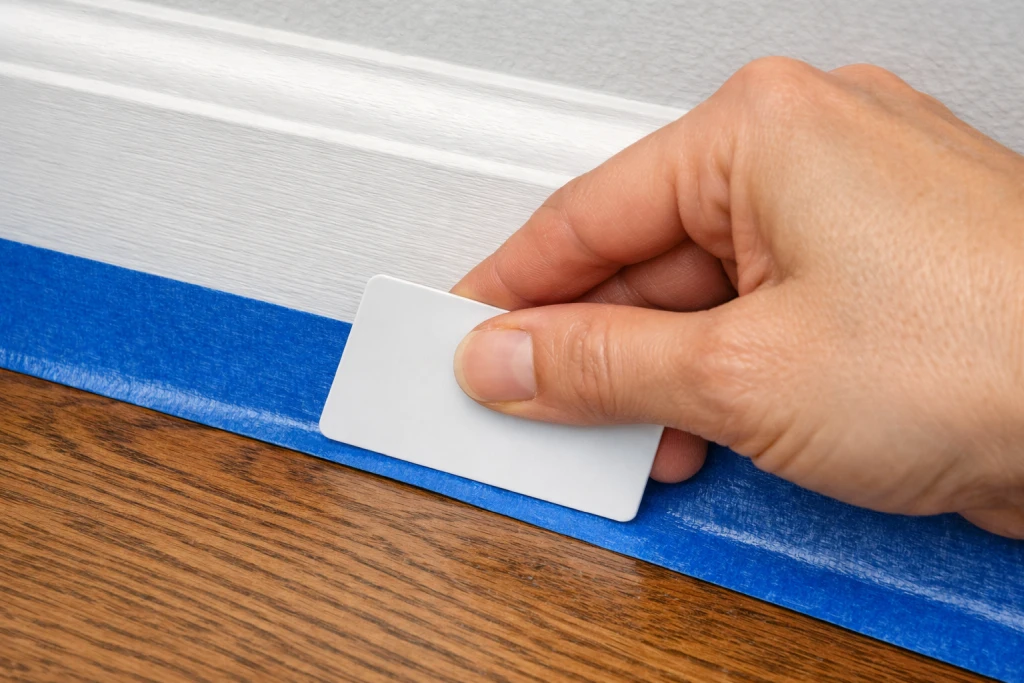
Here is a professional trick: run a credit card or plastic putty knife along the tape edge to seal it firmly against the surface. This extra step prevents paint seeping under the tape and creating messy lines.
For textured ceilings, run a screwdriver along the ceiling edge first to create a small texture-free groove where tape can adhere properly.
Step 3: Repair Wall Imperfections
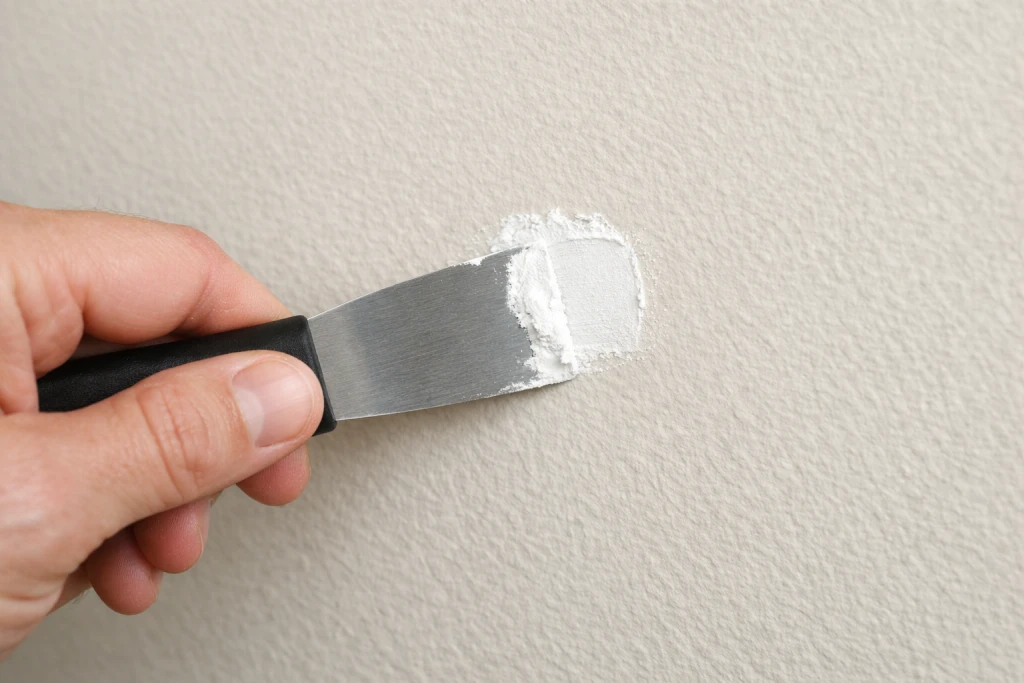
Before painting, inspect your walls carefully and fix small holes in drywall – any imperfections will show through your fresh paint and ruin the professional finish.
Use spackling compound and a small putty knife to fill nail holes, small dents, and hairline cracks. Apply the compound, scrape off the excess, and let it dry completely according to package directions.
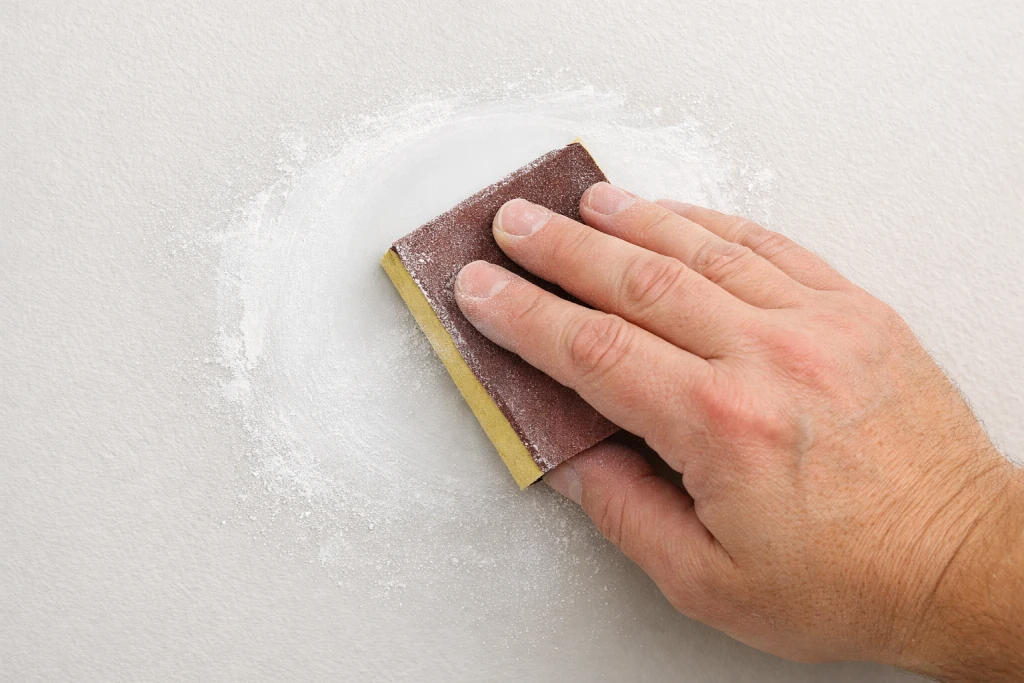
Once dry, sand the patched areas smooth with 120-150 grit sandpaper using circular motions. The repair should be completely flat and invisible to the touch. Wipe away all dust with a slightly damp cloth.
Step 4: Clean the Walls
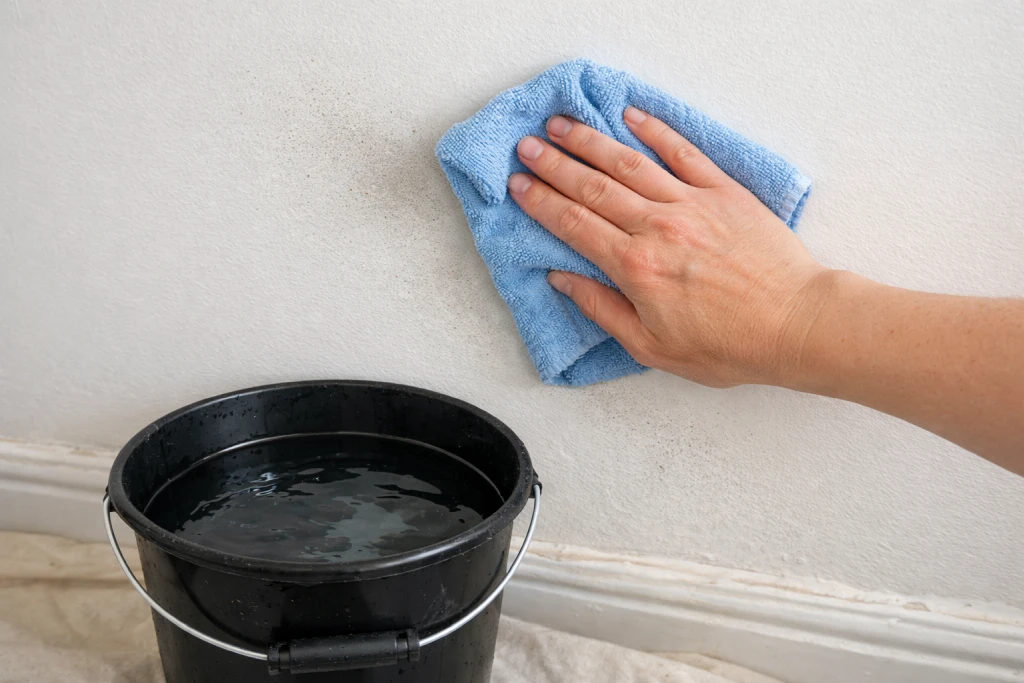
This step is often skipped but makes a real difference in how well paint adheres. Dust, cobwebs, and grease prevent paint from bonding properly.
Wipe down all walls with a slightly damp cloth, working from top to bottom. For kitchens, use a mild degreaser to remove cooking residue. Let walls dry completely before moving on – usually about 30 minutes.
Step 5: Apply Primer When Needed
Not every paint job requires primer, but certain situations demand it.
Use primer when:
- Painting over dark colours with light paint
- Covering new drywall or fresh repairs
- Painting over glossy surfaces
- Dealing with stains that might bleed through
- Apply primer using the same techniques you will use for paint. Allow it to dry completely – typically 2-4 hours for water-based primers.
Step 6: Master the Cutting-In Technique
Cutting in means painting the edges and corners with a brush before rolling the main wall areas. This technique creates those crisp, professional lines that make a paint job look polished.
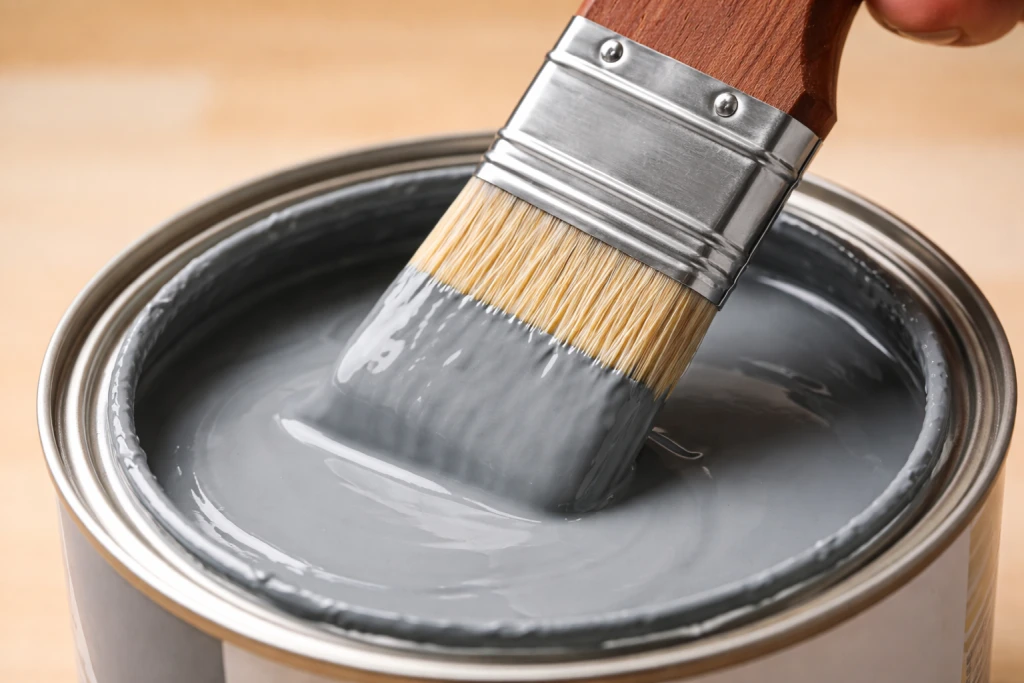
Load your angled brush by dipping it about one-third of the way up the bristles. Tap off excess paint on the inside of the can – do not scrape the brush against the rim, which removes too much paint.
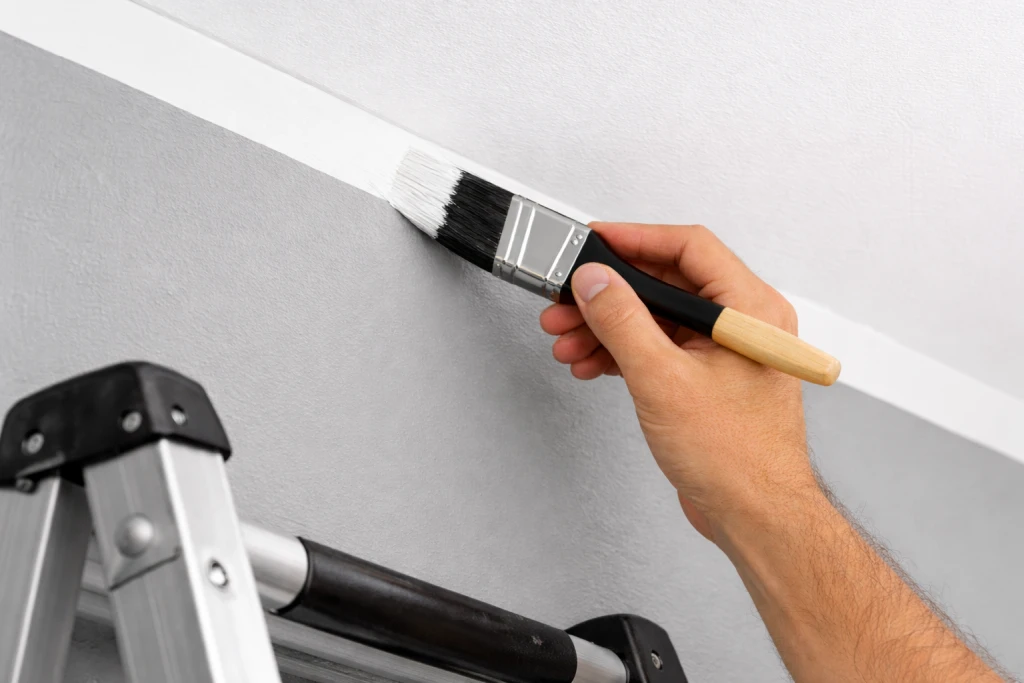
Start about 1cm away from the edge and work your paint toward the line using smooth, confident strokes. The paint will flow from the brush to create a clean edge. Work in sections of about 60-90cm at a time.
Family Handyman notes that one second of inattention is all it takes to bump the ceiling with your roller, creating a troublesome touch-up job. This is why cutting in first gives you a protective buffer zone.
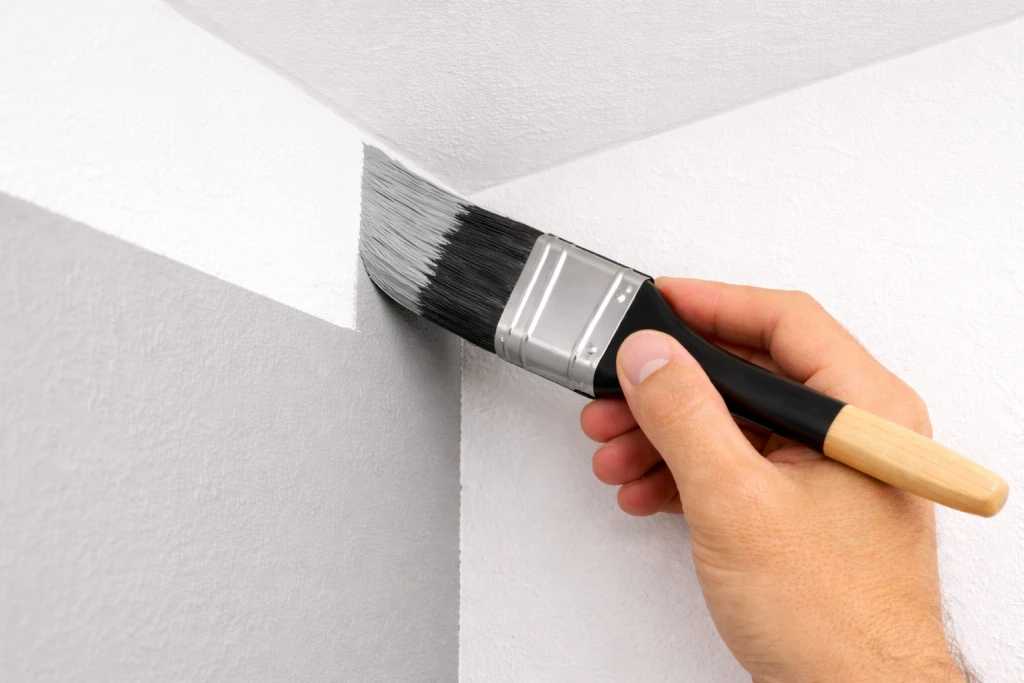
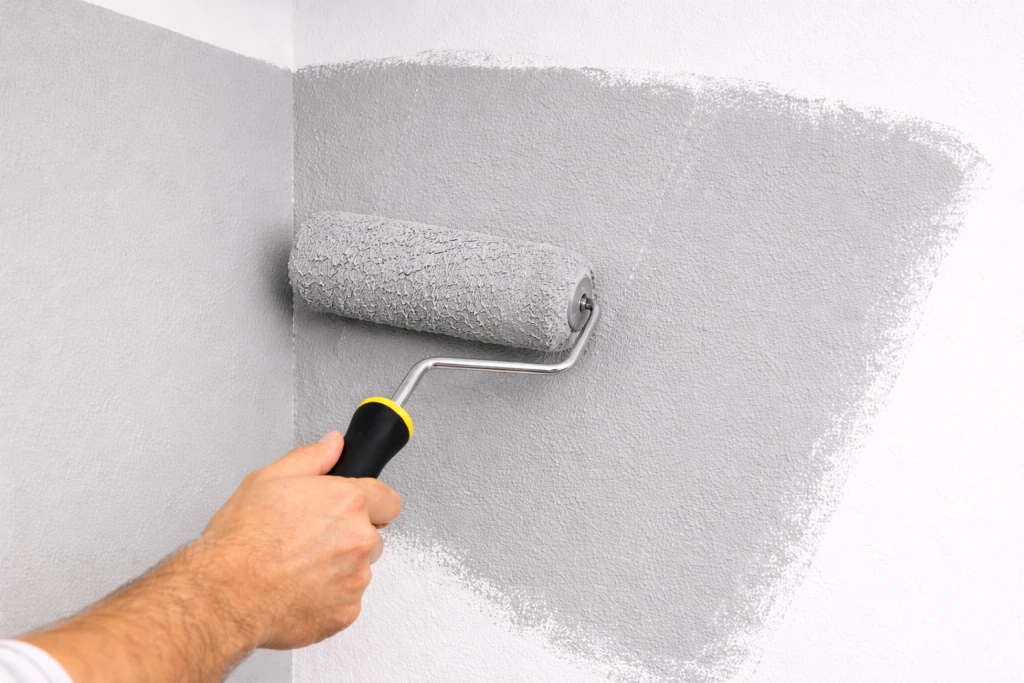
For corners where two walls meet, angle your brush to reach into the corner while keeping the bristles flat against the wall. Work the paint into the corner with gentle pressure, then smooth it outward.
Cut in around all door frames, window frames, outlets, corners, and where walls meet ceiling and floor. Keep these edges wet – you need to roll over them before they dry completely.
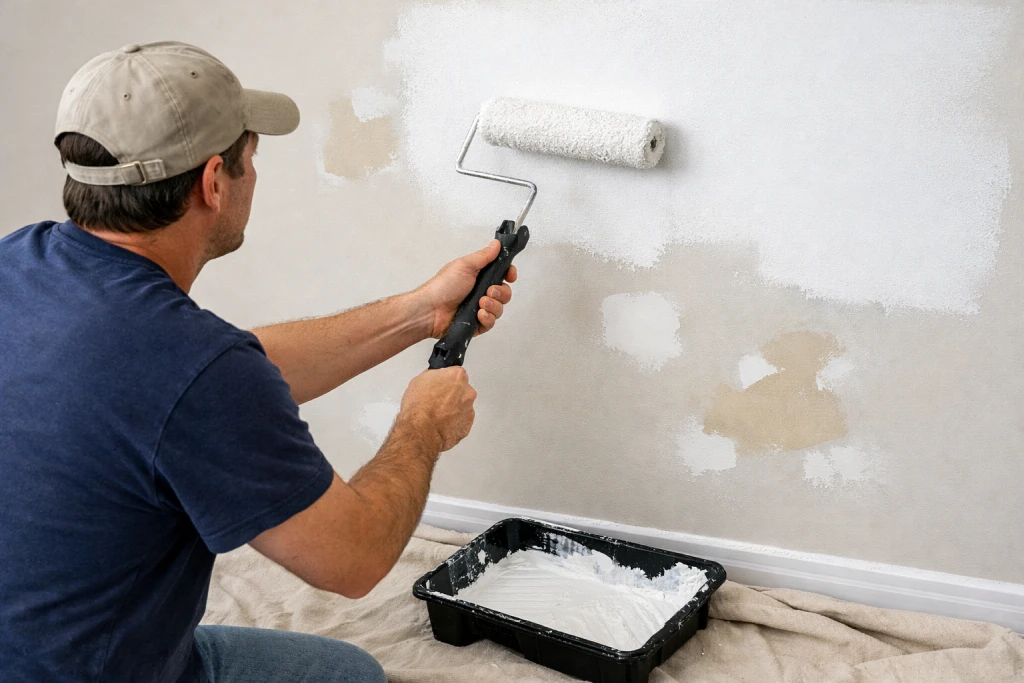
Step 7: Roll Paint Using the W-Pattern Method
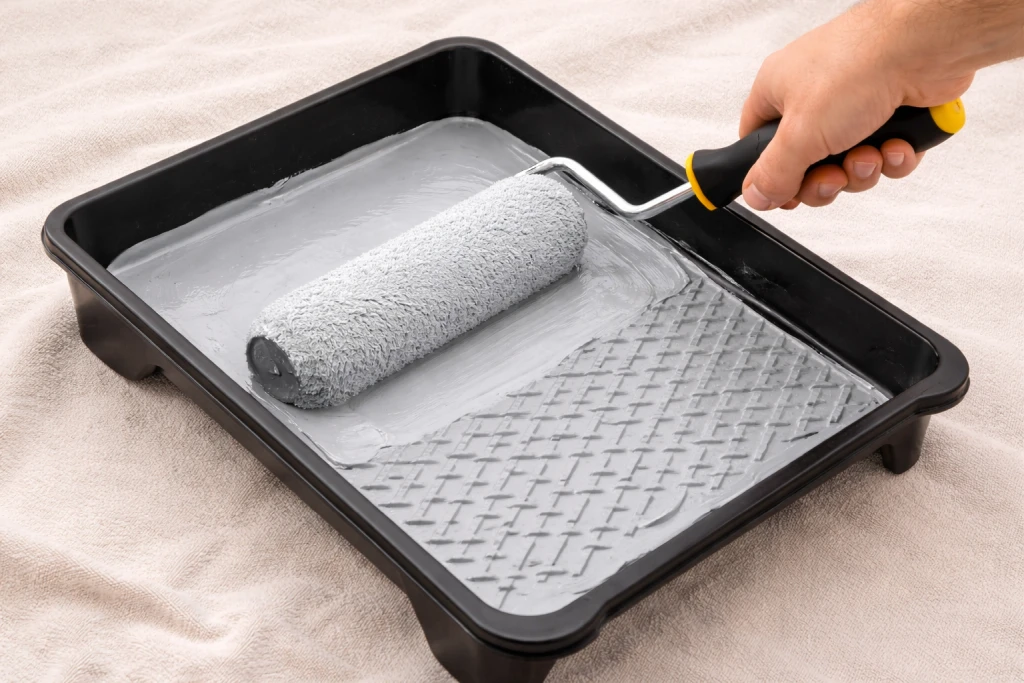
Loading your roller correctly prevents drips and ensures even coverage. Dip the roller into the paint tray reservoir, then roll it back and forth on the ridged section to distribute paint evenly across the entire sleeve.
The roller should be saturated but not dripping. If paint drips off when you lift the roller, you have loaded too much. Roll it on the ridges a few more times to remove excess.
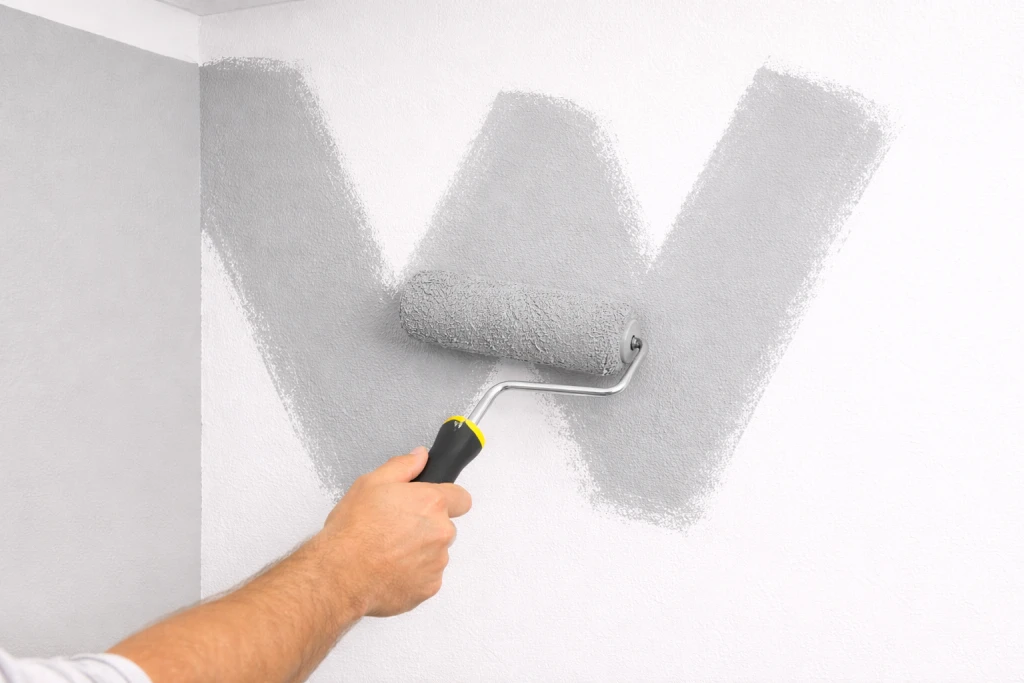
Start in a corner near a window and work outward. Use a W or M pattern: roll the paint onto the wall in a large W shape, then fill in the pattern without lifting the roller. This distributes paint evenly and prevents visible roller marks.
Work in sections of about half a metre squared. Apply moderate, consistent pressure – let the roller do the work rather than pressing hard.
The key to avoiding lap marks is maintaining a wet edge. This means overlapping each new section with the previous one while the paint is still wet. If the edge dries before you overlap it, you will see visible lines.
Work from the ceiling down and always roll in the direction of the light source. This technique hides any slight imperfections in coverage.
Step 8: Apply the Second Coat
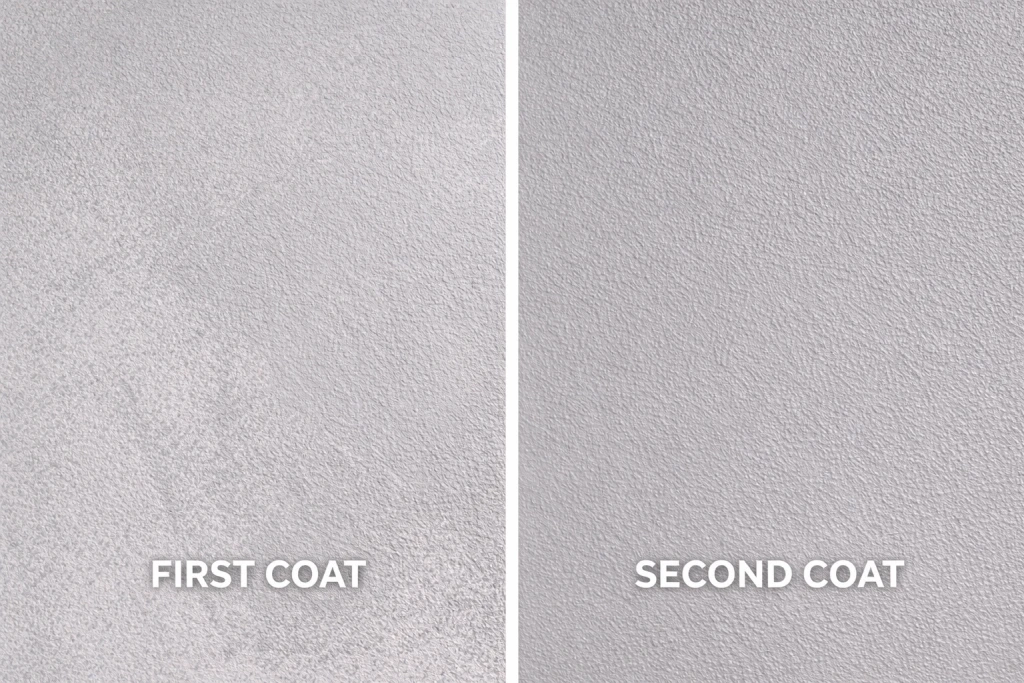
Almost every paint job requires two coats for proper coverage and durability. The first coat seals and primes the surface; the second coat provides rich, even colour.
Benjamin Moore advises that a typical room takes 2-3 days to paint properly, including drying time between coats. Water-based latex paint typically takes 2-4 hours to dry enough for recoating. Check your paint tin for specific drying times.
Before applying the second coat, lightly sand any visible brush marks or roller texture with fine sandpaper. Wipe away dust with a tack cloth, then repeat your cutting-in and rolling process.
The ideal conditions for painting are 10-25 degrees Celsius (50-77 degrees Fahrenheit) with moderate humidity. Avoid painting in extreme heat, cold, or high humidity, which affects drying times and finish quality.
Step 9: Remove Tape and Finish
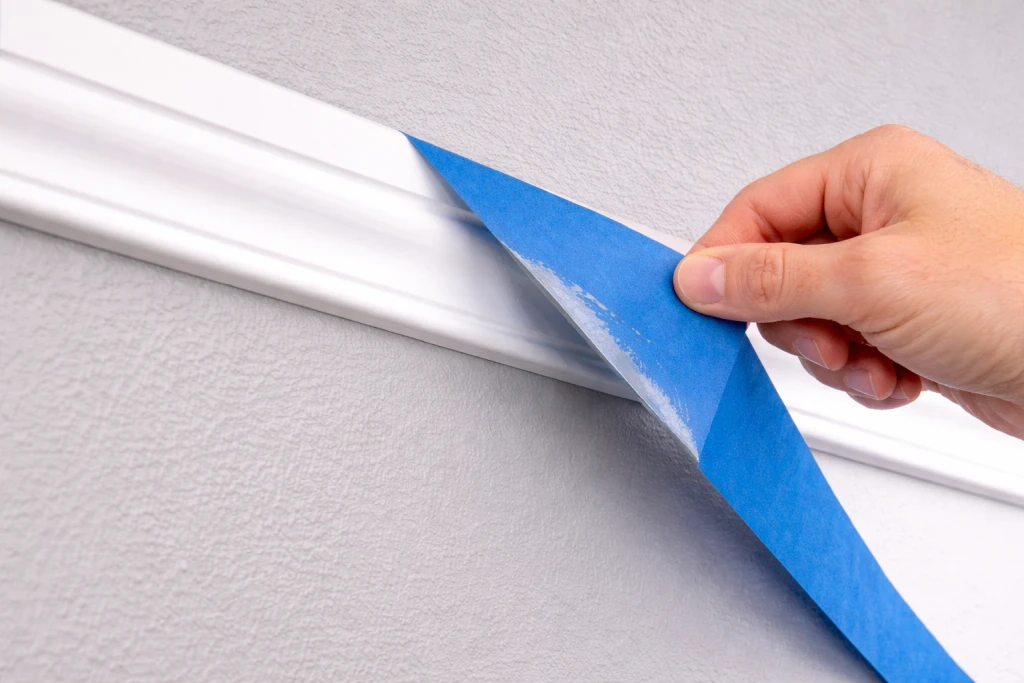
Timing your tape removal matters more than most people realise. Remove painter tape while the final coat is still slightly tacky – usually about one hour after painting. This prevents the dried paint film from peeling off with the tape.
Pull the tape at a 45-degree angle away from the painted surface, pulling slowly and steadily. If paint has dried over the tape edge, score along it with a utility knife before removing. Allow your paint to cure fully before moving furniture back against the walls. While paint feels dry to the touch within hours, it takes 2-4 weeks to reach maximum hardness and durability. Be gentle with newly painted surfaces during this curing period.
Common Mistakes When You Paint a Room
Skipping wall preparation:
Dust, grease, and imperfections show through paint and prevent proper adhesion. Always clean and repair walls first.
Choosing colour from tiny swatches:
Paint colours look dramatically different on large walls. Buy sample pots and paint test patches on your actual walls, observing them in different lighting throughout the day.
Applying second coat too quickly:
Rushing between coats causes peeling, streaking, and uneven texture. Always follow the recommended drying times on your paint tin.
Using cheap brushes and rollers:
Low-quality tools shed bristles into your paint and leave visible texture marks. Invest in decent brushes and roller sleeves – they make a noticeable difference.
Overloading or underloading the roller:
Too much paint causes drips and runs. Too little creates uneven coverage and visible roller marks
Painting in poor lighting:
Always paint during daylight hours. Artificial light makes it difficult to spot missed areas and uneven coverage.
How Much Paint Do You Need to Paint a Room?
Calculating paint quantity prevents both running short and wasting money on excess. The general rule is one gallon (approximately 3.8 litres) covers 35-40 square metres (350-400 square feet) with one coat.
To calculate your needs:
Measure each wall:
- height x width = wall area
- Add all wall areas together
- Subtract area of windows and doors
- Divide total by 37 square metres for litres needed per coat
- Multiply by 2 for two coats
- Add 10% extra for touch-ups
- For a standard 3.6m x 4.2m bedroom with 2.4m
Ceilings:
Total wall area is approximately 37 square metres. After subtracting a door and window, you need roughly 2.5 litres for two coats.
Choosing the Right Paint Finish for Your Room
- Matt/Flat: Hides imperfections well but marks easily and is harder to clean. Best for ceilings and low-traffic rooms like formal living areas.
- Eggshell: Slight sheen with better cleanability than matt. Ideal for living rooms, dining rooms, and bedrooms.
- Satin: Durable and washable with moderate sheen. Perfect for kitchens, bathrooms, hallways, and children’s rooms.
- Semi-gloss: High durability, easy to clean, noticeable shine. Best for trim, doors, and high-moisture areas.
- Gloss: Very shiny, extremely durable, shows every imperfection. Reserved for trim, doors, and accent features.
Troubleshooting Common Paint Problems
Problem: Lap marks and streaks
Cause: Letting edges dry before overlapping. Fix: Work faster in smaller sections, keep a wet edge at all times.
Problem: Paint bleeding under tape
Cause: Tape not sealed properly. Fix: Press tape firmly with a credit card or putty knife before painting.
Problem: Visible brush marks
Cause: Paint drying too fast, overworking the paint. Fix: Work in smaller sections, do not go back over semi-dry paint.
Problem: Drips and runs
Cause: Overloading brush or roller. Fix: Load less paint, work it out on ridged section of tray.
Problem: Uneven coverage
Cause: Insufficient paint, skipped primer, or rolling too fast. Fix: Apply additional coat, use primer on problematic areas.
Frequently Asked Questions About Painting a Room
How long does it take to paint a room?
A standard bedroom takes 4-6 hours for one coat when you include preparation. Add drying time between coats (2-4 hours) and you should plan for a full weekend to complete the job properly.
What order should I paint a room?
Start with the ceiling, then walls, then trim. Within each section, cut in edges first, then fill in with a roller. Always work from top to bottom to catch drips.
Do I need to prime before painting?
Prime when painting over dark colours, new drywall, repairs, glossy surfaces, or stains. Modern paint-and-primer products can skip priming for colour changes on previously painted walls in good condition.
How long between coats of paint?
Water-based latex paint: 2-4 hours. Oil-based paint: 24 hours. Always check the paint tin for specific recommendations. The surface should feel completely dry and not tacky.
Can I paint over old paint without primer?
Yes, if the old paint is in good condition and you are not making a dramatic colour change. Lightly sand to create tooth for adhesion and clean thoroughly before painting.
What paint finish should I use?
Eggshell or satin for most rooms – durable and cleanable. Matt for ceilings and low-traffic areas. Semi-gloss or gloss for trim and high-moisture areas like bathrooms.
How do I get straight lines without tape?
Experienced painters “cut in” freehand using an angled brush. Load the brush lightly, start slightly away from the edge, then work toward the line with steady strokes. Practice on scrap material first.
When should I remove painter tape?
Remove tape when paint is slightly tacky, typically 1 hour after the final coat. Pull slowly at a 45-degree angle. If paint has dried, score along the edge with a utility knife first.
How long before I can put furniture back?
Wait at least 24 hours before moving furniture against walls. For full cure (maximum hardness and durability), wait 2-4 weeks before hanging pictures or placing heavy furniture against painted surfaces.
Why is my new paint peeling?
Common causes: painting over dirty surfaces, painting in high humidity, applying second coat too soon, or painting over glossy surfaces without sanding. Proper preparation prevents peeling.
Conclusion
Learning how to paint a room properly transforms a daunting weekend project into a satisfying home improvement skill. The key is respecting the process: thorough preparation, patient application, and proper drying time between coats.
Start with these nine steps and you will achieve results that rival professional painters. Once your freshly painted room is complete, you will want to hang pictures without damaging walls – protecting your perfect paint job whilst adding personality to the space.
Once you master painting, you will have the confidence to tackle other basic DIY repairs around your home. The skills transfer: preparation matters, quality tools make a difference, and patience pays off. Your next room will go even faster.