How to Sharpen Kitchen Knives at Home: Complete Guide for All Methods
You’re sawing through a tomato like timber. Your onions bruise instead of slicing cleanly. Carrots require so much pressure you’re worried the knife will slip and find your finger. Your knives are dull, frustratingly dull, and you’ve been putting off doing anything about it.
BBC Good Food emphasizes that sharp knives are actually safer than dull ones, blunt blades require more pressure, increasing the risk of slipping and causing injury. A razor-sharp knife glides through food with minimal force, giving you complete control and producing cleaner cuts that make your cooking better.
This complete guide teaches you how to sharpen kitchen knives at home using three methods: whetstones (professional results), honing rods (quick maintenance), and manual sharpeners (convenient backup). You’ll learn the correct sharpening angle, how to test for sharpness, when to hone versus sharpen, and which knives never to sharpen yourself.
By the end, you’ll have sharp knives that make cooking efficient and enjoyable again. Sharp knives make food preparation safer and more efficient, pair this skill with other essential cooking skills like cooking perfect rice to build confidence in the kitchen.
Let’s restore those edges.
Understanding Sharp vs. Dull: Why It Matters
Signs your knife is dull:
Slips off tomato skins instead of piercing cleanly
Crushes onions and releases excessive juice (makes you cry more)
Requires significant pressure to cut soft vegetables
Tears herbs instead of slicing (they turn black quickly)
Makes rough, uneven cuts
Feels like you’re sawing rather than slicing
Why knives dull:
- Normal use: Every cut microscopically damages the edge
- Contact with hard surfaces: Cutting boards matter (wood/plastic good, glass/marble bad)
- Dishwashers: High heat and harsh detergents damage edges
- Improper storage: Knives clattering in drawers dull each other
- Cutting bones or frozen food: Chips and damages edge
Benefits of sharp knives:
Safety: Less pressure needed = better control, fewer accidents
Speed: Prep work takes half the time
Quality: Clean cuts preserve food structure and appearance
Enjoyment: Cooking becomes pleasure not chore
Precision: Intricate cuts (julienne, brunoise) become possible
Honing vs. Sharpening: Critical Difference
Many people confuse these. Understanding the difference saves frustration.
HONING (Maintenance):
What it does: Realigns the knife edge (straightens bent microscopic teeth)
Removes no metal: Just pushes edge back to centre
Tool: Honing rod/steel (smooth or ridged rod)
When: Before each use or every few days
Takes: 30 seconds
Result: Restores sharpness temporarily
Think: Straightening a bent nail
SHARPENING (Restoration):
- What it does: Grinds away metal to create new sharp edge
- Removes metal: Reshapes and refines edge
- Tools: Whetstone, manual sharpener, electric sharpener
- When: Every 3-6 months for home cooks (or when honing stops working)
- Takes: 10-20 minutes (whetstone)
- Result: Truly sharp edge
- Think: Reshaping a worn tool
Simple rule:
Hone often (weekly), sharpen occasionally (every few months)
When honing no longer restores edge, it’s time to sharpen
Professional chefs: Hone daily, sharpen monthly
Home cooks: Hone weekly, sharpen 2-4 times yearly
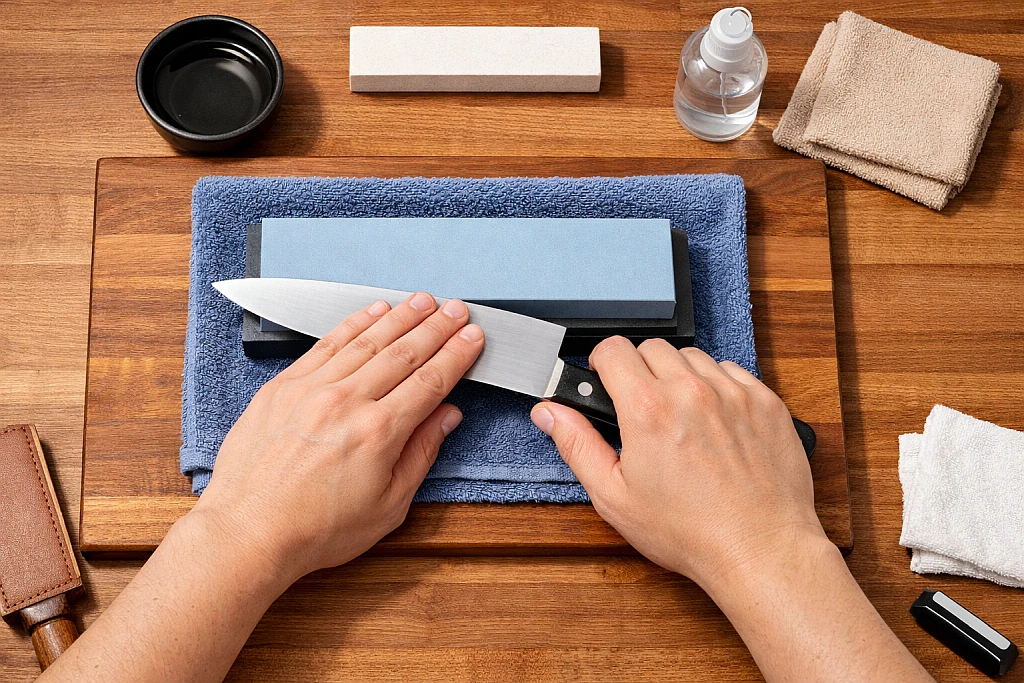
Method 1: Whetstone Sharpening (Best Results)
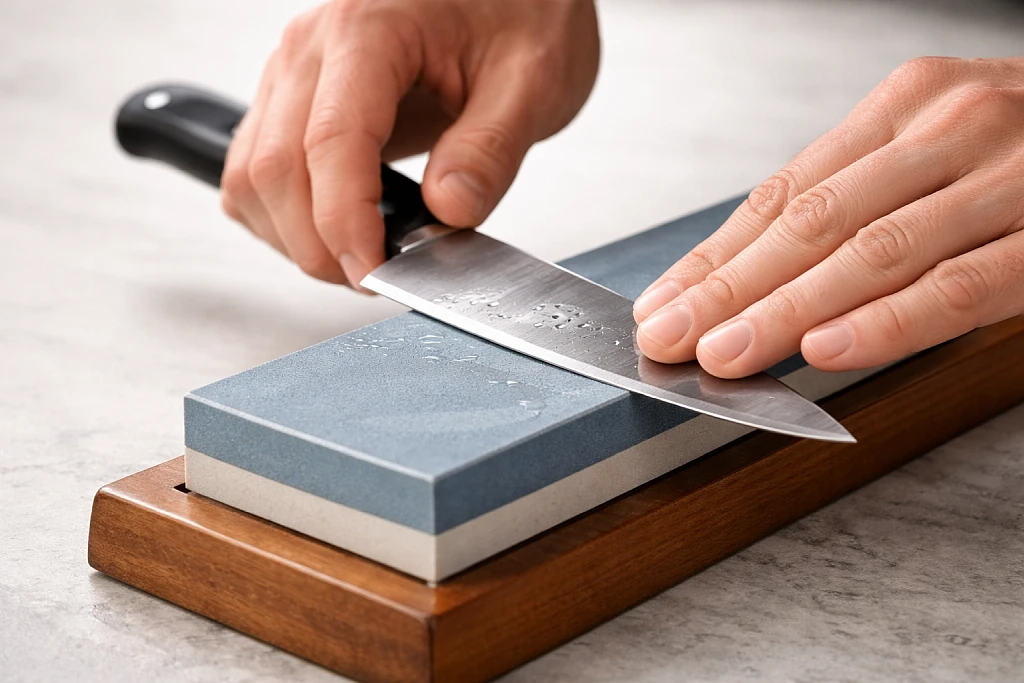
This is the professional method. Takes practice but delivers restaurant-quality edges.
What you need:
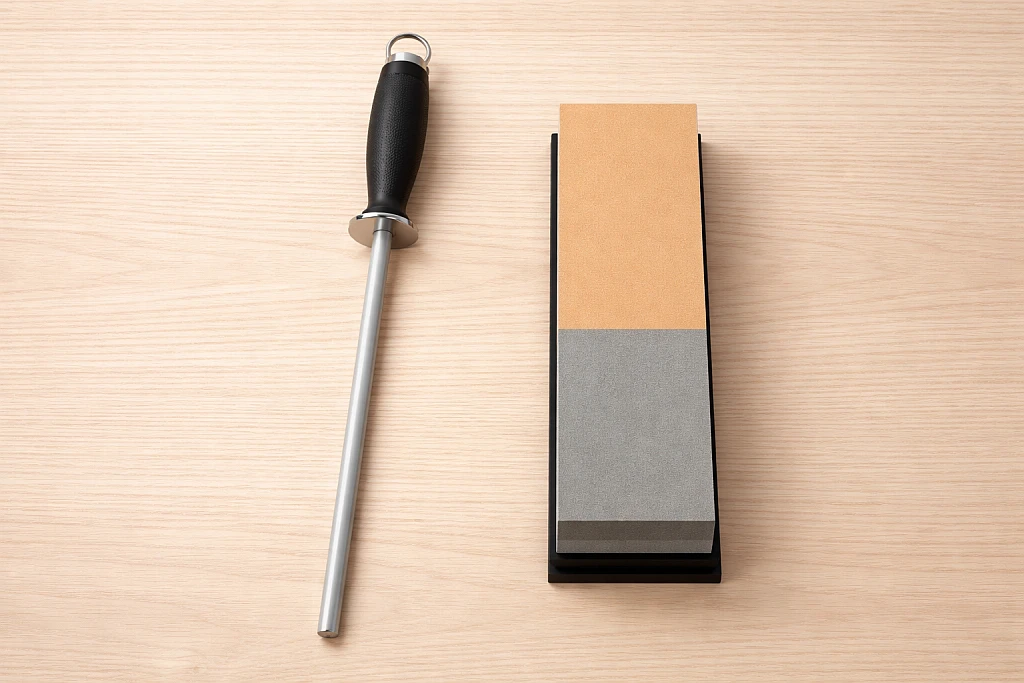
- Whetstone (dual-grit recommended: 1000/6000 or 400/1000) – £15-40
- Water or honing oil (check stone type)
- Towel to stabilise stone
- Patience and focus
Understanding grit numbers:
- Coarse (400-800): Repairs chips, reshapes very dull knives
- Medium (1000-3000): General sharpening, most common
- Fine (4000-8000): Polishing, razor edgesBeginners: Start with 1000 grit (most versatile)
Step-by-step process:
Step 1:
- Prepare stone
- Soak water stones for 10-15 minutes (until bubbles stop)
- Oil stones need few drops of honing oil
- Place damp towel on work surface
- Set stone on towel (prevents slipping)
- Start with coarser grit face up
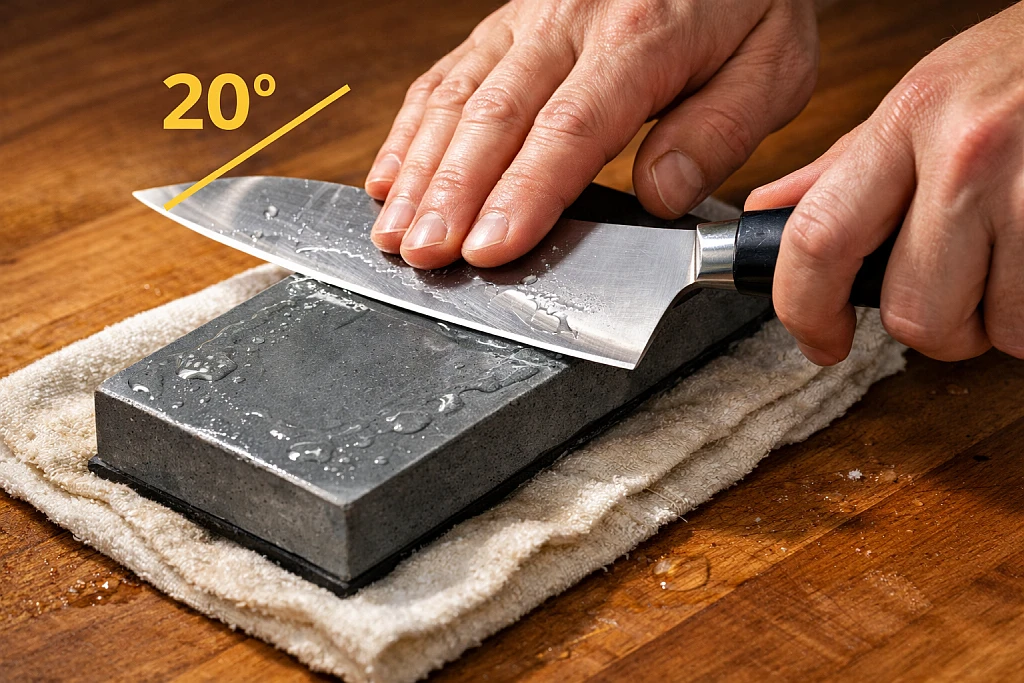
Step 2: Find correct angle (most critical)
- Western knives: 15-20 degrees (about 2-3 coins stacked under spine)
- Japanese knives: 10-15 degrees (sharper but more delicate)
- Most home cooks: Aim for 20 degrees (good balance)
- Visual trick: Imagine slicing thin matchbook off stone
- Maintain this angle throughout, consistency is everything
Step 3: Sharpen one side
- Hold knife at correct angle against stone
- Place fingers of free hand on blade (gentle pressure)
- Push blade AWAY from you across stone (or pull toward you, choose one method)
- Cover entire edge in sections (heel to tip)
- Use moderate, consistent pressure
- Count strokes: 10-20 passes per section
- Keep stone wet (spritz water as needed)
Step 4: Check for burr
- Run finger CAREFULLY along spine side of edge (not cutting edge)
- Feel for slight raised metal ridge (burr/wire edge)
- Burr = you’ve ground enough to reach the edge
- No burr = keep sharpening that side
- Must feel burr along entire edge before flipping
Step 5: Sharpen other side
- Flip knife over
- Maintain same angle
- Same motion, same number of strokes
- Sharpen until you feel burr flip to this side
- Equal work on both sides = centred edge
Step 6: Remove burr and polish (fine grit)
- Flip stone to finer grit (6000)
- Repeat process: 5-10 passes each side
- Use lighter pressure
- Alternate sides every few strokes (removes burr gradually)
- Finish with 3-4 very light passes each side
- Burr should detach cleanly
Step 7: Clean and test
- Wash knife with soap and water (remove metal particles)
- Dry thoroughly
- Test sharpness (see testing methods below)
- Clean stone with water, let dry completely before storing
Pro tips:
- Your first knife will take 30-45 minutes, that’s normal
- With practice, you’ll sharpen in 10-15 minutes
- Consistency of angle matters more than exact degree
- Can’t maintain angle? Try angle guide (£5-10)
Stone will wear dish-shaped over time, flatten periodically with flattening stone
Method 2: Honing Rod (Quick Maintenance)
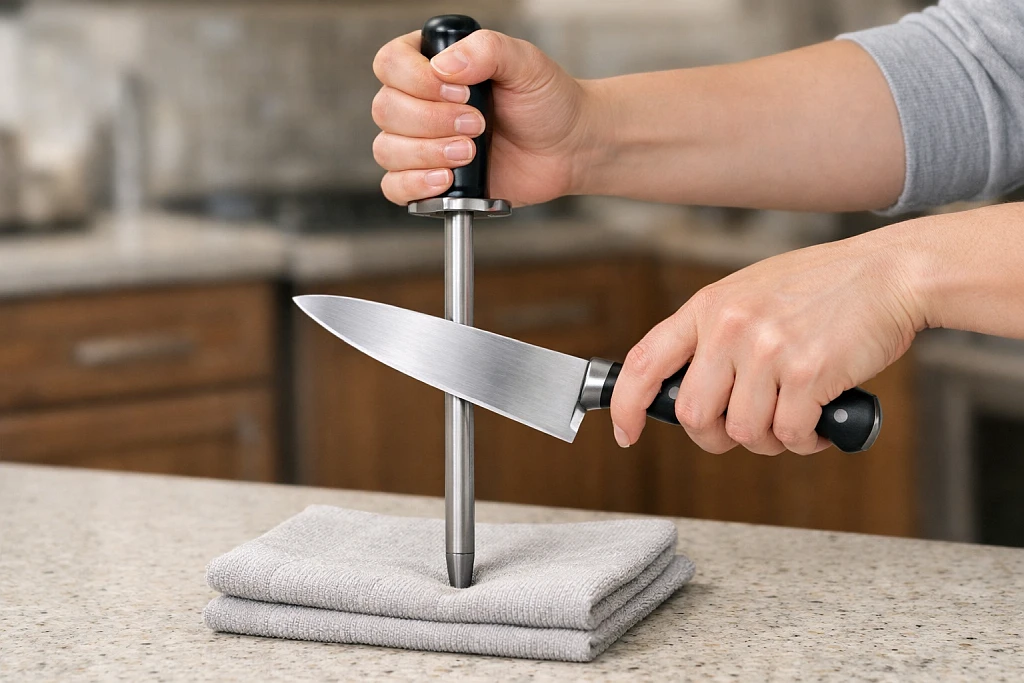
Use this between sharpenings to maintain edge. Takes 30 seconds.
What you need:
- Honing rod/steel (came with most knife sets) – £10-20 standalone
- Stable surface
- 30 seconds of time
Safe method (recommended for beginners):
- Place tip of honing rod on damp towel on counter (pointing away)
- Hold rod firmly at 45-degree angle to counter
- Place knife heel against top of rod at 15-20 degree angle
- Draw knife down and across rod (toward you) while pulling toward knife tip
- Light pressure, let weight of knife do work
- 5-6 passes each side, alternating
- Blade should travel from heel to tip in one smooth motion
Common mistakes:
- Too much pressure (gentle is key)
- Wrong angle (too steep damages edge)
- Going too fast (slow and controlled is better)
- Not covering full length of blade
- Inconsistent angle between strokes
When to hone:
- Before each use (professional chefs)
- Every few days (home cooks)
- When knife feels slightly dull but not terrible
- After washing and drying knife
Method 3: Manual Pull-Through Sharpeners (Convenient)
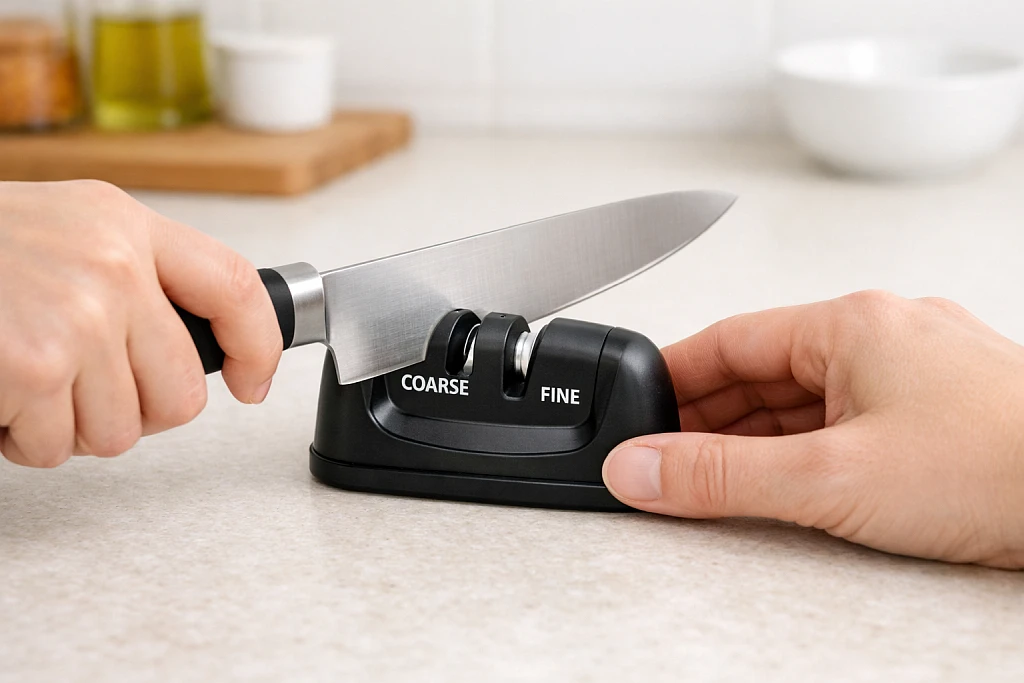
Not as precise as whetstone, but incredibly easy and consistent.
Advantages:
- Foolproof angle (built into device)
- Fast (2-3 minutes)
- No skill required
- Compact and affordable (£10-30)
- Consistent results
Disadvantages:
- Removes more metal than necessary (shortens knife life)
- Can’t adjust angle for different knives
- Not suitable for expensive Japanese knives
- Carbide wheels wear out eventually
How to use:
- Place sharpener on stable surface
- Hold firmly with one hand
- Start with coarse slot (if two-stage)
- Insert knife heel into slot
- Pull through smoothly from heel to tip (moderate pressure)
- 3-5 pulls through coarse slot
- 3-5 pulls through fine slot
- Clean knife before use
Best for:
- Budget kitchen knives
- People who won’t learn whetstones
- Quick maintenance between professional sharpenings
- Backup sharpening method
Testing Sharpness: How to Know You’re Done
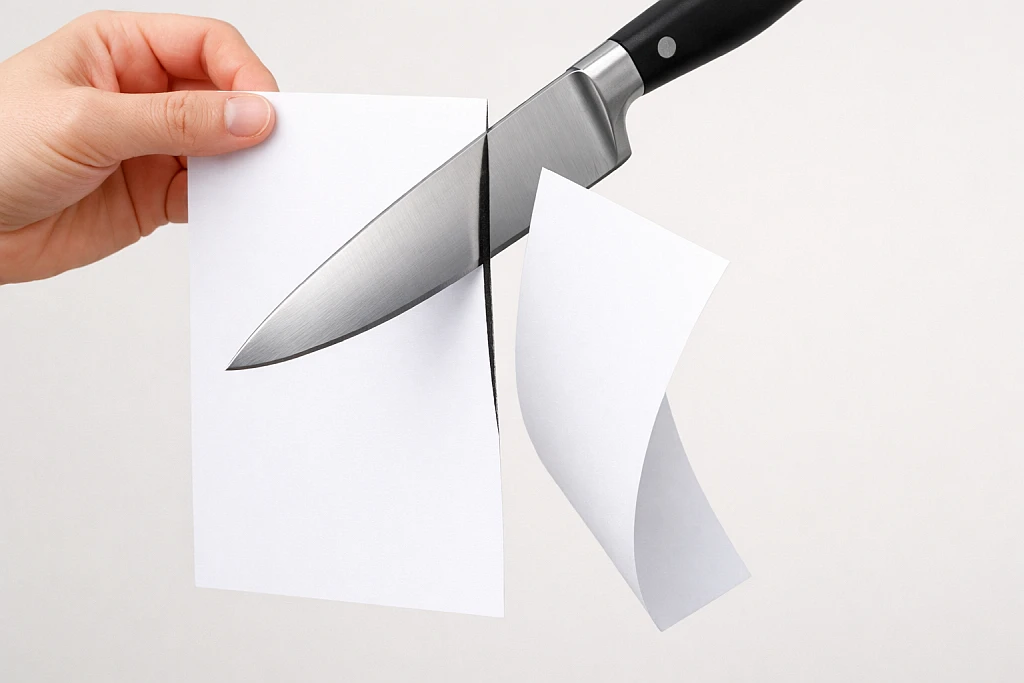
Test 1: Paper test (safest)
- Hold piece of paper vertically by edge
- Slice through paper with knife
- Sharp knife: Cuts cleanly with minimal sound
- Dull knife: Tears paper or requires sawing motion
- Very sharp knife: Cuts newspaper effortlessly
Test 2: Tomato test
- Place knife on tomato skin without pressure
- Sharp knife: Bites into skin immediately under its own weight
- Dull knife: Slides off or requires pressure
- This is the real-world test that matters
Test 3: Thumbnail test (careful!)
- GENTLY rest blade edge on thumbnail at shallow angle
- Sharp knife: Grips thumbnail, doesn’t slide
- Dull knife: Slides across nail
- USE EXTREME CAUTION, very light touch only
Test 4: Visual inspection
- Hold knife under bright light
- Look at edge straight-on
- Sharp edge: Invisible (no reflection)
- Dull edge: Reflects light (you see white line)
- Nicked edge: Bright spots where reflection occurs
Safety Guidelines When Sharpening
Following HSE safety guidelines when sharpening knives prevents injuries, always work away from your body, use stable surfaces, and maintain focus throughout the process.
Essential safety rules:
- Always sharpen AWAY from your body
- Secure stone/sharpener (use damp towel underneath)
- Keep fingers behind blade edge
- Work in good lighting (see what you’re doing)
- No distractions, sharpening requires focus
- Don’t test sharpness by running finger along edge
- Wash knife immediately after (metal particles embed in food)
- Store sharpened knives safely (knife block, magnetic strip, guards)
What NOT to do:
- Sharpen while distracted, tired, or rushed
- Hold knife in hand while honing (rod method requires stable surface)
- Use excessive pressure (causes loss of control)
- Sharpen serrated knives at home (requires special tools)
- Let children near sharpening area
Knife Care: Making Sharpness Last Longer
- Use proper cutting boards:
- Best: Wood (end-grain), bamboo, quality plastic
- Worst: Glass, marble, ceramic, granite (instantly dulls knives)
- Wood is gentler on edges than plastic
- Replace cutting boards when heavily scored
Hand wash only:
- NEVER put good knives in dishwasher
- High heat loosens handles, warps blades
- Harsh detergents corrode steel
- Knives bang against other items (dulls/chips edge)
- Wash immediately after use, dry thoroughly
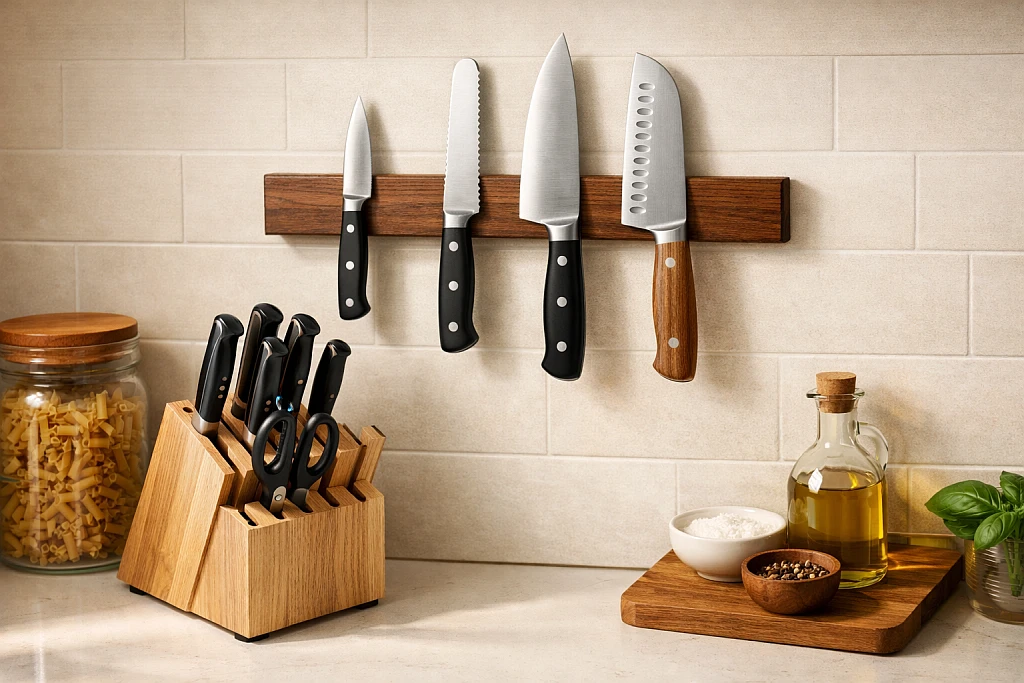
Store properly:
- Knife block (protects edges, keeps organised)
- Magnetic strip (space-saving, easy access)
- Individual blade guards (if drawer storage necessary)
- NEVER loose in drawer (edges bang together, dangerous when reaching in)
Use knives correctly:
- No cutting on plates/counters
- Don’t cut frozen food (chips edge)
- Don’t use as screwdriver, can opener, or box cutter
- Don’t cut bones (use cleaver)
- Avoid twisting motion (can snap tip)
Regular maintenance:
- Hone every few uses
- Sharpen every 3-6 months (home use)
- Professional sharpening annually for expensive knives
- Oil carbon steel blades to prevent rust
Frequently Asked Questions
Can I sharpen serrated knives?
Technically yes, but it requires a special tapered rod and considerable skill, each serration must be sharpened individually. For home cooks, serrated knives are best sent to professionals or replaced when dull. The good news: serrations stay effective much longer than straight edges. Bread knives can last years without sharpening. If yours still tears bread instead of slicing, professional sharpening costs £5-10.
How often should I sharpen my knives?
Home cooks: Sharpen every 3-6 months depending on use. Professional chefs: Monthly or more. Signs you need sharpening: Honing no longer restores edge, knife fails tomato test, or you’re using significant pressure to cut soft vegetables. Better to sharpen before knives become frustratingly dull. Prevention is easier than restoration. A sharp knife makes tasks like chopping vegetables for homemade stock much easier and safer, precise cuts mean better cooking results.
What’s the best sharpening method for beginners?
Start with a manual pull-through sharpener for convenience and consistent results. Once comfortable, invest time learning whetstones, they offer superior control and edge quality. Many cooks use both: pull-through for quick maintenance, whetstone for serious sharpening. Electric sharpeners work but remove excessive metal and offer less control. For first-timers, avoid electric and practice with manual methods first.
Can I sharpen expensive Japanese knives at home?
Yes, but only with whetstones and proper technique. Japanese knives have harder steel (60-62 HRC vs 56-58 for Western knives) and sharper angles (10-15 degrees). They’re more delicate and chip more easily. Never use pull-through sharpeners or electric sharpeners on Japanese knives, they’re designed for softer Western steel. If you own £100+ Japanese knives, invest time learning whetstone technique or pay for professional sharpening (£10-15 per knife).
Why do my knives dull so quickly?
Common causes: Cutting on hard surfaces (glass, ceramic, marble boards), dishwasher use, improper storage (loose in drawer), cutting frozen food, or simply budget knives with soft steel that doesn’t hold edge. Solution: Use wooden cutting boards, hand wash, store in block or on magnetic strip, and invest in one good chef’s knife rather than a set of mediocre ones. Quality knives maintain edges 3-5x longer.
Should I buy a knife sharpening service instead?
Professional sharpening costs £5-15 per knife and delivers excellent results. It’s worth it for expensive knives, serrated knives, or if you can’t master DIY methods. However, for everyday maintenance, learning to sharpen yourself saves money long-term and gives immediate results when you need them. Many people do both: sharpen at home regularly, professional service annually for precision tune-up.
What’s the difference between cheap and expensive sharpening stones?
Budget stones (£15-25) work perfectly fine for home use, they sharpen knives effectively. Expensive stones (£50-200) offer: finer grit for sharper edges, faster cutting (remove metal quicker), longer lifespan, and more pleasant feel. For beginners, start with budget dual-grit stone (1000/6000). Upgrade later if you enjoy the process. The technique matters far more than the stone quality for achieving sharp knives.
Conclusion
Sharp knives transform cooking from frustrating chore to enjoyable craft. Learning to sharpen knives at home gives you control over your most essential kitchen tools, saves money on professional services, and ensures your blades are always ready when you need them.
Start with a simple method that matches your confidence level. Manual pull-through sharpeners offer foolproof results with minimal practice. Honing rods maintain edges between sharpenings in just 30 seconds. Whetstones deliver professional-quality edges once you master the technique, and mastery comes faster than you think with practice.
The key principles are universal: maintain consistent angle, work methodically across the entire edge, check for burr formation, and test your results. Whether using a £15 manual sharpener or a £40 whetstone, these fundamentals determine success.
Pair sharp knives with proper care, wooden cutting boards, hand washing, safe storage, and your knives will serve you brilliantly for years. That satisfying sensation of a blade gliding through a tomato without pressure? You can experience that every day.
Your first sharpening attempt might feel awkward. By the third knife, you’ll find your rhythm. Soon it becomes a satisfying ritual, taking pride in transforming dull blades into precision tools. Start today, your knives are waiting.