
How to Speed Up a Slow Computer: 12 Easy Fixes
Is your computer crawling at a snail’s pace? Takes forever to boot up? Applications freezing mid-task? A slow computer isn’t just annoying – it’s a massive productivity killer that costs you valuable time every single day.
The good news? You don’t need to be a tech expert or buy a new computer to fix this. Most slow computer problems can be resolved with simple tweaks and optimizations that take just minutes to implement. In this comprehensive How to Speed Up a Slow Computer guide, you’ll learn exactly how to speed up your computer using 12 proven methods of that work for both Windows and Mac.
Whether your computer is brand new or several years old, these practical solutions will help you reclaim lost performance and enjoy a faster, more responsive computing experience. Let’s get your computer running like new again.
1. Free Up Disk Space with Disk Cleanup
A cluttered hard drive is one of the most common causes of slow computer performance. When your storage is nearly full (above 80-90% capacity), your computer struggles to find space for temporary files, virtual memory, and system operations, causing significant slowdowns.
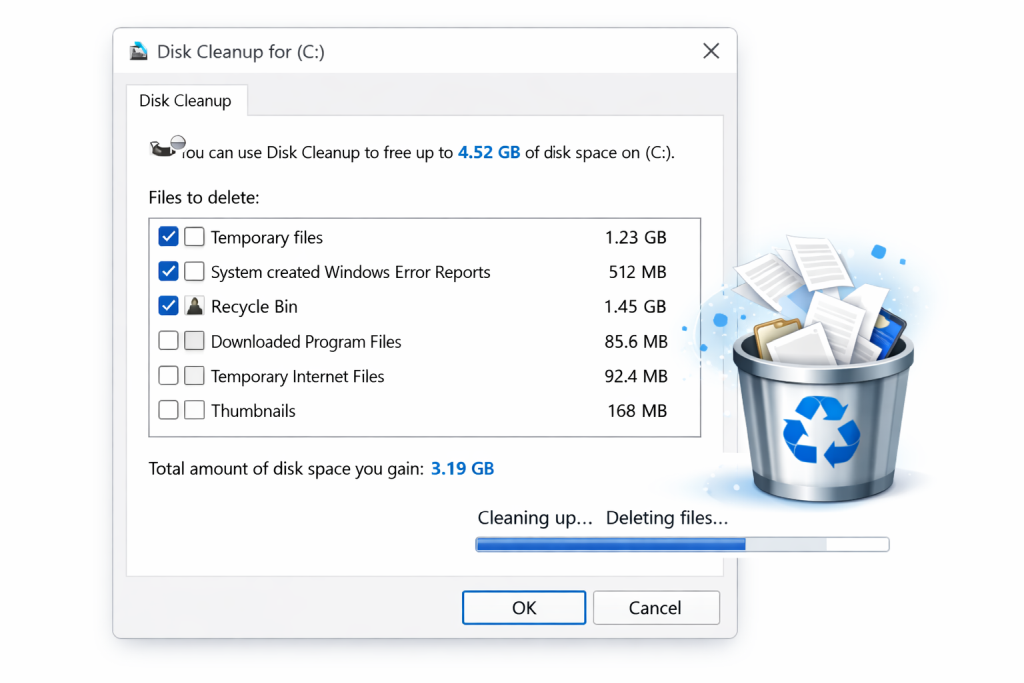
For Windows:
- Press Windows Key + R, type ‘cleanmgr’ and press Enter
- Select the drive you want to clean (usually C:)
- Click ‘OK’ and let Windows calculate how much space you can free
- Check all boxes except ‘Downloads’ (unless you’re sure you don’t need those files)
- Click ‘Clean up system files’ for deeper cleaning
- Select additional files like ‘Previous Windows installations’ and ‘Windows Update Cleanup’
- Click ‘OK’ and confirm to delete
For Mac:
- Click the Apple menu → About This Mac → Storage → Manage
- Use ‘Reduce Clutter’ to review and delete large files
- Empty Trash automatically (enable in recommendations)
- Optimize storage by storing files in iCloud
Pro tip: Uninstall programs you no longer use. They take up space and often run background processes that slow your system. On Windows, use ‘Apps & Features’ in Settings. On Mac, drag applications to the Trash from the Applications folder.
2. Disable Unnecessary Startup Programs
Every program that launches automatically when you start your computer consumes valuable system resources and increases boot time. Most people have 10-20 programs fighting to start simultaneously, creating a massive slowdown before you can even begin working.
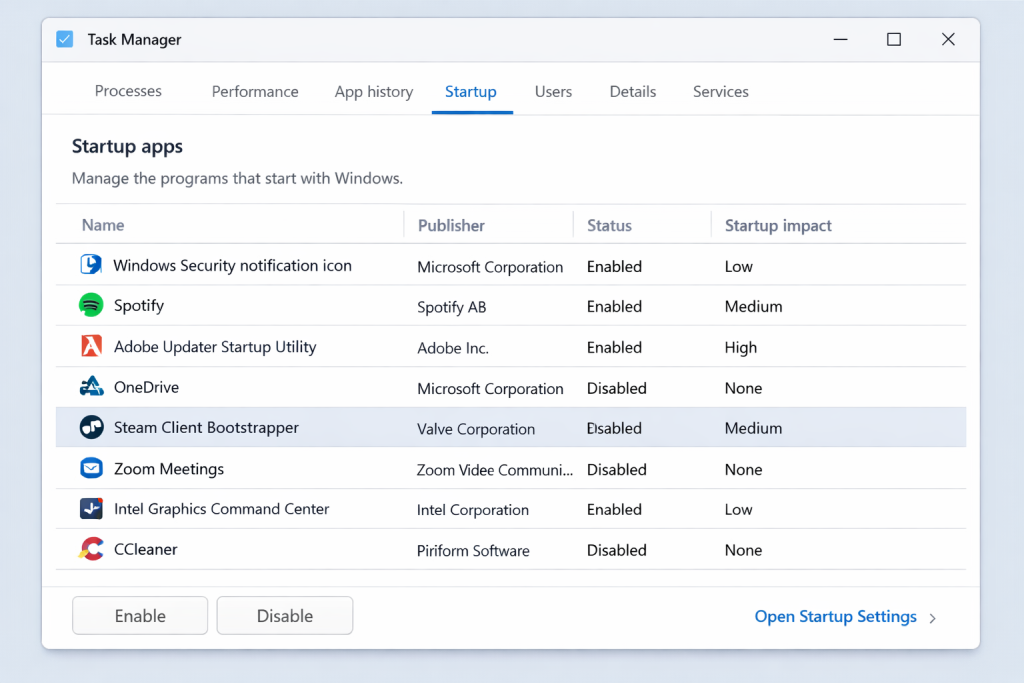
For Windows 10/11:
- Right-click the taskbar and select ‘Task Manager’ (or press Ctrl + Shift + Esc)
- Click the ‘Startup’ tab
- Review the list and identify programs you don’t need at startup
- Right-click unnecessary programs and select ‘Disable’
- Look at the ‘Startup impact’ column – prioritize disabling ‘High’ impact programs
For Mac:
- Click Apple menu → System Preferences → Users & Groups
- Select your user account and click ‘Login Items’
- Select apps you don’t need at startup
- Click the minus (-) button to remove them
What’s safe to disable:
- Cloud storage apps (Dropbox, Google Drive) – you can launch these manually when needed
- Messaging apps (Skype, Discord, Slack) – unless you need instant notifications
- iTunes Helper, Adobe updaters, printer utilities
- Game launchers (Steam, Epic Games) – launch these when gaming
What to keep enabled:
- Antivirus software
- Critical system drivers and services
- Graphics card control panels (NVIDIA, AMD)
3. Scan for Malware and Viruses
Malware, viruses, and unwanted programs often run hidden background processes that consume CPU and memory, dramatically slowing your computer. Sometimes the slowdown is so gradual you don’t notice it’s happening until performance becomes unbearable.
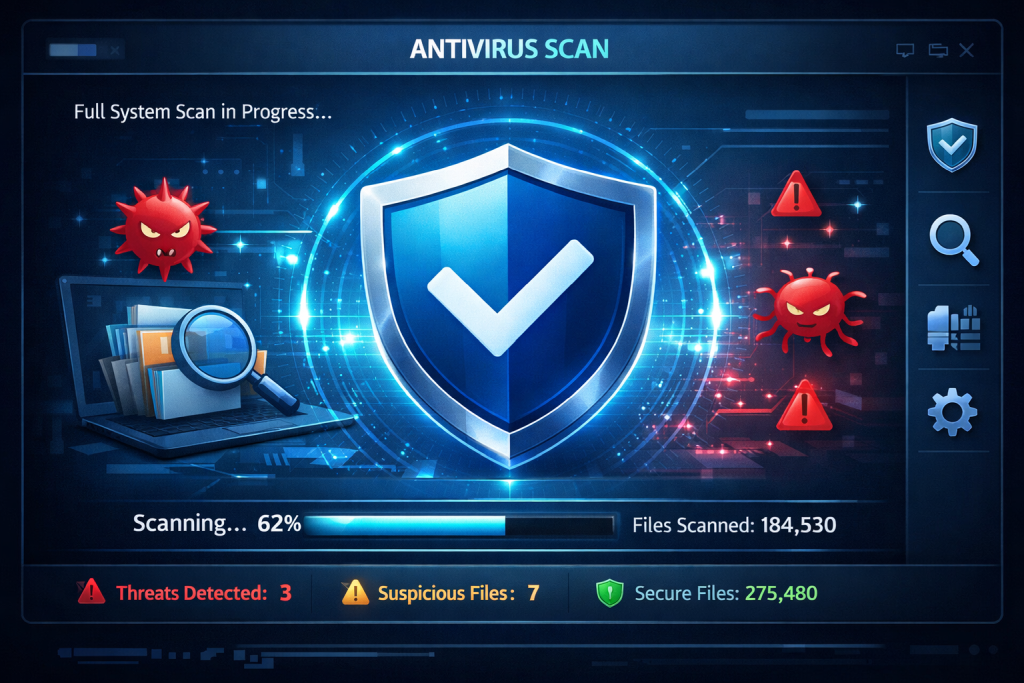
How to Scan for Threats:
Windows Defender (built-in):
- Open Windows Security (search in Start menu)
- Click ‘Virus & threat protection’
- Click ‘Quick scan’ or ‘Scan options’ for a full scan
- Let the scan complete and follow recommendations to remove threats
Additional protection: Download Malwarebytes (free version) for a second opinion. It catches threats that Windows Defender might miss. Run it weekly for optimal protection.
Mac Users:
While Macs are less susceptible to viruses, they’re not immune. Use Malwarebytes for Mac or CleanMyMac to scan for adware, potentially unwanted programs, and malware that can slow performance.
4. Update Your Operating System and Drivers
Outdated operating systems and drivers can cause performance issues, security vulnerabilities, and compatibility problems. Software updates often include performance optimizations and bug fixes that directly improve speed.
Windows Updates:
- Go to Settings → Windows Update
- Click ‘Check for updates’
- Download and install all available updates
- Restart your computer when prompted
Update Drivers:
- Press Windows Key + X and select ‘Device Manager’
- Expand categories like ‘Display adapters,’ ‘Network adapters’
- Right-click each device and select ‘Update driver’
- Choose ‘Search automatically for drivers’
For Mac:
Click Apple menu → System Preferences → Software Update. macOS handles driver updates automatically.
Pro tip: If you’re experiencing WiFi connection issues that might be slowing your internet speeds, check out our guide on how to fix WiFi problems for specific troubleshooting steps.
5. Adjust Visual Effects for Better Performance
Windows visual effects like animations, shadows, and transparency look nice but consume system resources, especially on older computers. Disabling these effects can provide an immediate performance boost without affecting functionality.
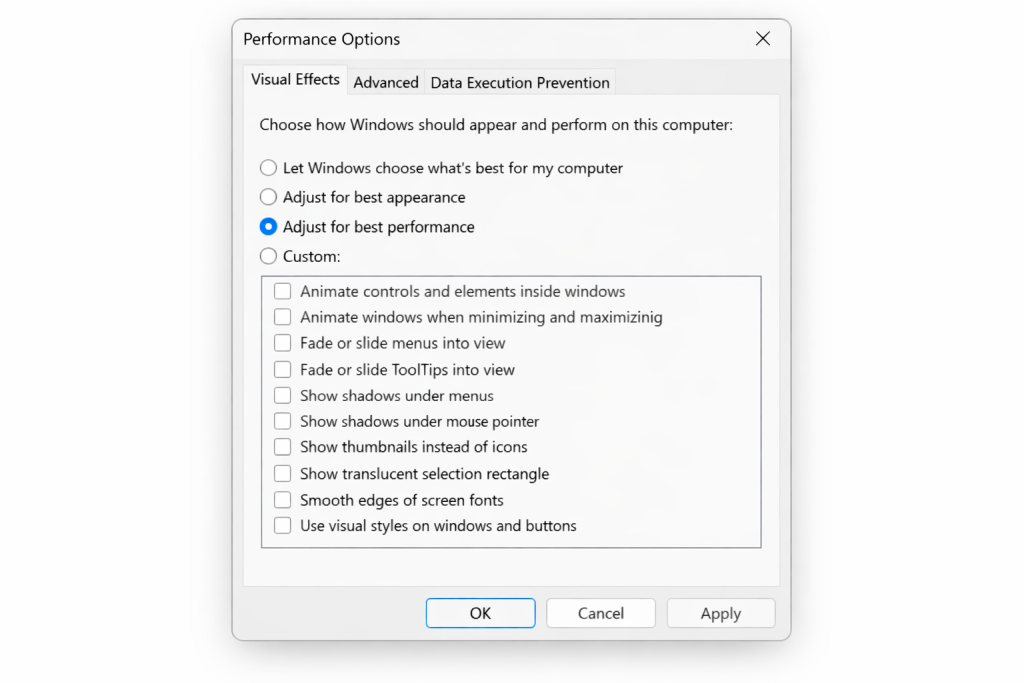
How to Adjust Visual Effects (Windows):
- Right-click ‘This PC’ or ‘My Computer’ and select ‘Properties’
- Click ‘Advanced system settings’ on the left
- Under ‘Performance,’ click ‘Settings’
- Select ‘Adjust for best performance’ for maximum speed
- Or select ‘Custom’ and manually uncheck effects you don’t need
- Click ‘Apply’ and ‘OK’
Recommended custom settings (keep these checked):
- Smooth edges of screen fonts (improves readability)
- Show thumbnails instead of icons (helpful for finding files)
- Show window contents while dragging (minimal performance impact)
Mac Users:
macOS is generally well-optimized, but you can reduce transparency and motion effects in System Preferences → Accessibility → Display → Reduce motion and Reduce transparency.
6. Defragment Your Hard Drive (HDD Only)
If you’re using a traditional hard disk drive (HDD), fragmentation occurs naturally over time as files are written, deleted, and modified. Defragmentation reorganizes data so files are stored contiguously, improving access speed.
Important: NEVER defragment a solid-state drive (SSD). SSDs don’t benefit from defragmentation and the process can actually reduce their lifespan. Windows automatically optimizes SSDs differently.
How to Defragment (Windows):
- Type ‘defragment’ in the Start menu search and open ‘Defragment and Optimize Drives’
- Select your hard drive
- Click ‘Analyze’ to check fragmentation level
- If fragmented above 10%, click ‘Optimize’
- Let the process complete (can take 1-3 hours for heavily fragmented drives)
Enable automatic optimization: In the same window, click ‘Change settings’ and enable scheduled optimization to run weekly or monthly.
7. Upgrade to an SSD (Biggest Performance Boost)
If you’re still using a traditional hard drive (HDD), upgrading to a solid-state drive (SSD) is hands-down the single most impactful upgrade you can make. The speed difference is night and day – your computer will feel brand new.
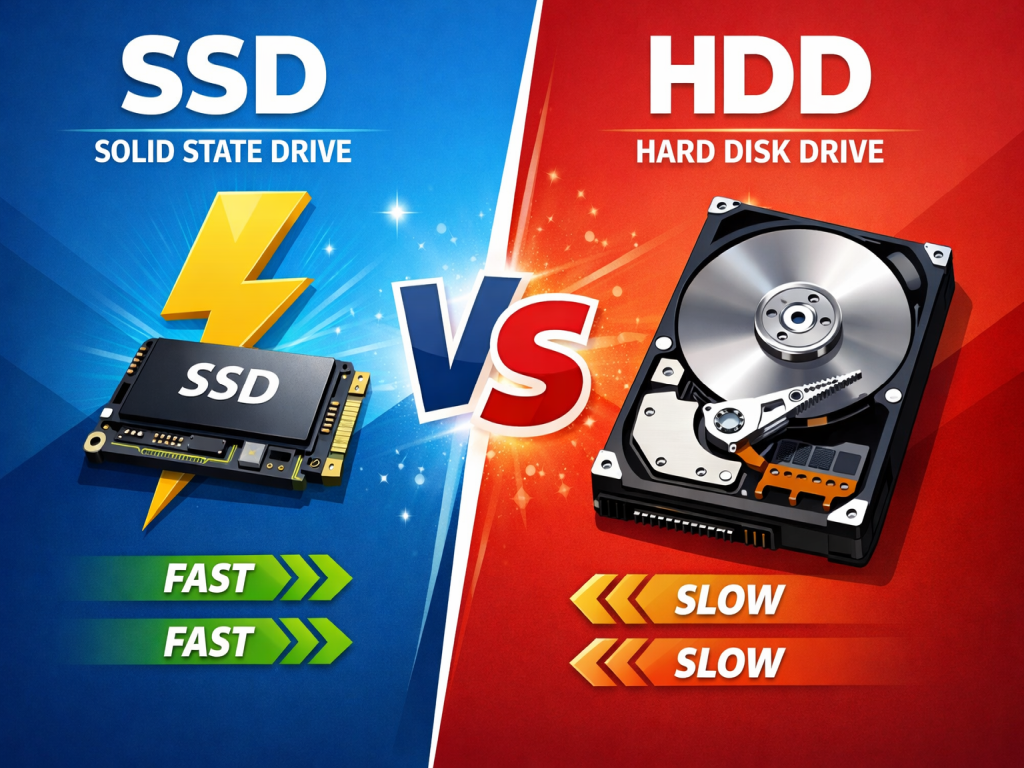
Why SSDs Are Faster:
- No moving parts (mechanical drives have spinning platters and read/write heads)
- Access times measured in microseconds vs milliseconds (100x faster)
- Read speeds: SSD 500+ MB/s vs HDD 80-160 MB/s
- Boot times: 10-15 seconds with SSD vs 30-60+ seconds with HDD
- Applications launch instantly instead of taking seconds
Cost considerations:
- 250GB SSD: $25-40 (perfect for operating system and programs)
- 500GB SSD: $40-60 (good balance for most users)
- 1TB SSD: $70-100 (plenty of space for programs and files)
Installation tip: You can clone your existing drive to the new SSD using free software like Macrium Reflect (Windows) or Carbon Copy Cloner (Mac), preserving all your programs and files. Alternatively, do a fresh Windows/macOS install for the cleanest experience.
For laptops, check if your model has an accessible drive bay. Most modern laptops use M.2 SSDs, while older ones use 2.5″ SATA drives. Verify compatibility before purchasing.
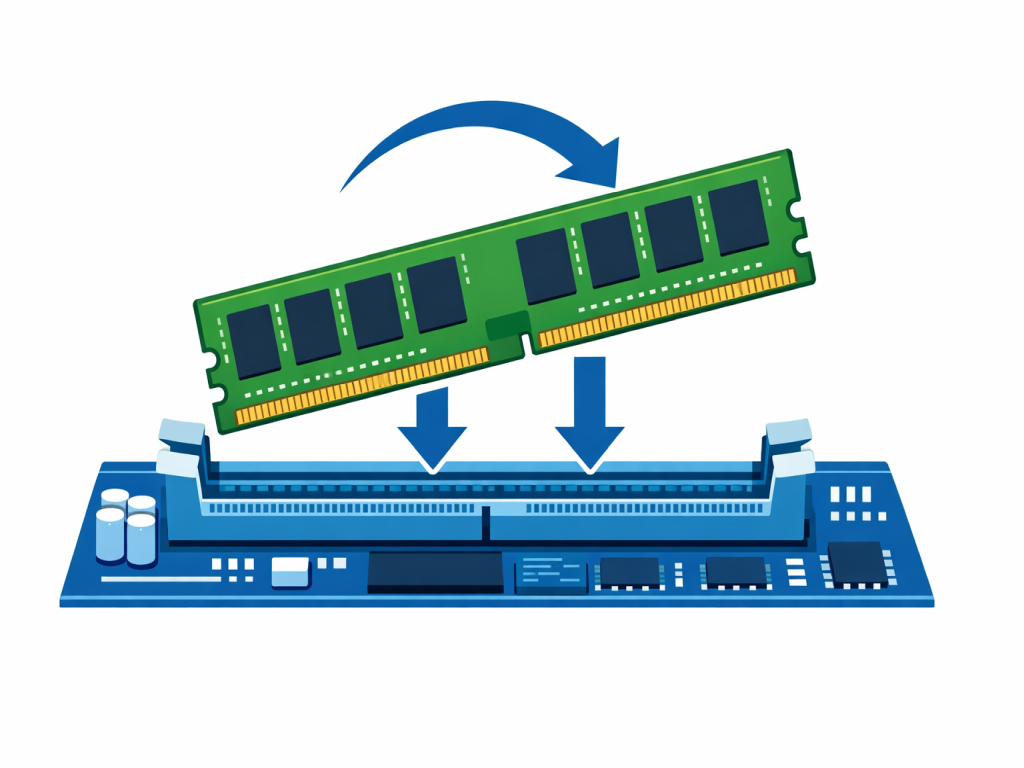
8. Add More RAM (Random Access Memory)
RAM is your computer’s short-term memory. When you run out of RAM, your computer uses hard drive space as virtual memory, which is dramatically slower. If you frequently run multiple programs simultaneously or notice slowdowns when multitasking, more RAM can help.
How Much RAM Do You Need?
- 4GB: Minimum for basic web browsing and light tasks (barely adequate today)
- 8GB: Sweet spot for most users (web browsing, Office, light photo editing)
- 16GB: Recommended for multitasking, content creation, gaming
- 32GB+: For video editing, 3D rendering, running virtual machines
Check Current RAM Usage (Windows):
- Open Task Manager (Ctrl + Shift + Esc)
- Click the ‘Performance’ tab
- Select ‘Memory’ on the left
- Check the ‘In use’ percentage – if consistently above 80%, you need more RAM
Before buying: Check your computer’s maximum supported RAM and available slots. Use a tool like Crucial System Scanner or CPU-Z to identify compatible RAM modules.
9. Limit Browser Extensions and Tabs
Web browsers, especially Chrome, are notorious memory hogs. Each tab and extension consumes RAM and CPU resources. If you regularly have 20+ tabs open with dozens of extensions, your browser alone could be causing your computer to slow down.
Browser Optimization Tips:
- Close unused tabs (bookmark them for later instead of keeping them open)
- Remove or disable extensions you don’t use regularly
- Use The Great Suspender extension (Chrome) to auto-suspend inactive tabs
- Clear cache and cookies periodically (Settings → Privacy → Clear browsing data)
- Consider switching to a lighter browser like Firefox or Edge if Chrome is too heavy
- Enable hardware acceleration in browser settings
Check which tabs use most resources: In Chrome, type ‘chrome://task-manager‘ in the address bar to see memory and CPU usage per tab and extension.
10. Disable Transparency and Animations
Windows 10 and 11 include transparency effects, animations, and other visual enhancements that look modern but consume GPU and CPU resources. Disabling these creates a snappier feel, especially on lower-end hardware.
How to Disable Transparency (Windows 10/11):
- Go to Settings → Personalization → Colors
- Turn OFF ‘Transparency effects’
Disable Animations (Windows 11):
- Go to Settings → Accessibility → Visual effects
- Turn OFF ‘Animation effects’
These small changes make the interface feel more responsive, especially on computers with integrated graphics or older hardware.
11. Adjust Power Settings for Better Performance
By default, many computers use ‘Balanced’ or ‘Power Saver’ modes that reduce performance to save energy. If you’re plugged in and want maximum speed, switching to ‘High Performance’ mode makes a noticeable difference.
For Windows:
- Search for ‘Power & sleep settings’ in the Start menu
- Click ‘Additional power settings’ on the right
- Select ‘High performance’ (you may need to click ‘Show additional plans’)
- For laptops, this setting drains battery faster – use only when plugged in
For Mac:
- Go to System Preferences → Energy Saver
- Uncheck ‘Put hard disks to sleep when possible’
- Adjust sliders to prevent automatic sleep during use
12. Perform a Clean Windows Install (Nuclear Option)
If you’ve tried everything and your computer is still frustratingly slow, a clean operating system install can work miracles. Over time, Windows accumulates junk files, registry errors, and software conflicts that gradually degrade performance. A fresh start eliminates all these issues.
When to Consider a Clean Install:
- Your computer is more than 2 years old and has never been reinstalled
- You’ve tried all other methods with minimal improvement
- Startup time exceeds 2 minutes on an SSD
- You suspect system file corruption
- You want the cleanest, fastest experience possible
Before You Begin:
- Backup all important files to external drive or cloud storage
- Write down all programs you need to reinstall
- Save product keys and license information
- Sync browser bookmarks and passwords
Windows 10/11 offers a ‘Reset this PC’ option that reinstalls Windows while optionally keeping your personal files. Find it in Settings → System → Recovery → Reset PC.
Choose ‘Remove everything‘ for the cleanest start, then reinstall only the programs you actually use. You’ll be amazed at how fast your computer feels.
Additional Quick Performance Tips
- Keep desktop clean (too many icons slow down rendering)
- Disable Search Indexing if you rarely search for files (Services → Windows Search → Disable)
- Turn off Windows Tips and Suggestions (Settings → System → Notifications)
- Disable Cortana if you don’t use voice commands
- Check Task Manager for programs using high CPU – uninstall ones you don’t need
- Ensure adequate ventilation – overheating causes thermal throttling and slowdowns
- For network-related slowness, optimize your internet connection with our WiFi signal boosting guide

Frequently Asked Questions
Why is my computer slow after a Windows update?
Windows updates can temporarily slow your computer as background processes index new files, update apps, and optimize the system. Give it 24 hours after an update to complete background tasks. If slowness persists, check Task Manager for high CPU usage, restart your computer, and ensure all drivers are updated.
How can I tell if I need more RAM or a faster processor?
Open Task Manager and check the Performance tab. If RAM usage consistently exceeds 80-90%, you need more memory. If CPU usage stays at 100% during normal tasks, your processor is the bottleneck. In most cases, adding RAM is cheaper and easier than upgrading the CPU, which often requires a new motherboard.
Will upgrading from Windows 10 to Windows 11 speed up my computer?
Not necessarily. Windows 11 has higher system requirements and can actually run slower on older hardware. If your computer barely meets Windows 11 requirements (4GB RAM, older processor), stick with Windows 10. However, on capable hardware, Windows 11 offers improved performance for specific tasks like gaming and multitasking.
Should I use CCleaner or similar optimization software?
Use with caution. While tools like CCleaner can help clean temporary files, aggressive registry cleaning can cause more problems than it solves. Windows’ built-in Disk Cleanup is usually sufficient. If you do use third-party cleaners, stick to safe options like temporary file cleaning and avoid automatic registry fixes unless you know what you’re doing.
How often should I restart my computer?
Restart your computer at least once per week to clear memory leaks, apply updates, and refresh system processes. Many people leave computers on for weeks or months, leading to gradual performance degradation. A simple restart often solves mysterious slowdowns by clearing accumulated temporary processes and memory usage.
Can low disk space slow down my computer?
Absolutely. When your storage is over 80-90% full, your computer struggles with virtual memory, temporary files, and system operations. Windows needs free space to function properly. Keep at least 15-20% of your drive free for optimal performance. Delete unnecessary files, uninstall unused programs, or upgrade to a larger drive.
Is it worth upgrading an old computer, or should I buy new?
For computers 5+ years old, upgrading to an SSD and adding RAM can extend life by 2-3 years for basic tasks, costing $80-150. However, if you need modern performance for demanding applications, a new computer makes more sense. Evaluate the upgrade cost versus a new budget laptop ($400-600). Generally, desktops are more worth upgrading than laptops due to easier component replacement.
Conclusion
A slow computer doesn’t mean it’s time for a replacement. By implementing these 12 methods, you can dramatically improve performance without spending a fortune. Start with the free solutions – disk cleanup, disabling startup programs, and scanning for malware – which alone can provide significant speed improvements.
If your computer is still sluggish after software optimizations, hardware upgrades like adding an SSD or more RAM offer the best bang for your buck. An SSD upgrade, in particular, transforms even older computers into responsive, usable machines.
Remember: computer maintenance is ongoing. Schedule monthly disk cleanups, update your operating system regularly, and restart your computer weekly. These simple habits prevent slowdowns before they start. And if your internet speeds seem slow, don’t forget to check our guides on fixing WiFi problems and boosting WiFi signal for network optimization.