How to Patch Drywall: 3 Methods for Any Hole Size
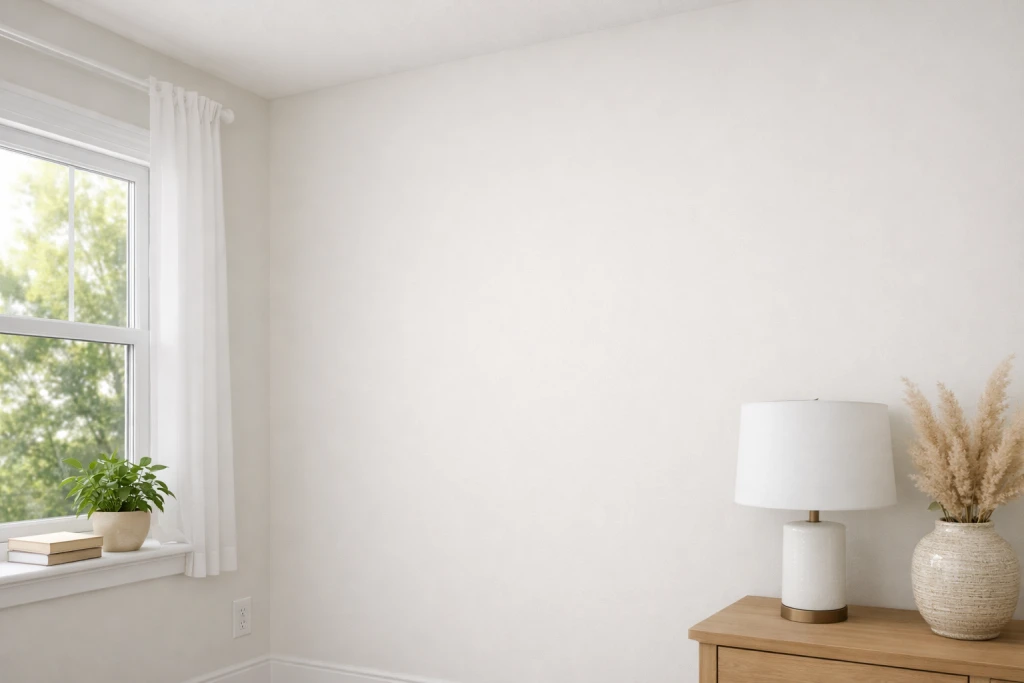
Holes and dents in drywall are inevitable. Whether from doorknobs, furniture bumps, removed fixtures, or accidents, damaged walls are one of the most common household problems. The good news is that learning how to patch drywall is surprisingly straightforward, and with the right technique, your repairs will be completely invisible. Before painting a room, you need to patch any holes and imperfections for a professional finish. Paint cannot hide bumps, dents, or holes, it actually makes them more visible. That is why proper wall preparation is essential, and patching drywall is the first step. This guide covers three proven methods to patch drywall based on hole size: spackle for small holes, mesh patches for medium holes, and the California patch or backing board technique for larger damage. By the end, you will know exactly which method to use and how to execute invisible repairs every time.
What You Need to Patch Drywall
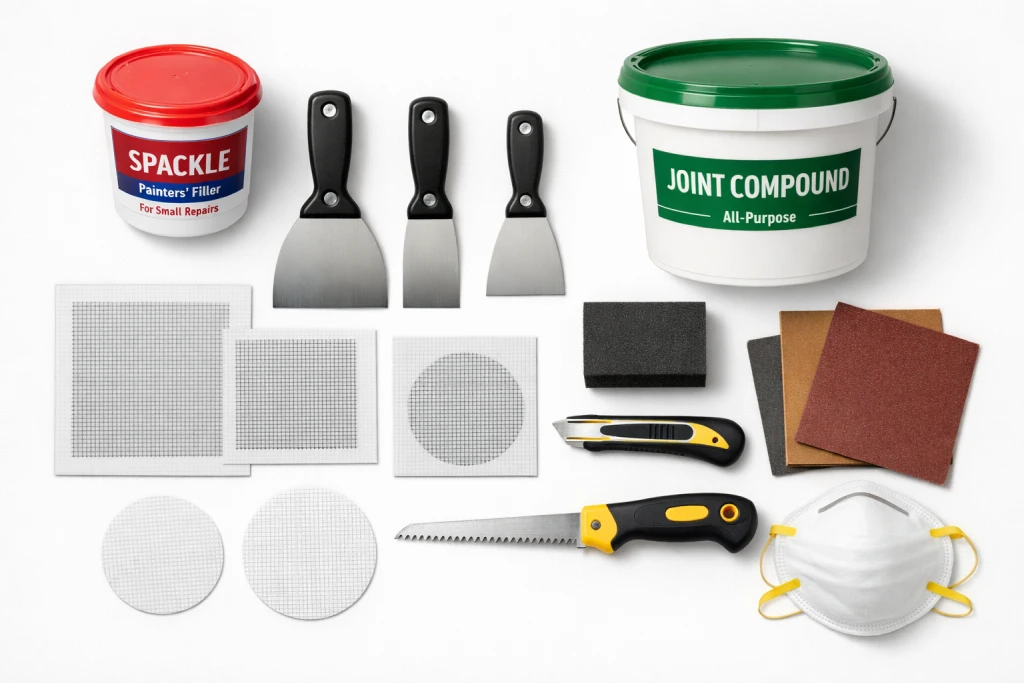
Gathering the right supplies before you start makes patching drywall much easier. The materials you need depend on the size of the hole you are repairing.
For Small Holes (Nail Holes and Dents):
- Lightweight spackle or spackling compound
- Small putty knife (5-7.5cm / 2-3 inches)
- Fine-grit sandpaper (120-150 grit)
- Clean cloth
For Medium Holes (Up to 15cm / 6 inches):
- Self-adhesive mesh drywall patch
- Lightweight joint compound
- Drywall knife (15cm / 6 inches)
- Sanding sponge or sandpaper
For Large Holes (Over 15cm / 6 inches):
- Scrap drywall piece
- Wooden furring strips or 25mm x 75mm (1×3 inch) boards
- Drywall screws
- Self-adhesive fiberglass mesh tape
- Joint compound
- Wide drywall knife (20-30cm / 8-12 inches)
- Utility knife and drywall saw
- Drill and screwdriver bit
For All Repairs:
- Dust mask
- Safety glasses
- Primer
- Paint to match wall
Choosing the Right Method to Patch Drywall
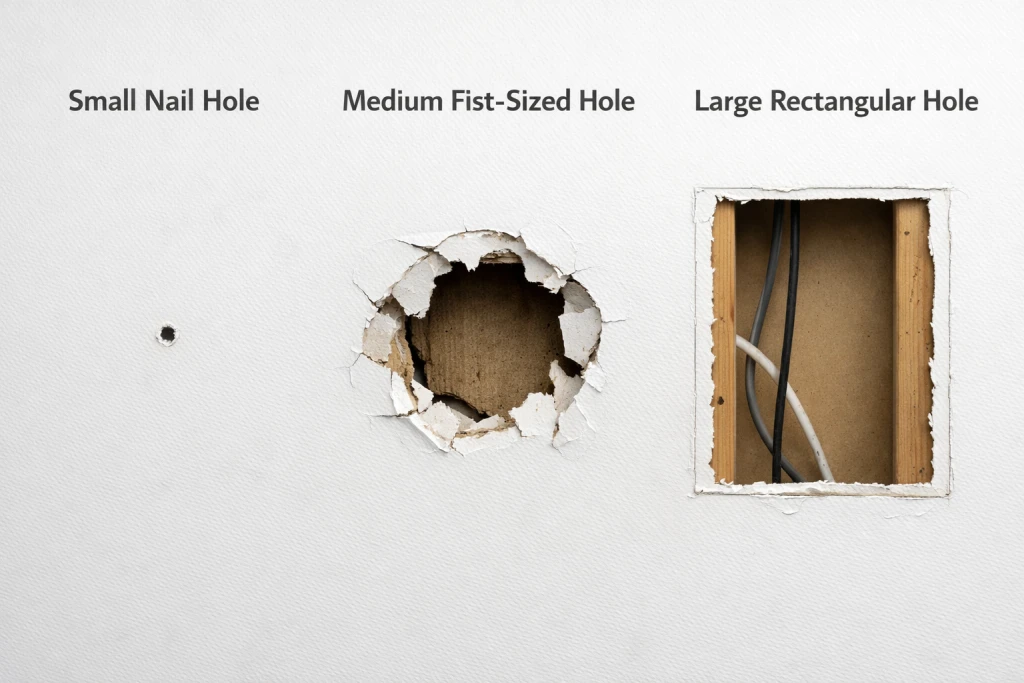
The key to successful drywall repair is matching your technique to the hole size. Using the wrong method leads to visible repairs, cracking, or patches that fall out over time.
- Small Holes (Under 2.5cm / 1 inch): Nail holes, small dents, and minor scratches. Use spackle alone, no patch needed. Spackle is budget-friendly options that cost under £10 for most repairs.
- Medium Holes (2.5cm-15cm / 1-6 inches): Doorknob damage, removed fixtures, and fist-sized holes. Use self-adhesive mesh patch kits.
- Large Holes (Over 15cm / 6 inches): Major damage, removed electrical boxes, and renovation holes. Use California patch or backing board method with new drywall.
Method 1: How to Patch Drywall Small Holes with Spackle
Small holes from hanging pictures or mounting hardware are the easiest to repair. This method takes about 30 minutes including drying time.
Step 1: Prepare the Surface
Make sure to clean the wall surface around the damaged area to remove dust and debris. Use a utility knife to remove any loose drywall paper or crumbling edges around the hole. The area should be clean and stable before applying spackle.
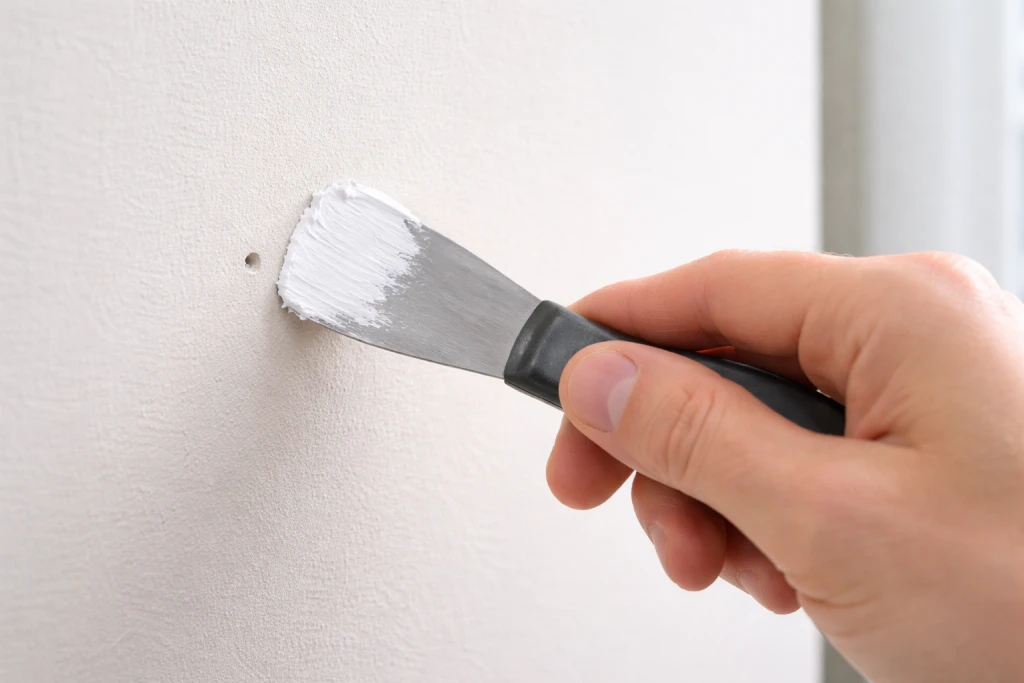
Step 2: Apply Spackle
Scoop a small amount of spackle onto your putty knife. Press the spackle firmly into the hole, filling it completely. Draw the knife across the surface at a 45-degree angle to remove excess and create a smooth finish level with the surrounding wall.
Step 3: Allow to Dry
Lightweight spackle typically dries in 15-30 minutes. Some products change colour from pink to white when fully dry, making it easy to know when to proceed. Check the manufacturer instructions for specific drying times.
Step 4: Sand Smooth
Once completely dry, lightly sand the patched area using fine-grit sandpaper (120-150 grit). Use gentle circular motions and avoid pressing too hard, over-sanding is the most common mistake. Wipe away dust with a clean cloth.

Step 5: Prime and Paint
Apply primer over the patched area before painting. This prevents the repair from showing through as a dull spot. Once primer is dry, touch up with matching wall paint.
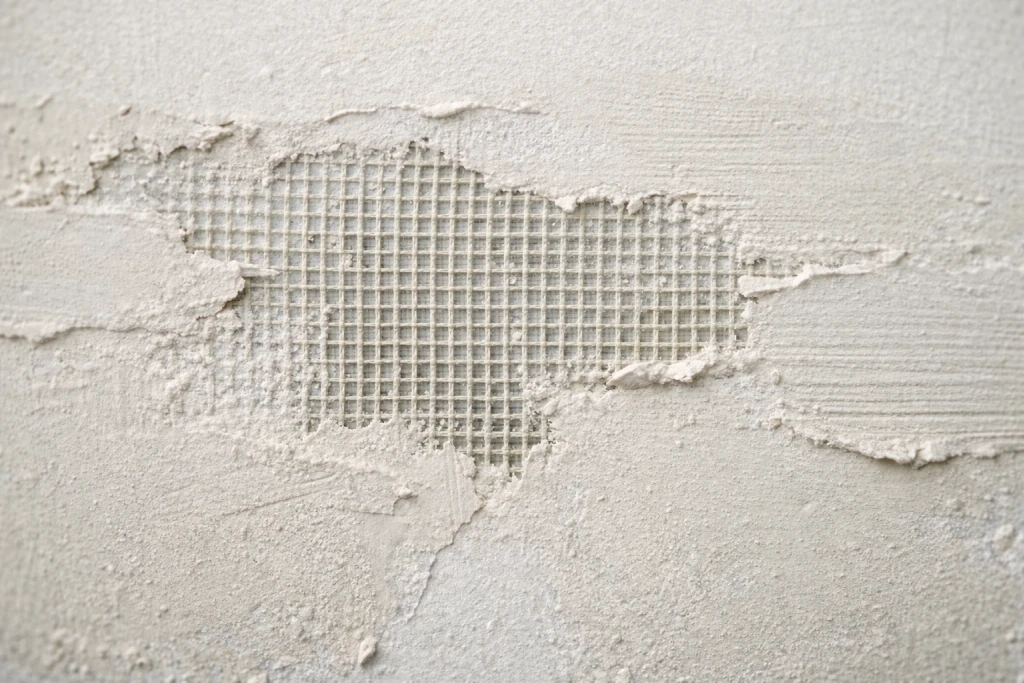
Method 2: How to Patch Drywall Medium Holes with Mesh Patches
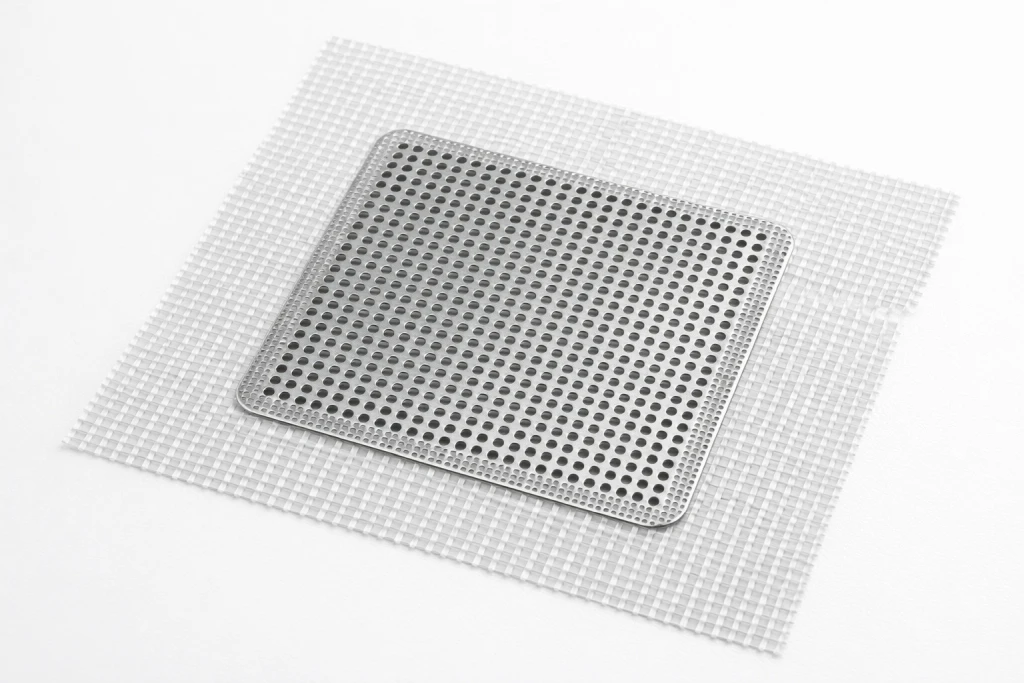
Self-adhesive mesh patch kits are the easiest way to repair medium-sized holes. These kits include an aluminium mesh backing with fiberglass tape edges that stick directly to your wall.
Step 1: Clean and Prepare
Remove any loose debris from the hole. Use a utility knife to trim away jagged edges and loose drywall paper. The patch needs a clean, flat surface to adhere properly.
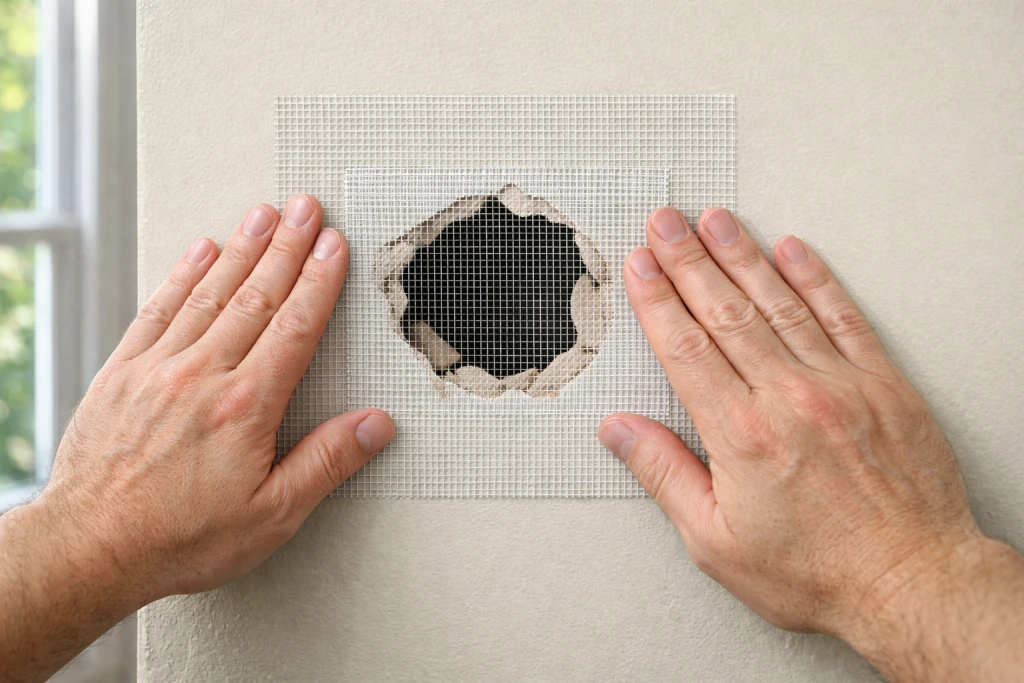
Step 2: Apply the Mesh Patch
Choose a patch at least 5cm (2 inches) larger than the hole on all sides. Peel off the backing and centre the patch over the hole. Press firmly around all edges to ensure good adhesion to the wall surface.
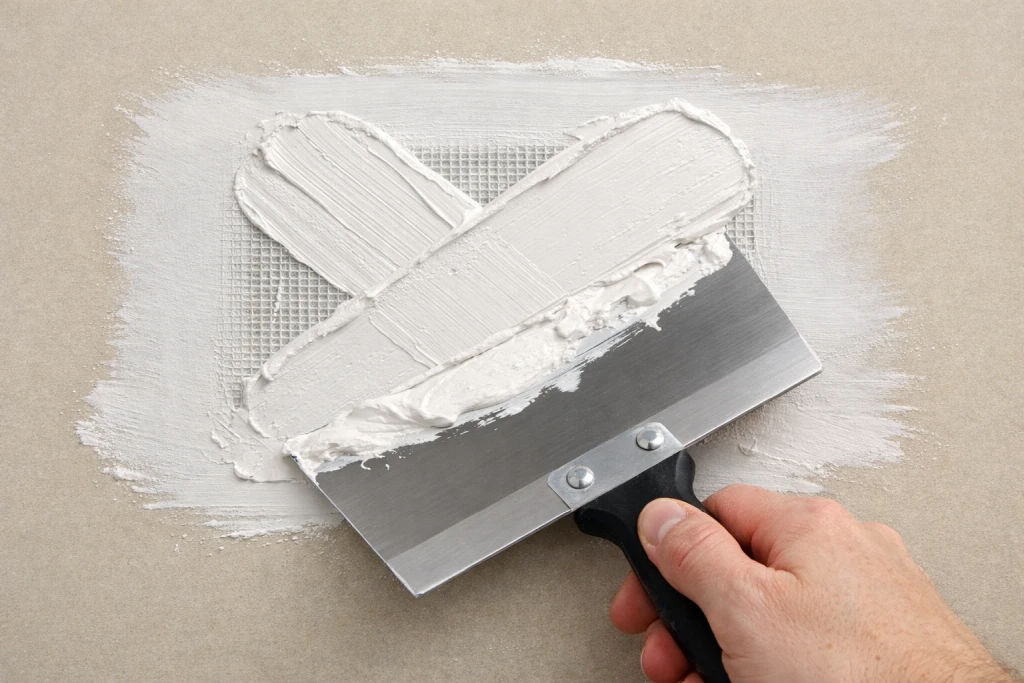
Step 3: Apply First Coat of Joint Compound
Using a drywall knife, spread a thin layer of lightweight joint compound over the entire patch. Work in a crisscross pattern, pressing the compound into the mesh. Extend the compound 5-7.5cm (2-3 inches) beyond the patch edges.
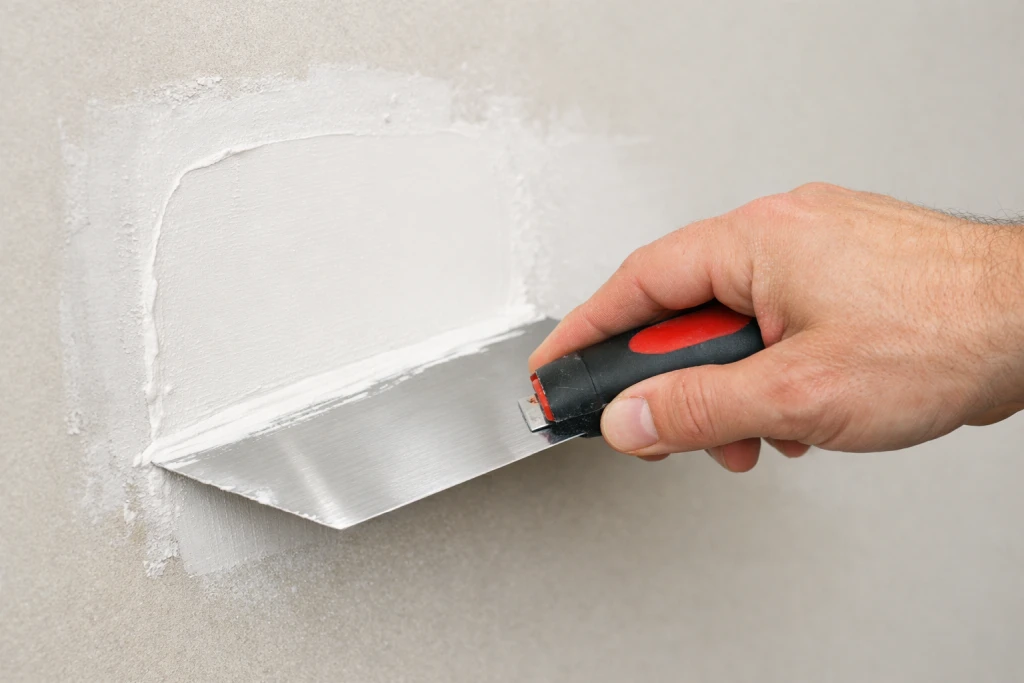
Step 4: Feather the Edges
This step is critical for invisible repairs. Hold your drywall knife at a low angle and gradually reduce pressure as you move toward the outer edges. The compound should transition from full thickness at the centre to paper-thin at the edges, blending seamlessly with the wall.
Step 5: Allow to Dry (24 Hours)
Joint compound requires much longer drying time than spackle, typically 24 hours. Do not rush this step. Applying a second coat before the first is fully dry causes cracking and poor adhesion.
Step 6: Apply Second Coat
Once the first coat is completely dry, lightly sand any rough spots. Apply a second thin coat of joint compound, extending even further beyond the first coat (7.5-10cm / 3-4 inches). Feather the edges again. Allow to dry another 24 hours.
Step 7: Final Sand, Prime, and Paint
After the second coat dries, sand the entire patched area with fine-grit sandpaper until perfectly smooth. Wipe away all dust. Apply primer over the repair, then paint to match your wall.
Method 3: How to Patch Drywall Large Holes – California Patch Method
For holes up to 15-20cm (6-8 inches), the California patch (also called butterfly patch) creates the strongest, most seamless repair. This clever technique uses the drywall’s own paper as built-in tape.
Step 1: Cut Your Patch Piece
Cut a piece of scrap drywall approximately 7.5cm (3 inches) larger than the hole in all dimensions. For example, a 10cm hole needs a 25cm patch piece.
Step 2: Score the Back
Turn the patch over to the brown paper side. Using a utility knife and straightedge, score lines approximately 4cm (1.5 inches) from each edge. Score only through the paper and gypsum core, do not cut through the front white paper.
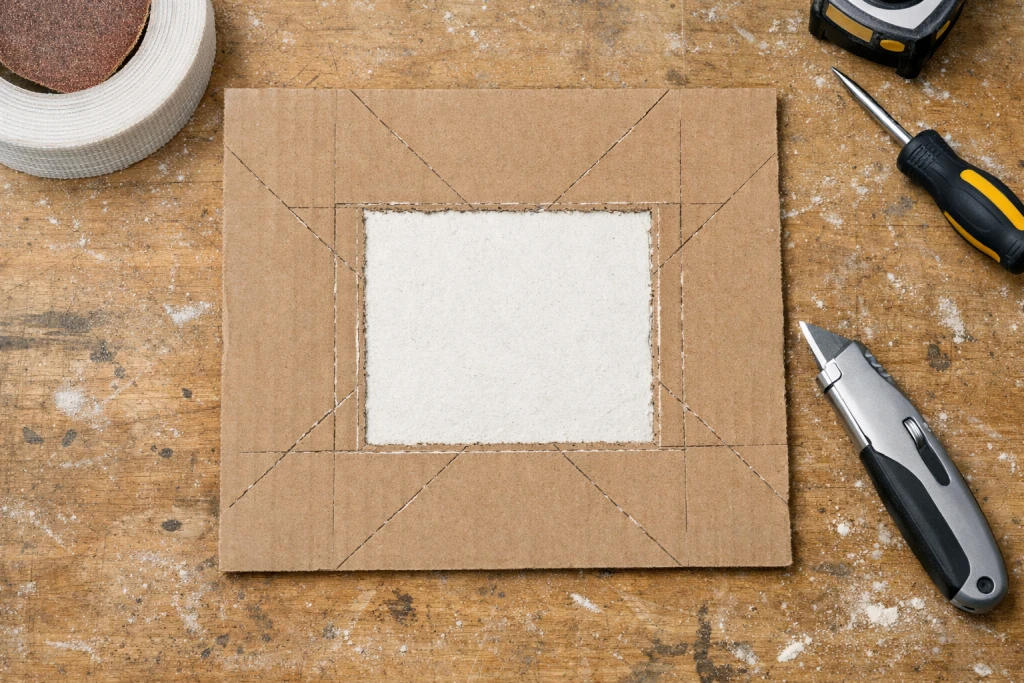
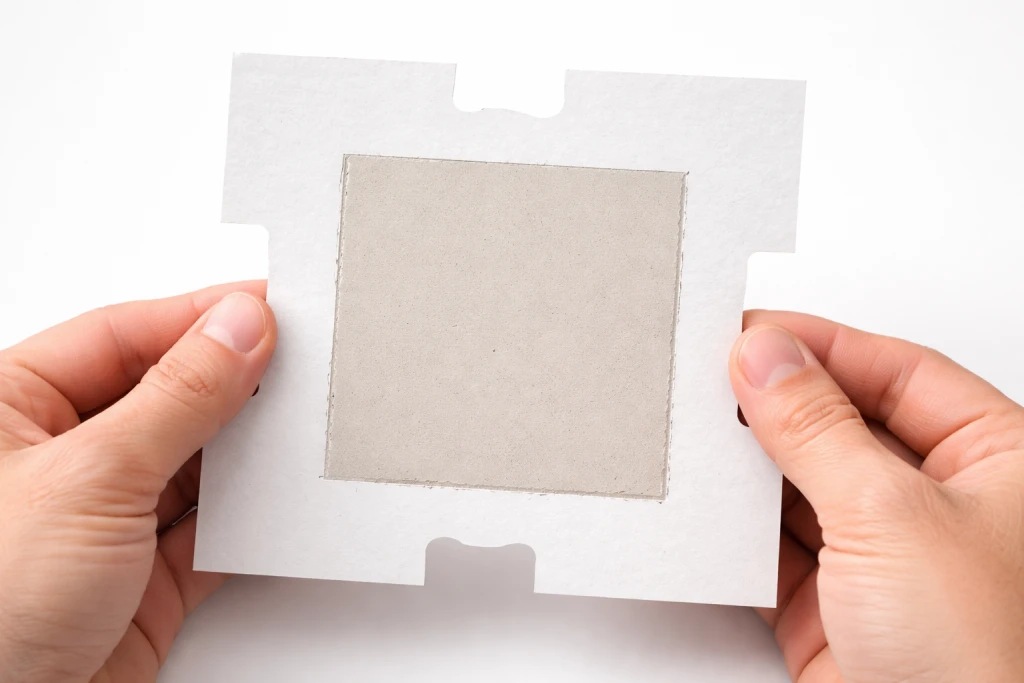
Step 3: Snap and Peel
Carefully snap the drywall along your score lines. Peel away the gypsum from the outer edges, leaving only the front paper attached. You should now have a gypsum centre with paper “wings” extending from all four sides.
Step 4: Prepare the Hole
Square up the hole in your wall to match the gypsum portion of your patch. Score the paper around the hole approximately 4cm (1.5 inches) from the edges and remove it. This creates a recessed area for the paper wings to sit flush.
Step 5: Test Fit and Install
Test fit your patch in the hole. The gypsum should fit snugly while the paper wings lay flat against the wall. Apply a thin layer of joint compound around the hole edges. Press the patch into place, smooth down the paper wings, and squeeze out excess compound.
Step 6: Finish with Compound
Apply joint compound over the entire patch and paper wings, feathering the edges. Allow 24 hours to dry, sand lightly, and apply a second coat. Repeat until smooth, then prime and paint.
How to Patch Drywall Large Holes – Backing Board Method
For holes larger than 15-20cm (6-8 inches), or when you need extra strength, use the backing board method. This technique provides solid support for your drywall patch.
Step 1: Square the Hole
Use a pencil and straightedge to mark a clean rectangle around the damaged area. Cut along your lines with a drywall saw. Check for electrical wires, pipes, or ductwork before cutting, wires are typically attached to studs.
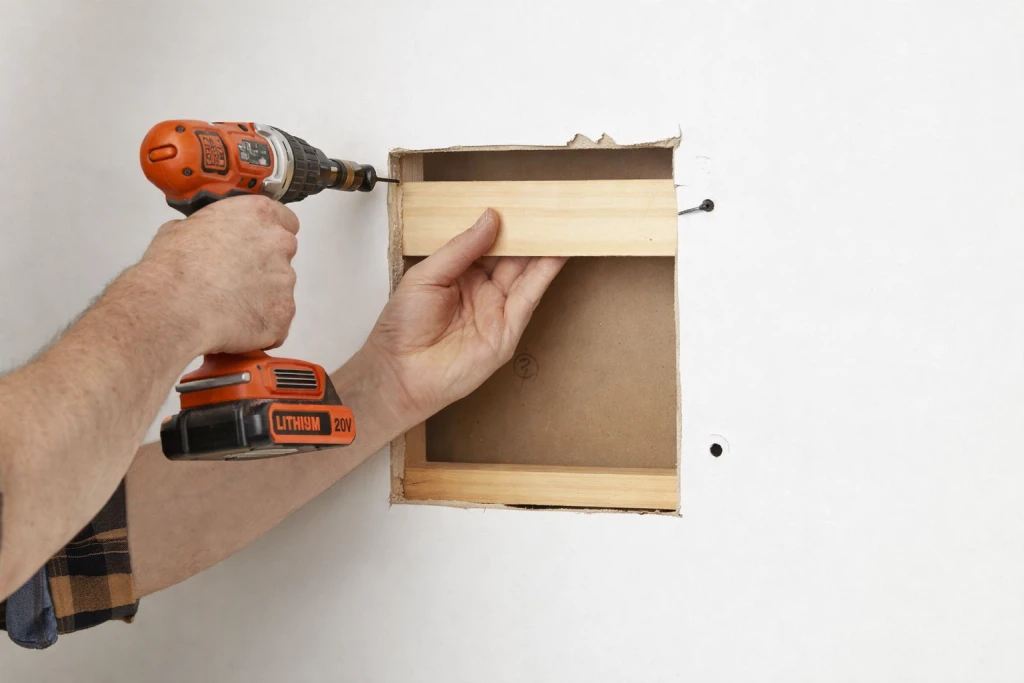
Step 2: Install Backing Boards
Cut two pieces of 25mm x 75mm (1×3 inch) wood approximately 10cm (4 inches) longer than the hole height. Insert these backing boards through the hole and position them behind the drywall edges. Secure with drywall screws driven through the existing wall into the boards.
Step 3: Cut and Install Patch
Measure and cut a drywall patch to fit the squared hole. Leave approximately 3mm (1/8 inch) gap on all sides. Secure the patch to the backing boards with drywall screws, sinking the screw heads slightly below the surface.
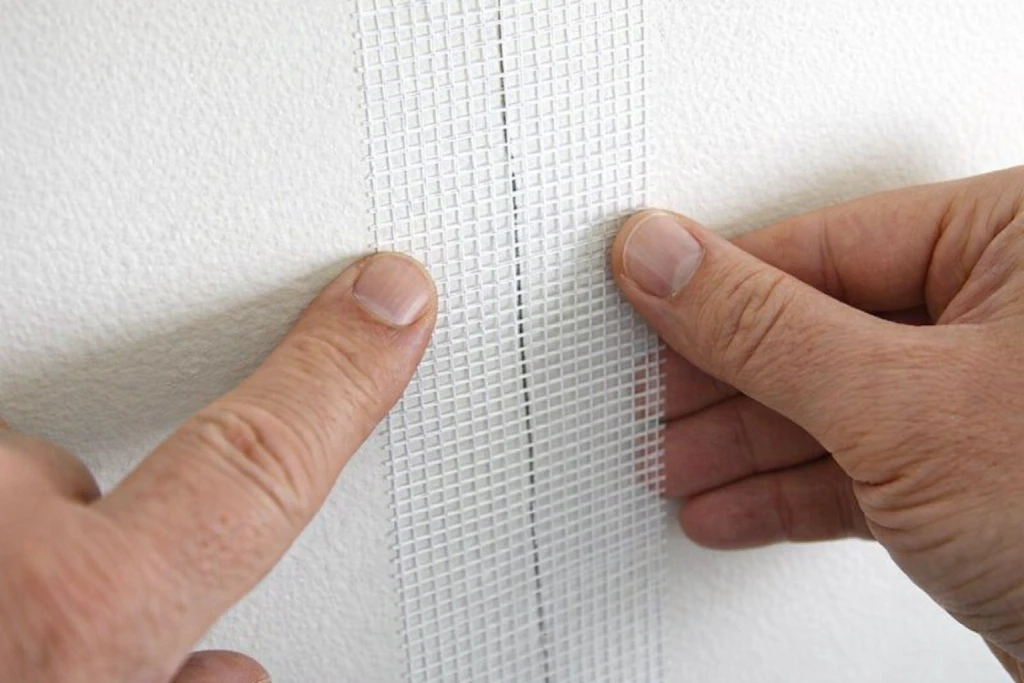
Step 4: Apply Mesh Tape
Cover all seams with self-adhesive fiberglass mesh tape. Centre the tape over each joint, pressing firmly. Avoid overlapping tape at corners as this creates visible ridges.
Step 5: Apply Joint Compound
Cover the tape and screw heads with joint compound using a wide drywall knife. Feather edges 15-20cm (6-8 inches) beyond the repair. Allow 24 hours to dry, sand, and apply additional coats as needed until smooth.
Why Priming Your Drywall Patch Matters
Never skip priming. Joint compound and spackle absorb paint differently than the surrounding wall. Without primer, your repair will appear as a dull, flat spot, even with matching paint.
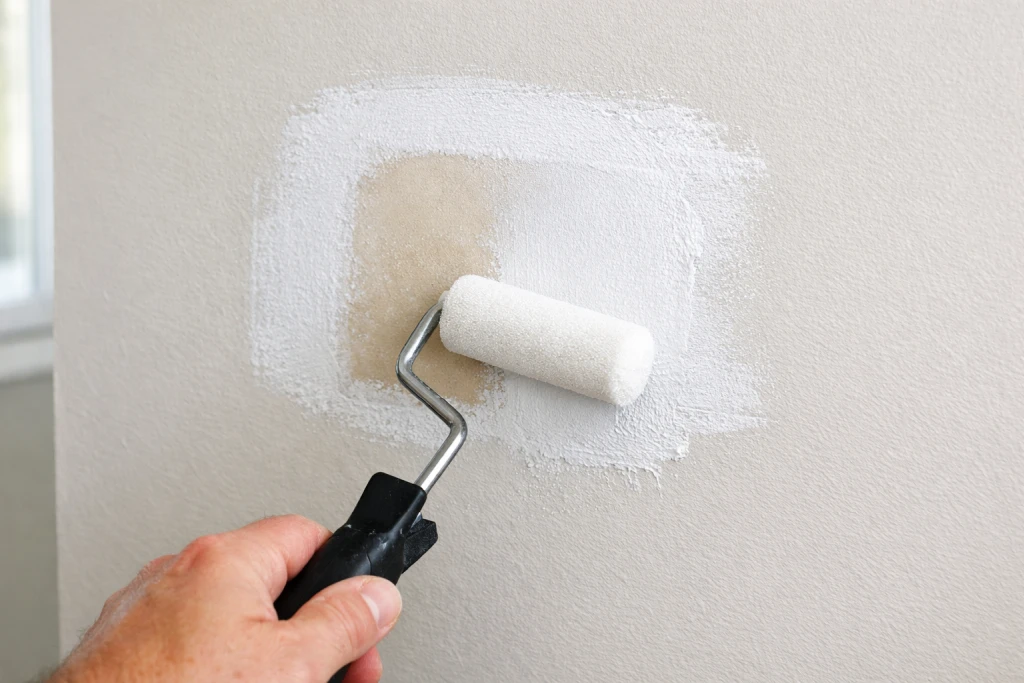
Apply primer to the entire patched area plus 5-10cm (2-4 inches) beyond. Use a primer-sealer designed for new drywall or patched surfaces. Allow the primer to dry completely before painting, following manufacturer guidelines.
Common Mistakes When You Patch Drywall
Even experienced DIYers make these errors. Avoid them for professional results.
- Over-Sanding: The number one mistake. Sanding too aggressively exposes mesh tape or damages the paper surface. Use light pressure and fine-grit sandpaper.
- Rushing Dry Time: Applying second coats or paint before compound is fully dry causes cracking, bubbling, and poor adhesion. Wait the full 24 hours.
- Thick Compound Layers: Applying compound too thickly causes cracks and takes forever to dry. Multiple thin coats are always better than one thick coat.
- Not Feathering Edges: Leaving sharp edges around your patch creates visible ridges. Always feather compound gradually to blend with the wall.
- Skipping Primer: Paint alone cannot hide repairs. Unprimed patches show through as flat, dull spots.
- Wrong Product for Hole Size: Using spackle for large holes or joint compound for tiny nail holes wastes time and money. Match your method to the damage size.
Spackle vs Joint Compound: Which to Use When You Patch Drywall
These products look similar but serve different purposes.
Use Spackle When:
- Filling nail holes and small dents under 6mm (1/4 inch)
- You need fast drying (15-30 minutes)
- Making quick touch-ups before painting
- Working on small repairs without patches
Use Joint Compound When:
- Covering mesh patches
- Taping drywall seams
- Repairing large holes
- You need to build up multiple layers
- Feathering over large areas
Key Differences:
- Spackle dries in 30 minutes; joint compound needs 24 hours
- Spackle barely shrinks; joint compound shrinks and requires multiple coats
- Spackle comes ready-mixed in small tubs; joint compound comes in buckets and may need mixing
- Spackle costs more per volume but you need less
Frequently Asked Questions About How to Patch Drywall
How long does it take to patch drywall?
Small holes with spackle take 30-60 minutes including drying time. Medium holes with mesh patches require 2-3 days to allow for multiple coats and drying time. Large holes using backing boards may take 3-4 days to complete properly.
Can I paint over drywall patch the same day?
Only for small spackle repairs. Spackle dries in 15-30 minutes, so you can sand, prime, and paint within a few hours. Joint compound requires 24 hours between coats, so painting the same day is not possible for larger repairs.
Why does my drywall patch show through the paint?
You likely skipped priming. Patched areas absorb paint differently than existing wall surfaces, creating visible dull spots. Always apply primer before painting any repair.
How do I match textured walls after patching drywall?
After your smooth patch is complete and primed, use spray-on wall texture (available at hardware stores) to match the surrounding wall. Practice on cardboard first to match the existing texture. Apply texture before painting.
Can I patch drywall over wallpaper?
No. Remove wallpaper from the damaged area first. Patches applied over wallpaper will not adhere properly and may peel or crack. Remove wallpaper at least 10cm (4 inches) beyond the damaged area.
What size mesh patch do I need?
Choose a patch at least 5cm (2 inches) larger than your hole on all sides. A 10cm (4 inch) hole needs at least a 20cm (8 inch) patch. Self-adhesive patches come in sizes from 10cm x 10cm (4×4 inch) up to 20cm x 20cm (8×8 inch).
How do I fix a patch that cracked?
Cracks usually occur from rushing dry time or applying compound too thickly. Sand the cracked area lightly, apply a thin coat of joint compound, and allow to dry fully (24 hours) before sanding and adding additional coats.
Should I use mesh tape or paper tape?
Self-adhesive fiberglass mesh tape is easier for DIY repairs because it sticks directly to the wall and is more forgiving. Paper tape requires embedding in wet compound but creates a slightly stronger bond. For patches, mesh tape is the better choice.
Can I use joint compound instead of spackle for nail holes?
Yes, but it takes longer to dry (24 hours vs 30 minutes) and may require two coats due to shrinkage. Spackle is specifically designed for small repairs and is more convenient for nail holes and minor dents.
How do I patch drywall around an electrical outlet?
Turn off power at the circuit breaker before working near electrical outlets. Use mesh tape and joint compound around the outlet box, being careful not to get compound inside the box. If the hole is larger than the outlet cover can hide, use a mesh patch or California patch technique.
Conclusion
Patching drywall is one of the most satisfying DIY home repairs you can master. With the three methods covered in this guide, spackle for small holes, mesh patches for medium holes, and California or backing board techniques for large damage, you can repair any wall damage invisibly. Remember the keys to success: match your method to the hole size, apply thin coats of compound, feather edges carefully, allow proper drying time, and always prime before painting. Avoid the common mistakes of over-sanding, rushing dry times, and skipping primer. Whether you are preparing walls for a fresh coat of paint or simply maintaining your home, these drywall patching skills will serve you for years to come. The supplies are inexpensive, the techniques are straightforward, and the results are professional, all without calling a contractor.